Histo Scanner Plugin Documentation
Welcome to the documentation page for the Histo Scanner Plugin, a powerful tool for scanning large areas and stitching images onto a large canvas. This page provides detailed information on how to configure and use the plugin effectively.
Overview
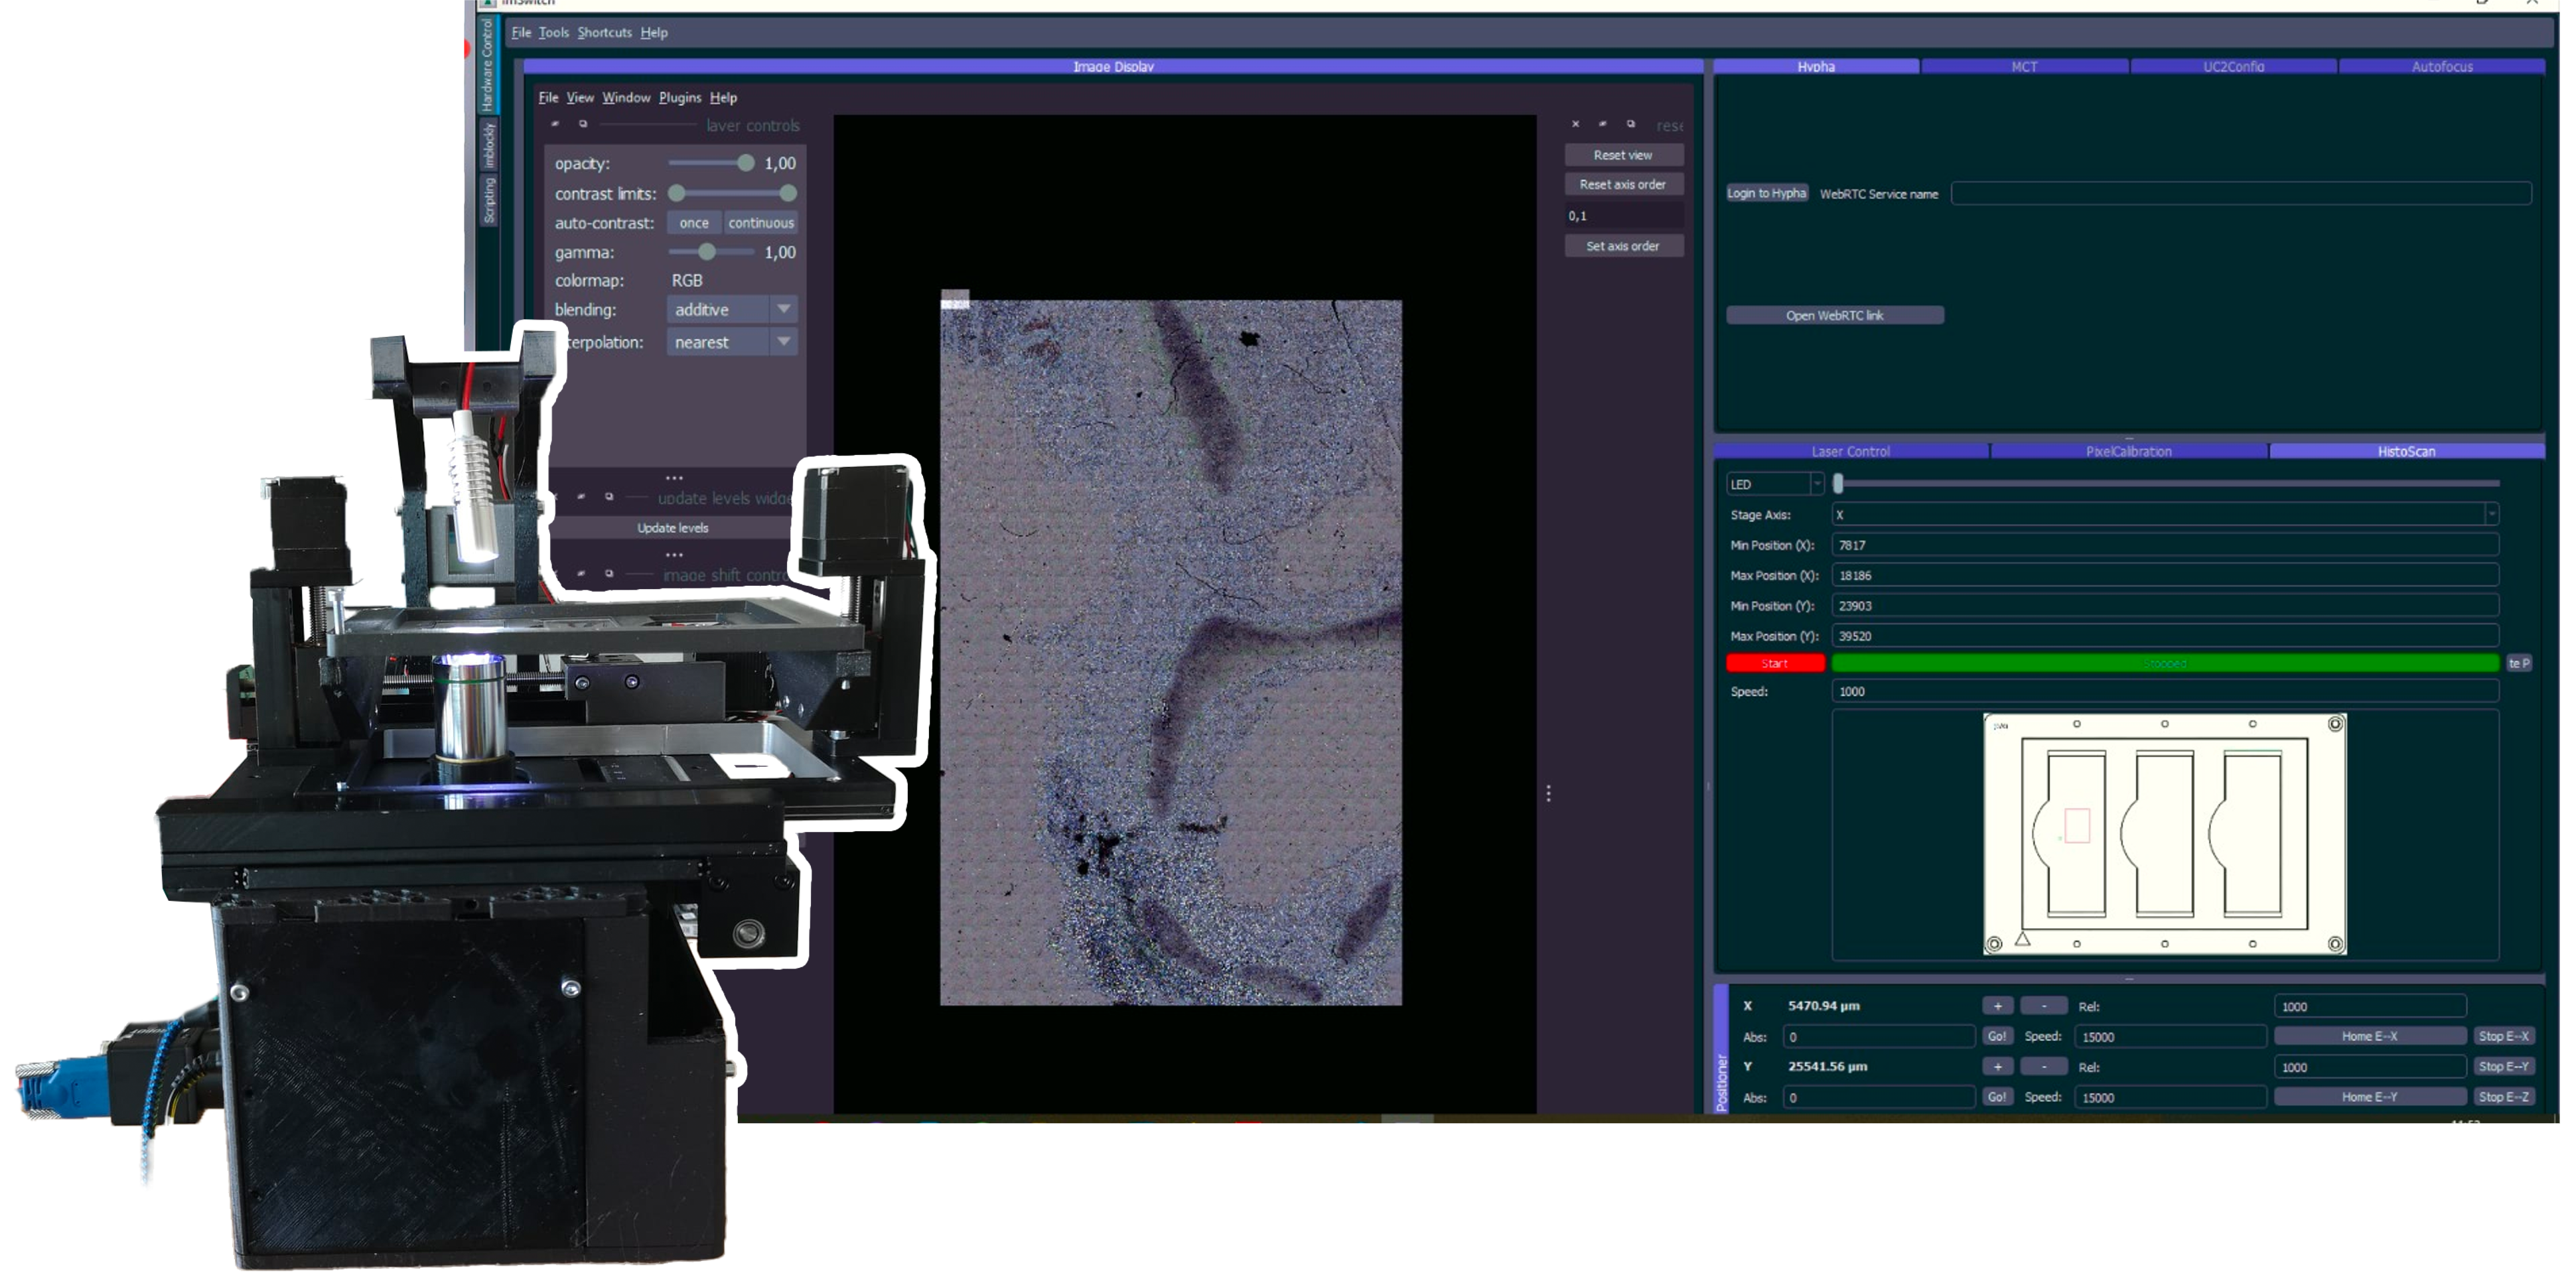
The Histoscanner Plugin integrates with the ImSwitch widget and controller to facilitate the scanning of large sample areas. Users can select a sample geometry and initiate scanning, which captures images and stitches them together to form a comprehensive view.
Initial Setup
Before starting a scan, ensure the following settings are configured correctly:
- Pixel Size: Set in the
setup.jsonfile. This size must be calibrated, possibly using a ruler. - Step Size of Axis: Also set in the
setup.json. It typically depends on the steps/mm defined by the leadscrew. - Sample Configuration File: An example file can be found here.
Scanning Process
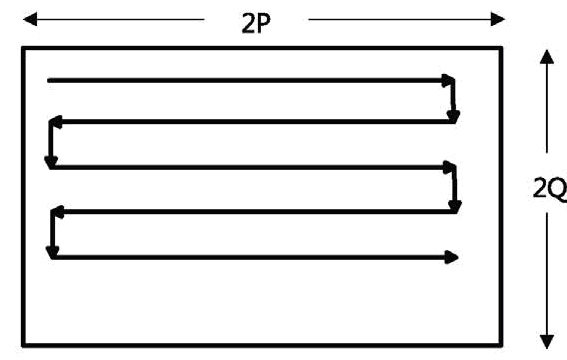
The microscope will compute the scan area and the necessary scan stepsize on its own and will perform a snake scan. Alternatively you can provide a list of coordinates.
Once the scan is successfully initiated, the final output is displayed in a downscaled version on napari to conserve memory.
ImSwitch Configuration
The configuration settings for the detector and stage are crucial. Here are the JSON settings for both:
For the Stage
  "positioners": {
    "ESP32Stage": {
      "managerName": "ESP32StageManager",
      "managerProperties": {
        "rs232device": "ESP32",
        "isEnable": true,
        "enableauto": false,
        "stepsizeX": -0.3125,
        "stepsizeY": -0.3125,
        "stepsizeZ": 0.3125,
        "homeSpeedX": 15000,
        "homeSpeedY": 15000,
        "homeSpeedZ": 15000,
        "isDualaxis": true,
        "homeDirectionX": 1,
        "backlashXOld": 15,
        "backlashYOld": 40,
        "backlashX": 0,
        "backlashY": 0,
        "homeEndstoppolarityY": 0,
        "homeDirectionY": -1,
        "homeDirectionZ": 0,
        "homeXenabled": 1,
        "homeYenabled": 1,
        "homeZenabled": 0,
        "initialSpeed": {
          "X": 15000,
          "Y": 15000,
          "Z": 15000
        }
      },
      "axes": [
        "X",
        "Y",
        "Z"
      ],
      "forScanning": true,
      "forPositioning": true
    }
  }
For the Detector
  "detectors": {
    "WidefieldCamera": {
      "analogChannel": null,
      "digitalLine": null,
      "managerName": "HikCamManager",
      "managerProperties": {
        "isRGB": 1,
        "cameraListIndex": 0,
        "cameraEffPixelsize": 0.2257,
        "hikcam": {
          "exposure": 0,
          "gain": 0,
          "blacklevel": 100,
          "image_width": 1000,
          "image_height": 1000
        }
      },
      "forAcquisition": true,
      "forFocusLock": true
    }
File Handling
- Storing Metadata: All metadata is stored in the
OME.TIFformat. - Opening in Fiji: Files can be easily opened and stitched in Fiji by importing them as OME.TIF.
- Opening in ASHLAR: Use the script developed during the openUC2 hackathon available here as a starting point for handling files in Ashlar.
Hardware/Software Setup
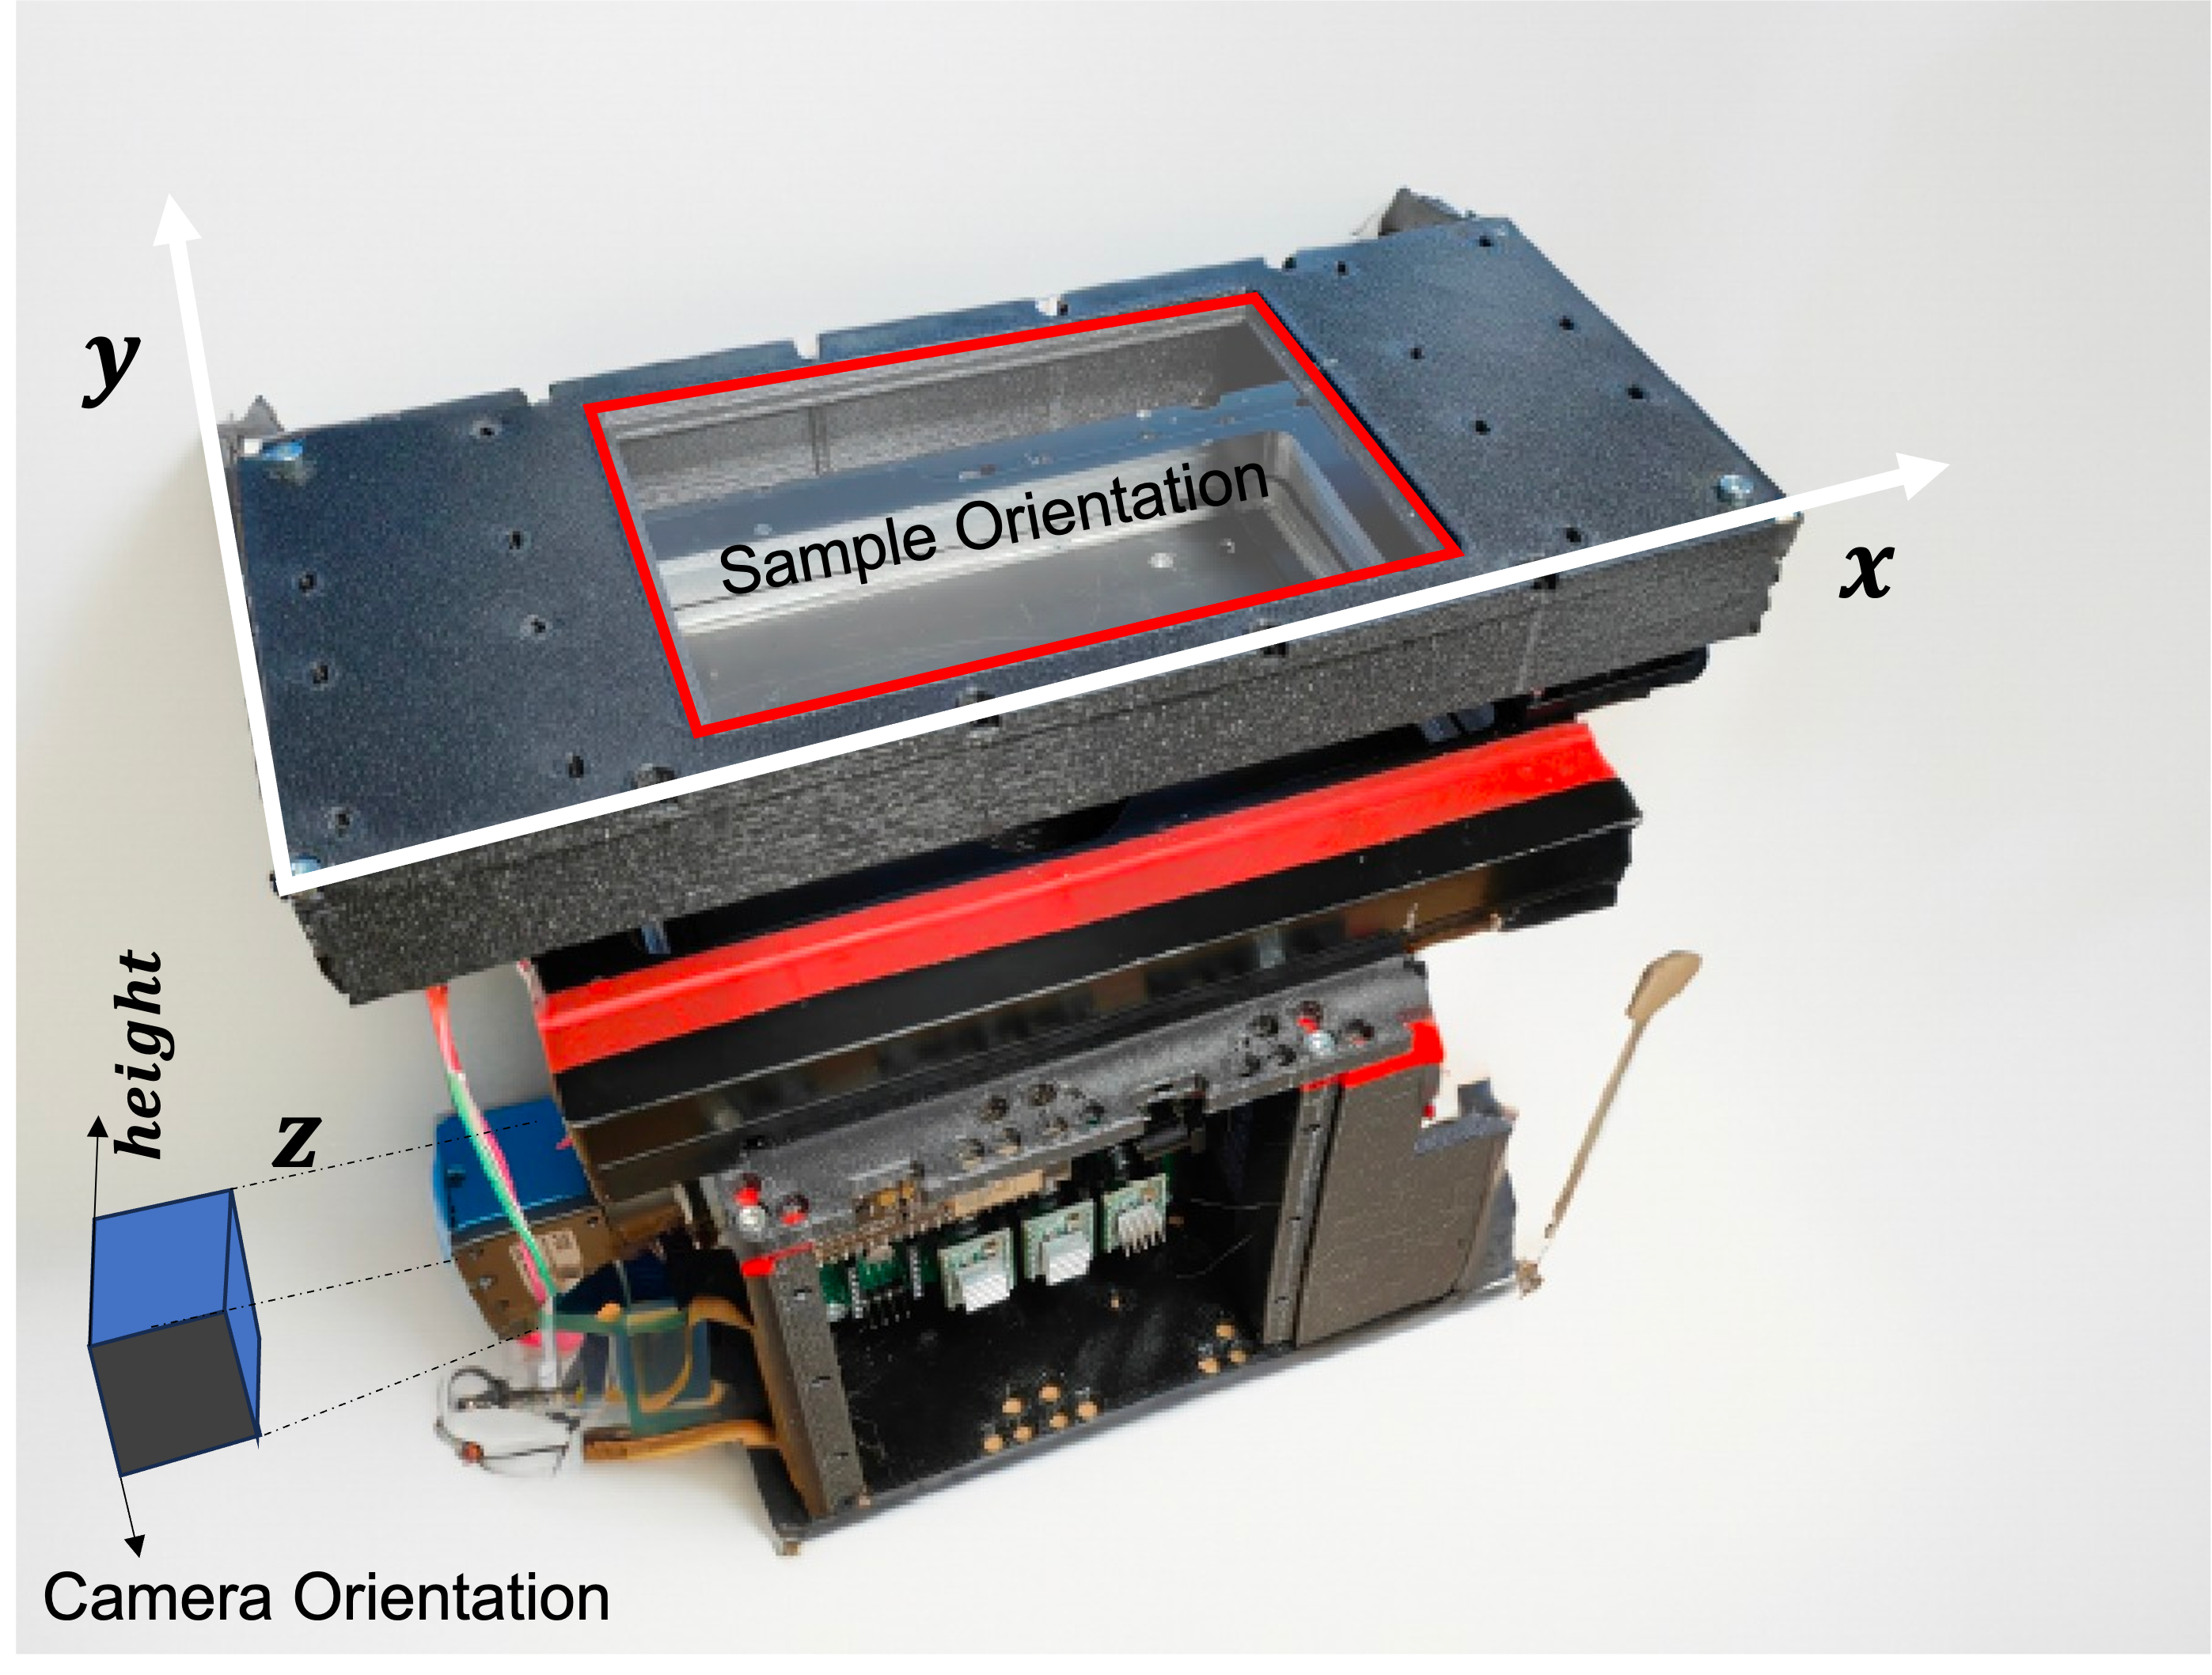
Correct orientation of the stage coordinates and camera coordinates is essential. The configuration ensures that the camera orientation matches the stage scanning positions.
In order to have correct orientation it's important that the stage coordinates and the camera coordaintes are matching. The below image shows how the camera has to be orietned w.r.t. the stage scanning positions
Tutorials and Demonstrations
- Tutorial on Matching Axes: A tutorial explaining the matching of different axes is available on YouTube.
- Full Plugin in Action: Watch the plugin in action here.
Feel free to reach out with any queries or suggestions to enhance this documentation. Happy scanning with Histo Scanner! uUlJuI&ab_channel=openUC2