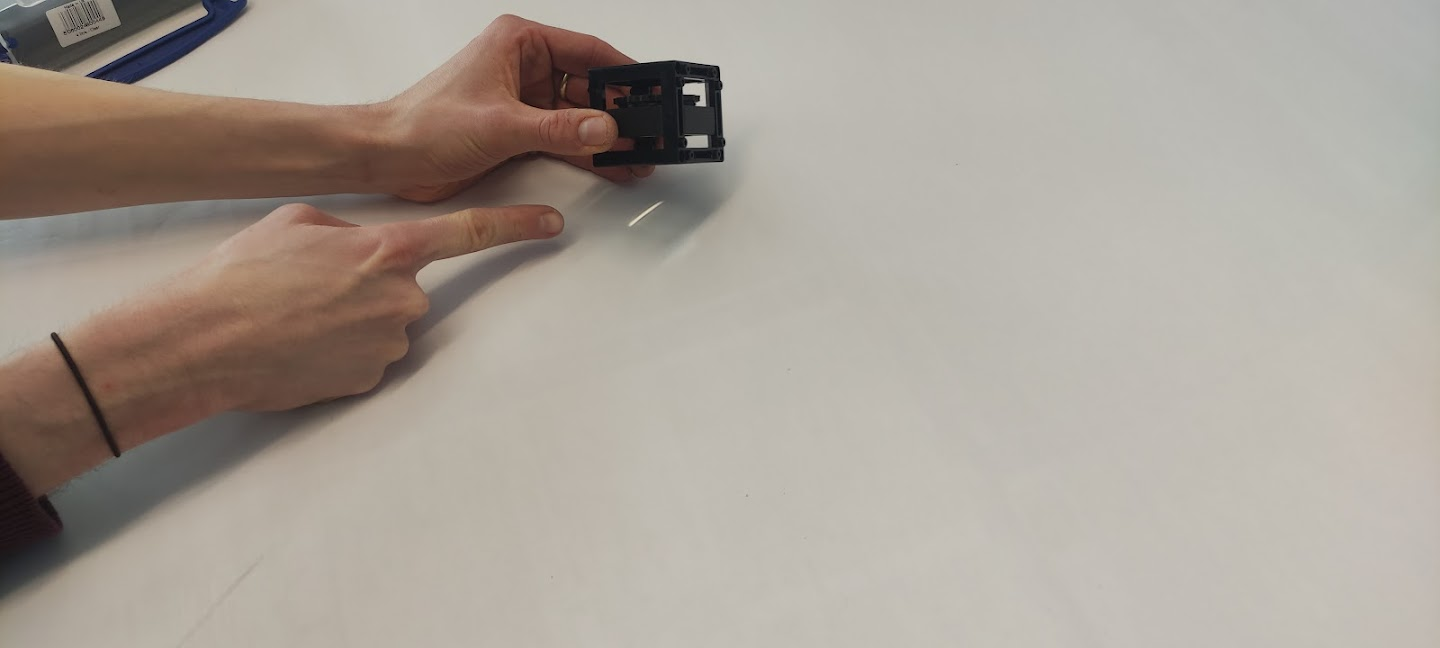
Lens
Lenses
In ray optics, light is represented as a bundle of rays (arrows), which simplifies the physical properties of light. A ray has a direction and is therefore drawn with an arrow. A lens "refracts" the beam, changing its direction.
The focal length of a lens corresponds to the distance from the lens to the focal plane on which the focal point lies. It is given in millimeters (f = mm).
Converging (positive) and diverging (negative) lenses
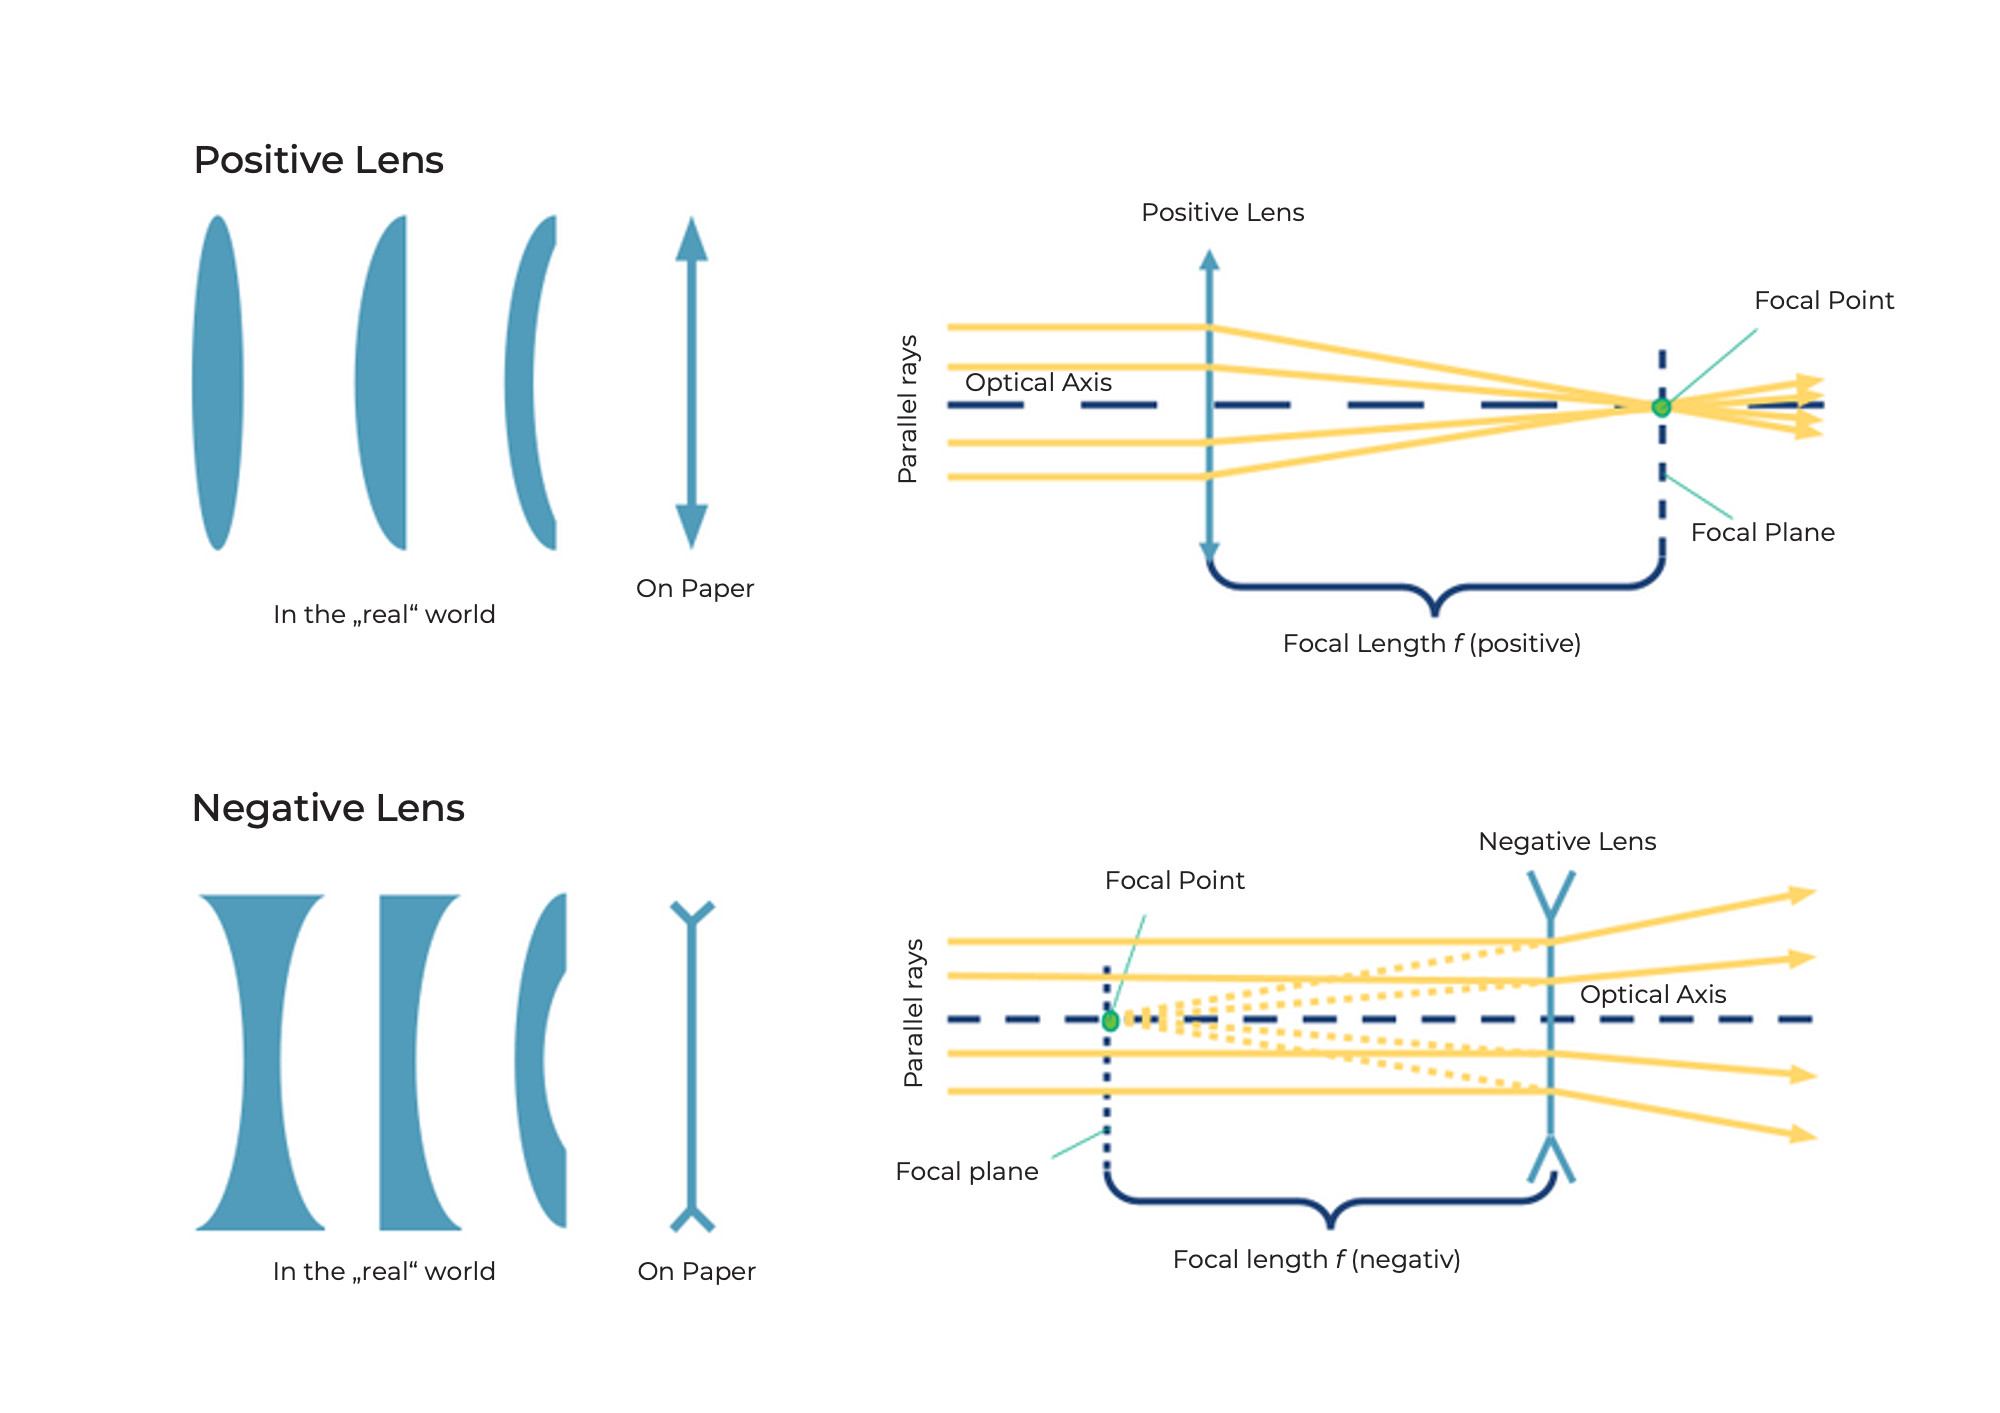
Converging lenses refract the rays of light traveling parallel to the optical axis at a point called the focal point.
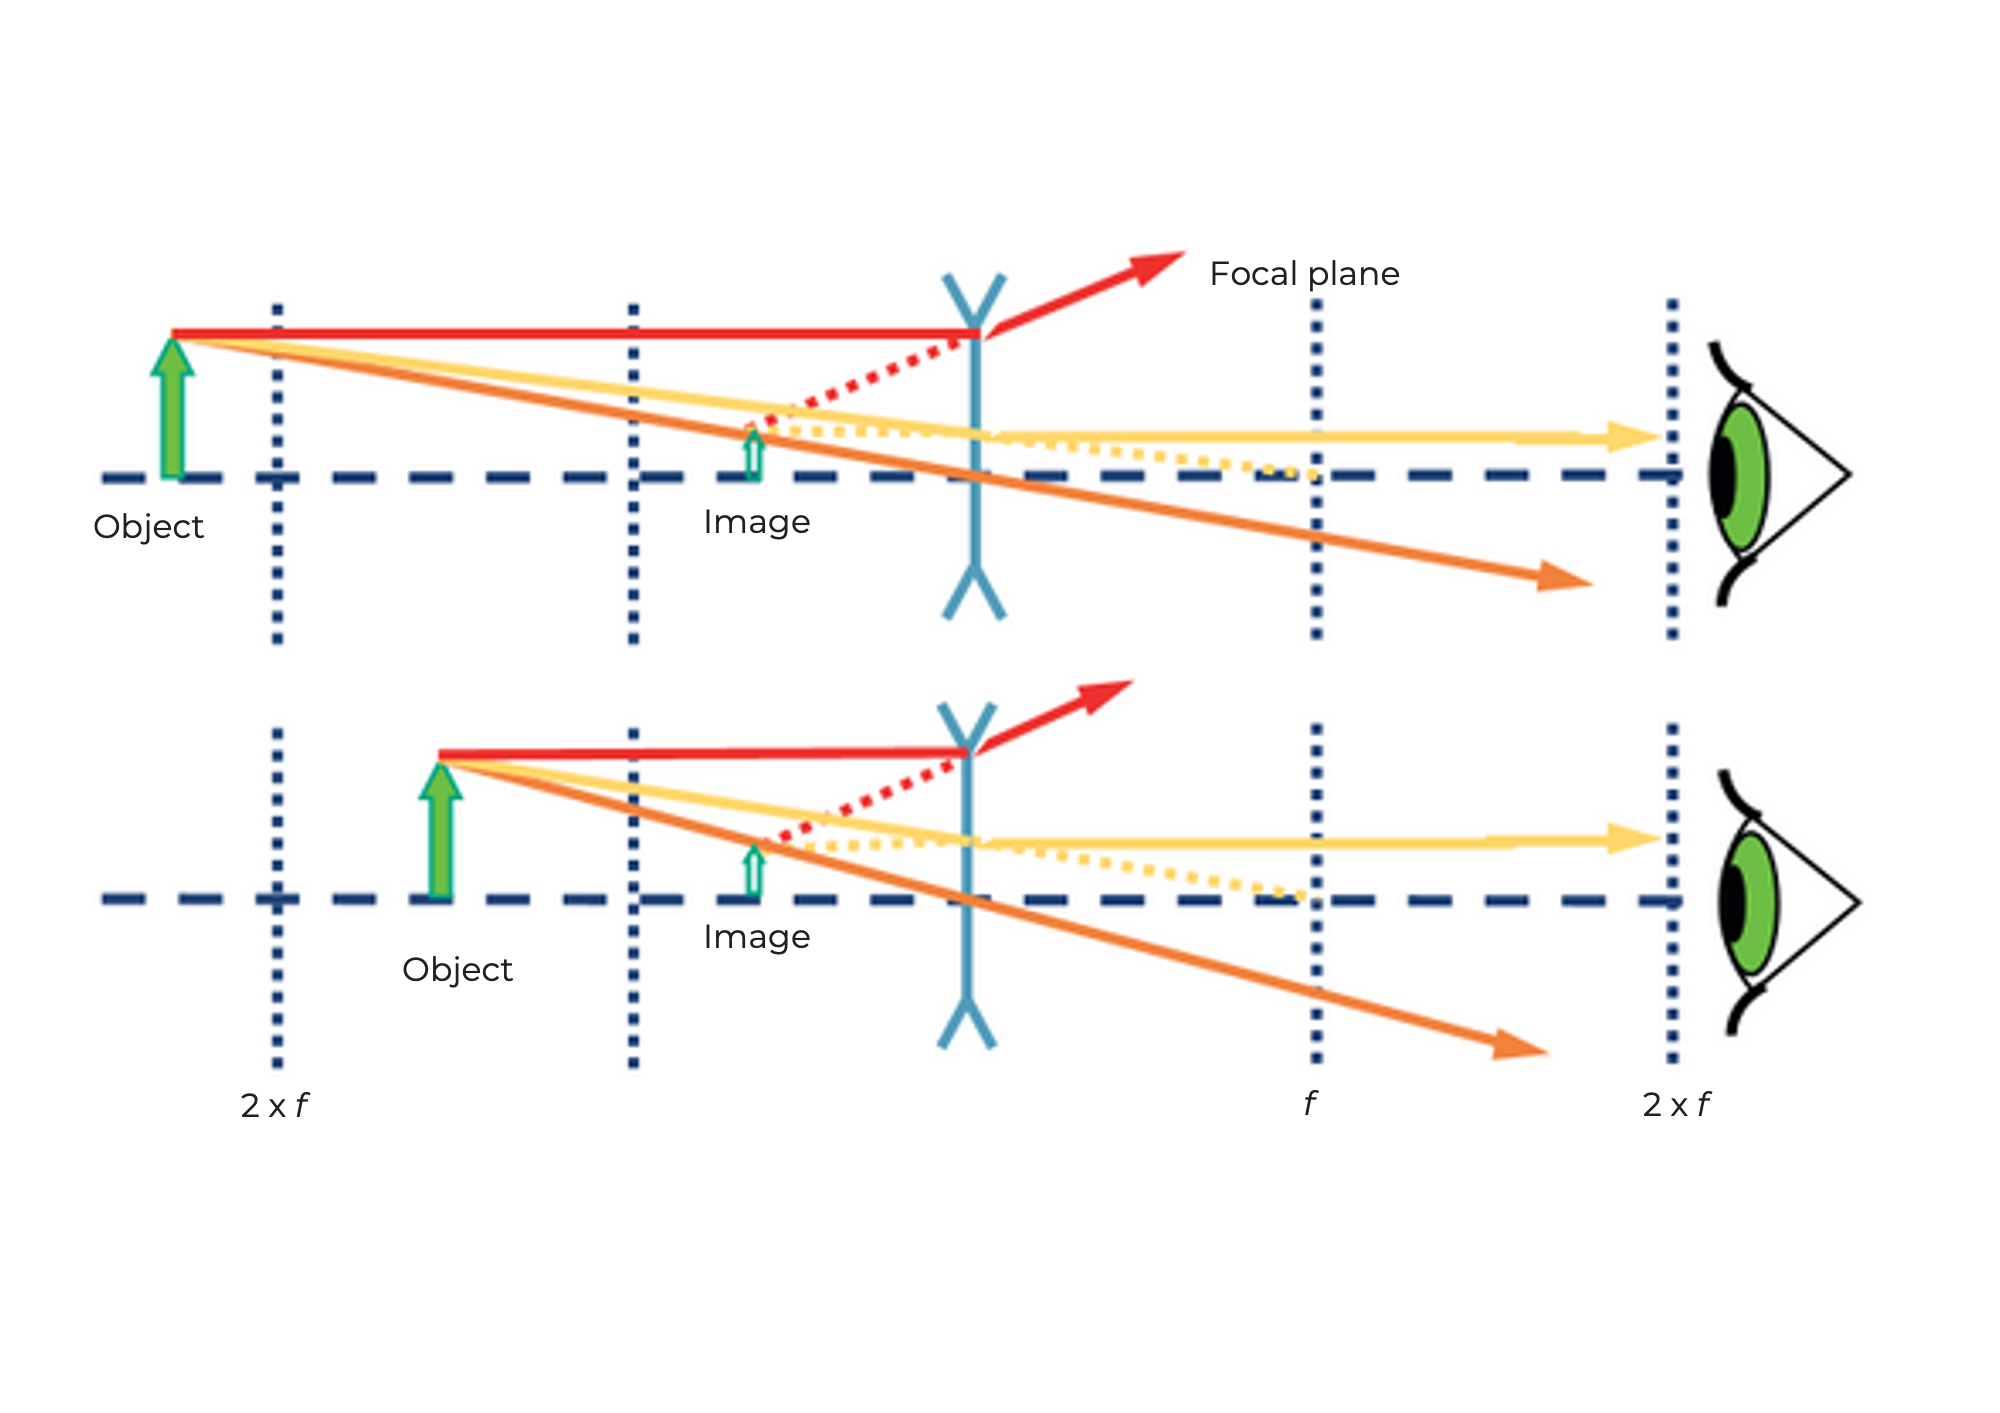
The diverging lenses refract the rays of light traveling parallel to the optical axis as if they originated from a point called the "virtual" focus.
Lenses “refract” the rays of light
You can find the focal length of the lens as a printed number on the lens holder. The MiniBOX receives a 100mm converging lens, two 40mm converging lenses and a -50mm negative lens. The numbers indicate the focal length.
The converging lens is also called a positive or convex lens. The middle part of the lens is always thicker than the edge.
The negative lens (spreading lens) is sometimes also called a negative or concave lens. The middle part of the lens is always thinner than the edge.
We assume that our lenses are so-called "thin lenses". This means we can consider them as one plane and not care about their thickness. This makes explanations and calculations much easier.
Lens image
Now take the lentil cubes. With the right lens, try to decipher the focal length information in the cubes shown. Move the lens over the writing until it is the same size as the "UC2" text.
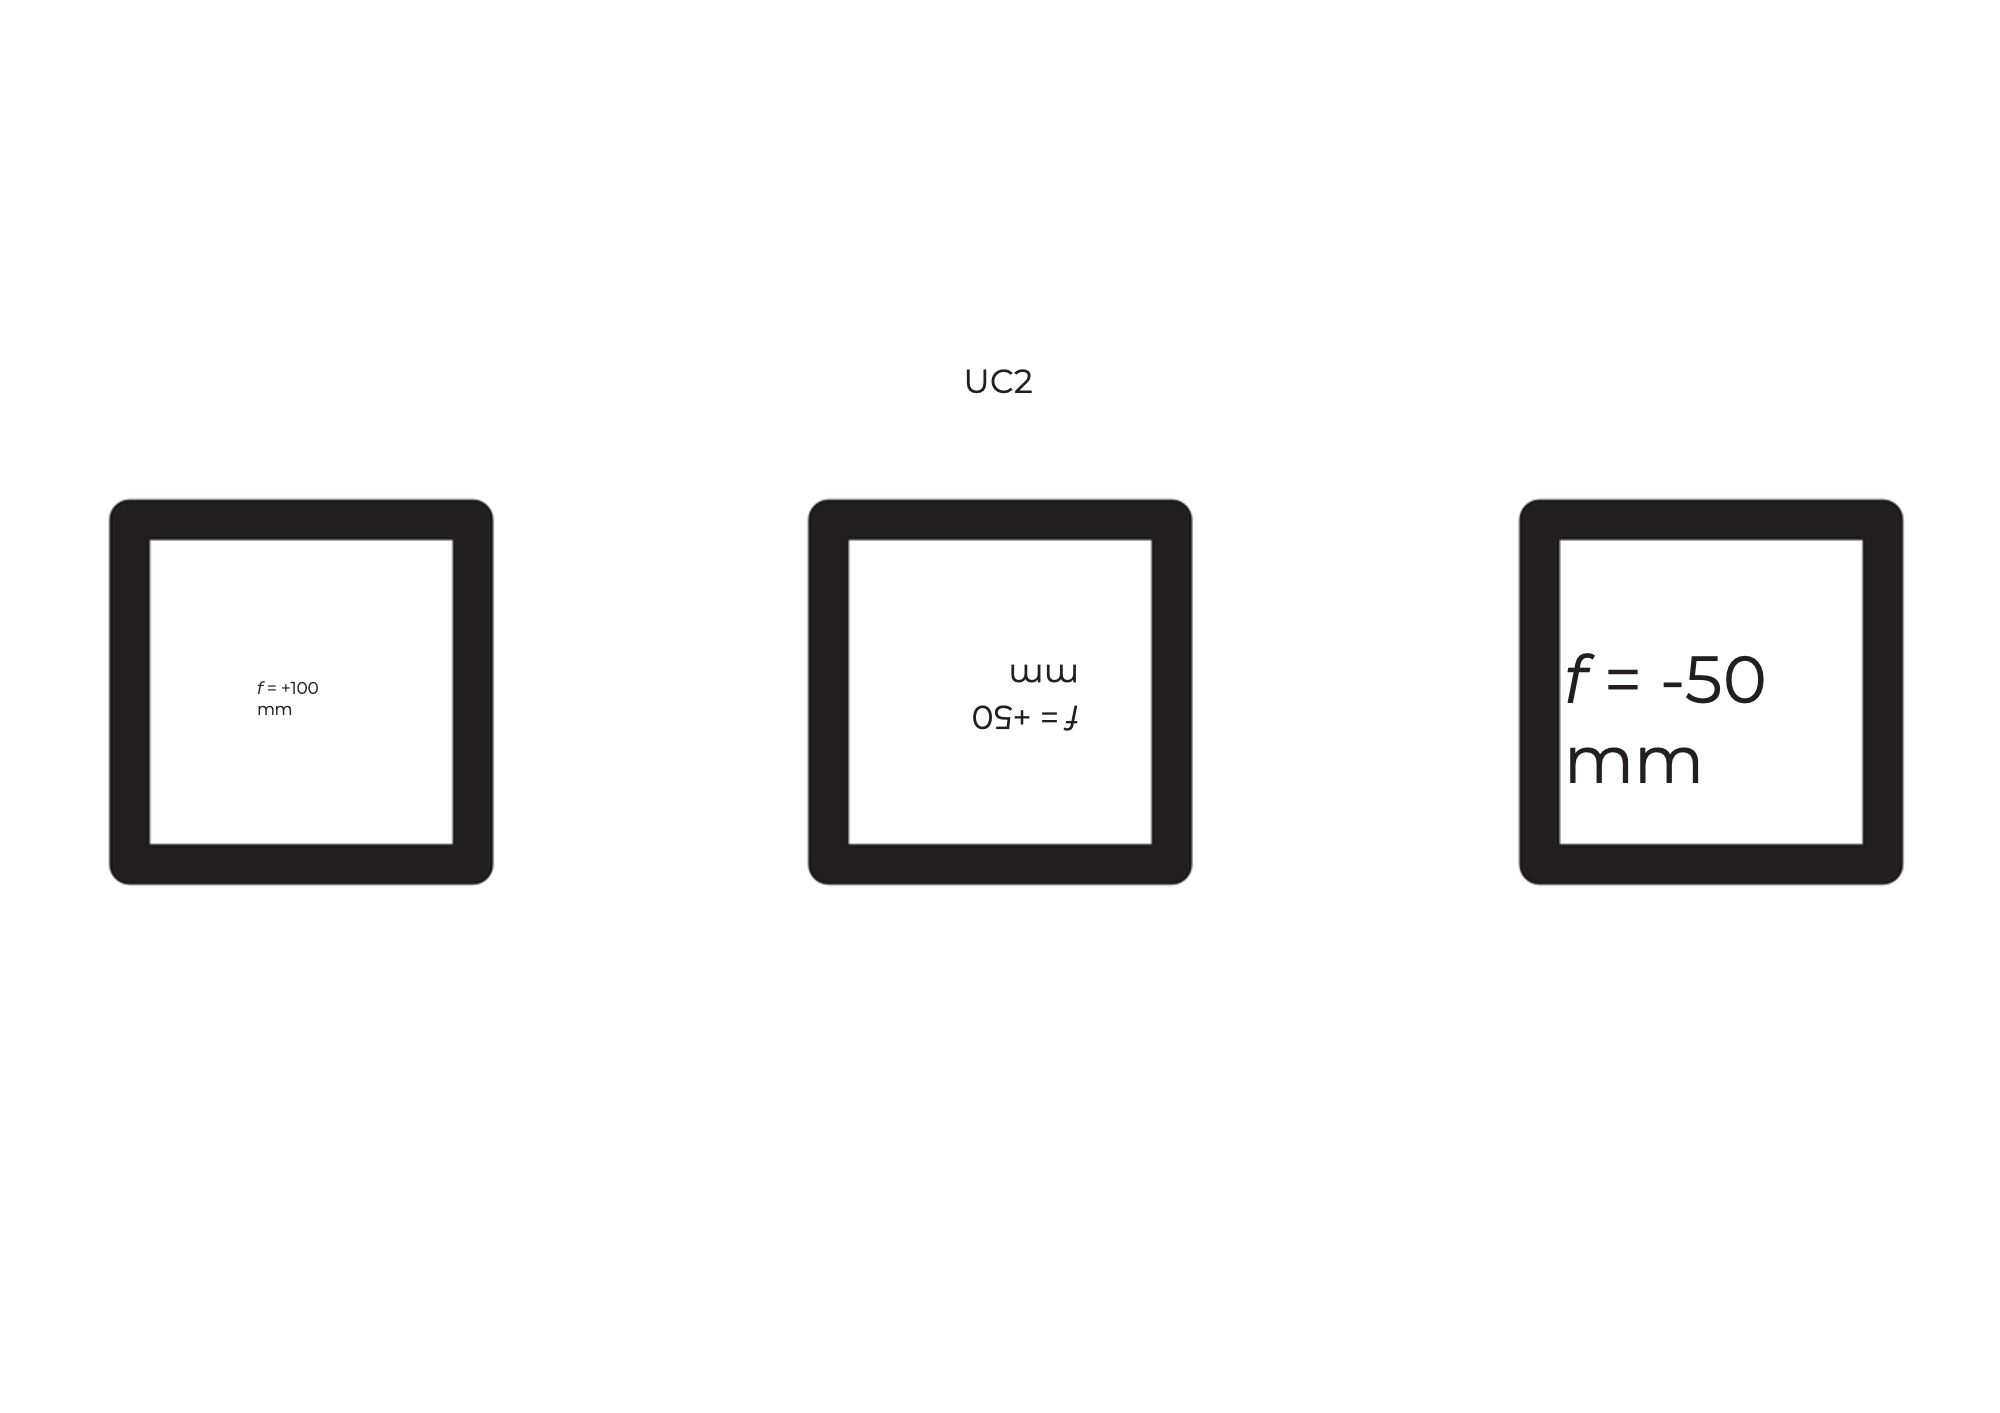
Image of an object through a positive lens
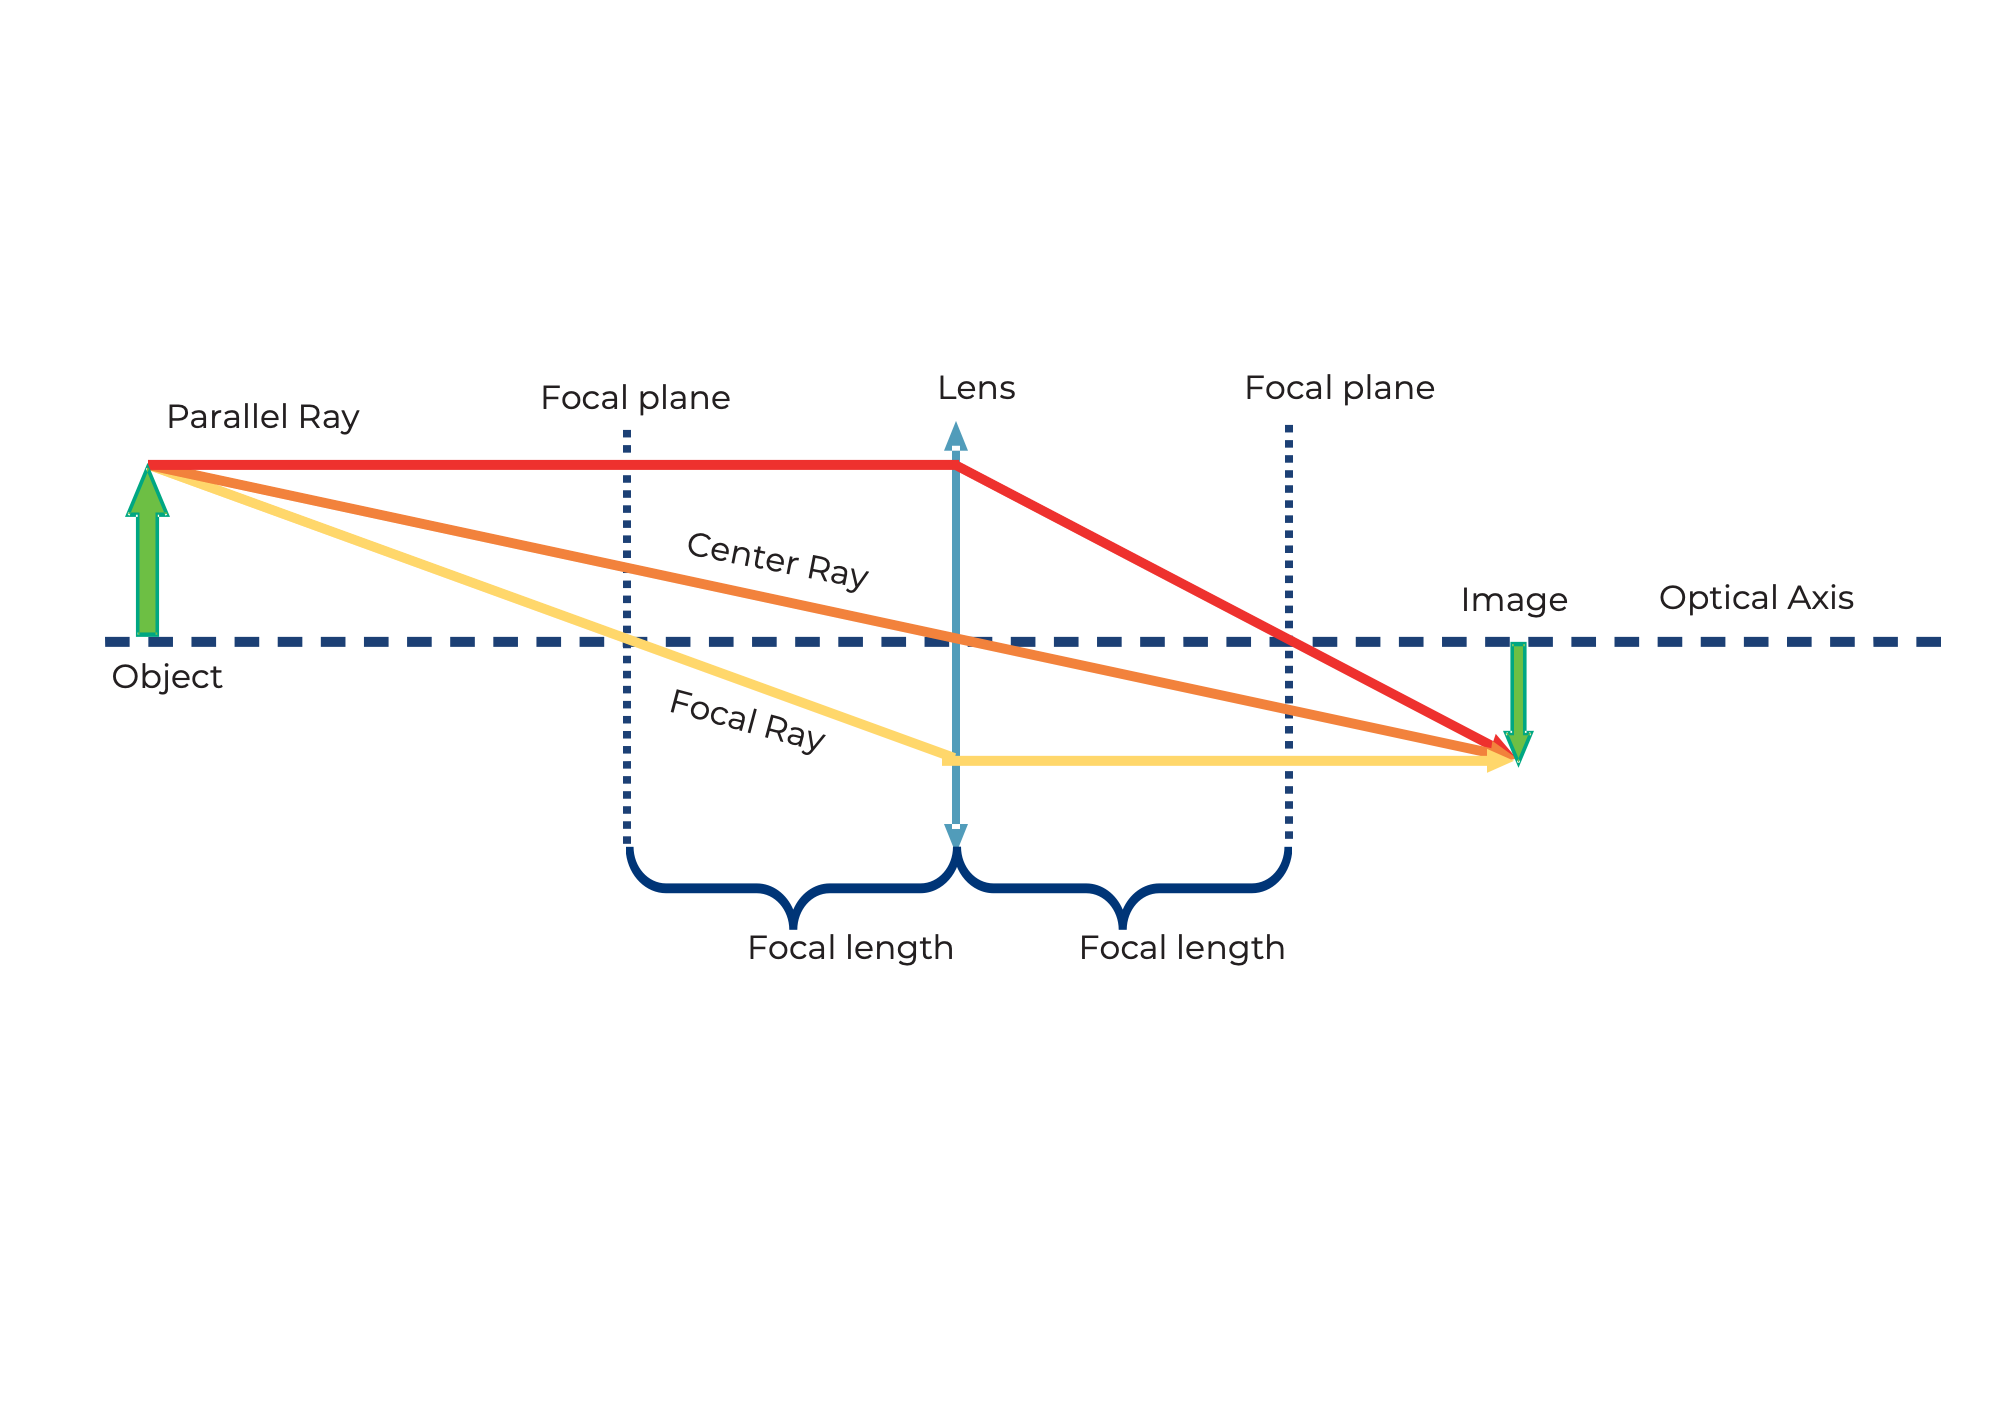
Let's take the converging lens as an example. We start with an object (green arrow) and see what happens to the rays that start from the top. There are infinitely many rays in all directions, but for drawing the figure the following three rays will suffice:
- The centre beam (orange) passes undisturbed through the center of the lens.
- The focus ray (yellow) also starts from the tip of the arrow, but goes through the object-side focus at focal length f. After the lens, it continues at the same height, but now parallel to the optical axis.
- The parallel beam (red) initially runs parallel to the optical axis, but is then refracted at the lens in such a way that it passes through the focal point on the image side at focal length f.
The image is formed where all the rays intersect. The principle is used for all points or the rays of an object emanating from them. Depending on which lens is used and depending on the position of the object, the properties of the image change, such as size, orientation and position.
Image of an object through a negative lens
In the case of the negative lens, we use the same method to image the ray path. Unlike the case of the converging lens, the image is always reduced and virtual. Magnification depends on the position of the object in front of the lens. Unlike the converging lens, the image is created on the object side and is therefore called a virtual image. You can see it directly with your eyes but not project it onto a screen.
The converging lens as a magnifying glass
Take the UC2 lens cube with focal length f=40mm and use it as a magnifying glass.
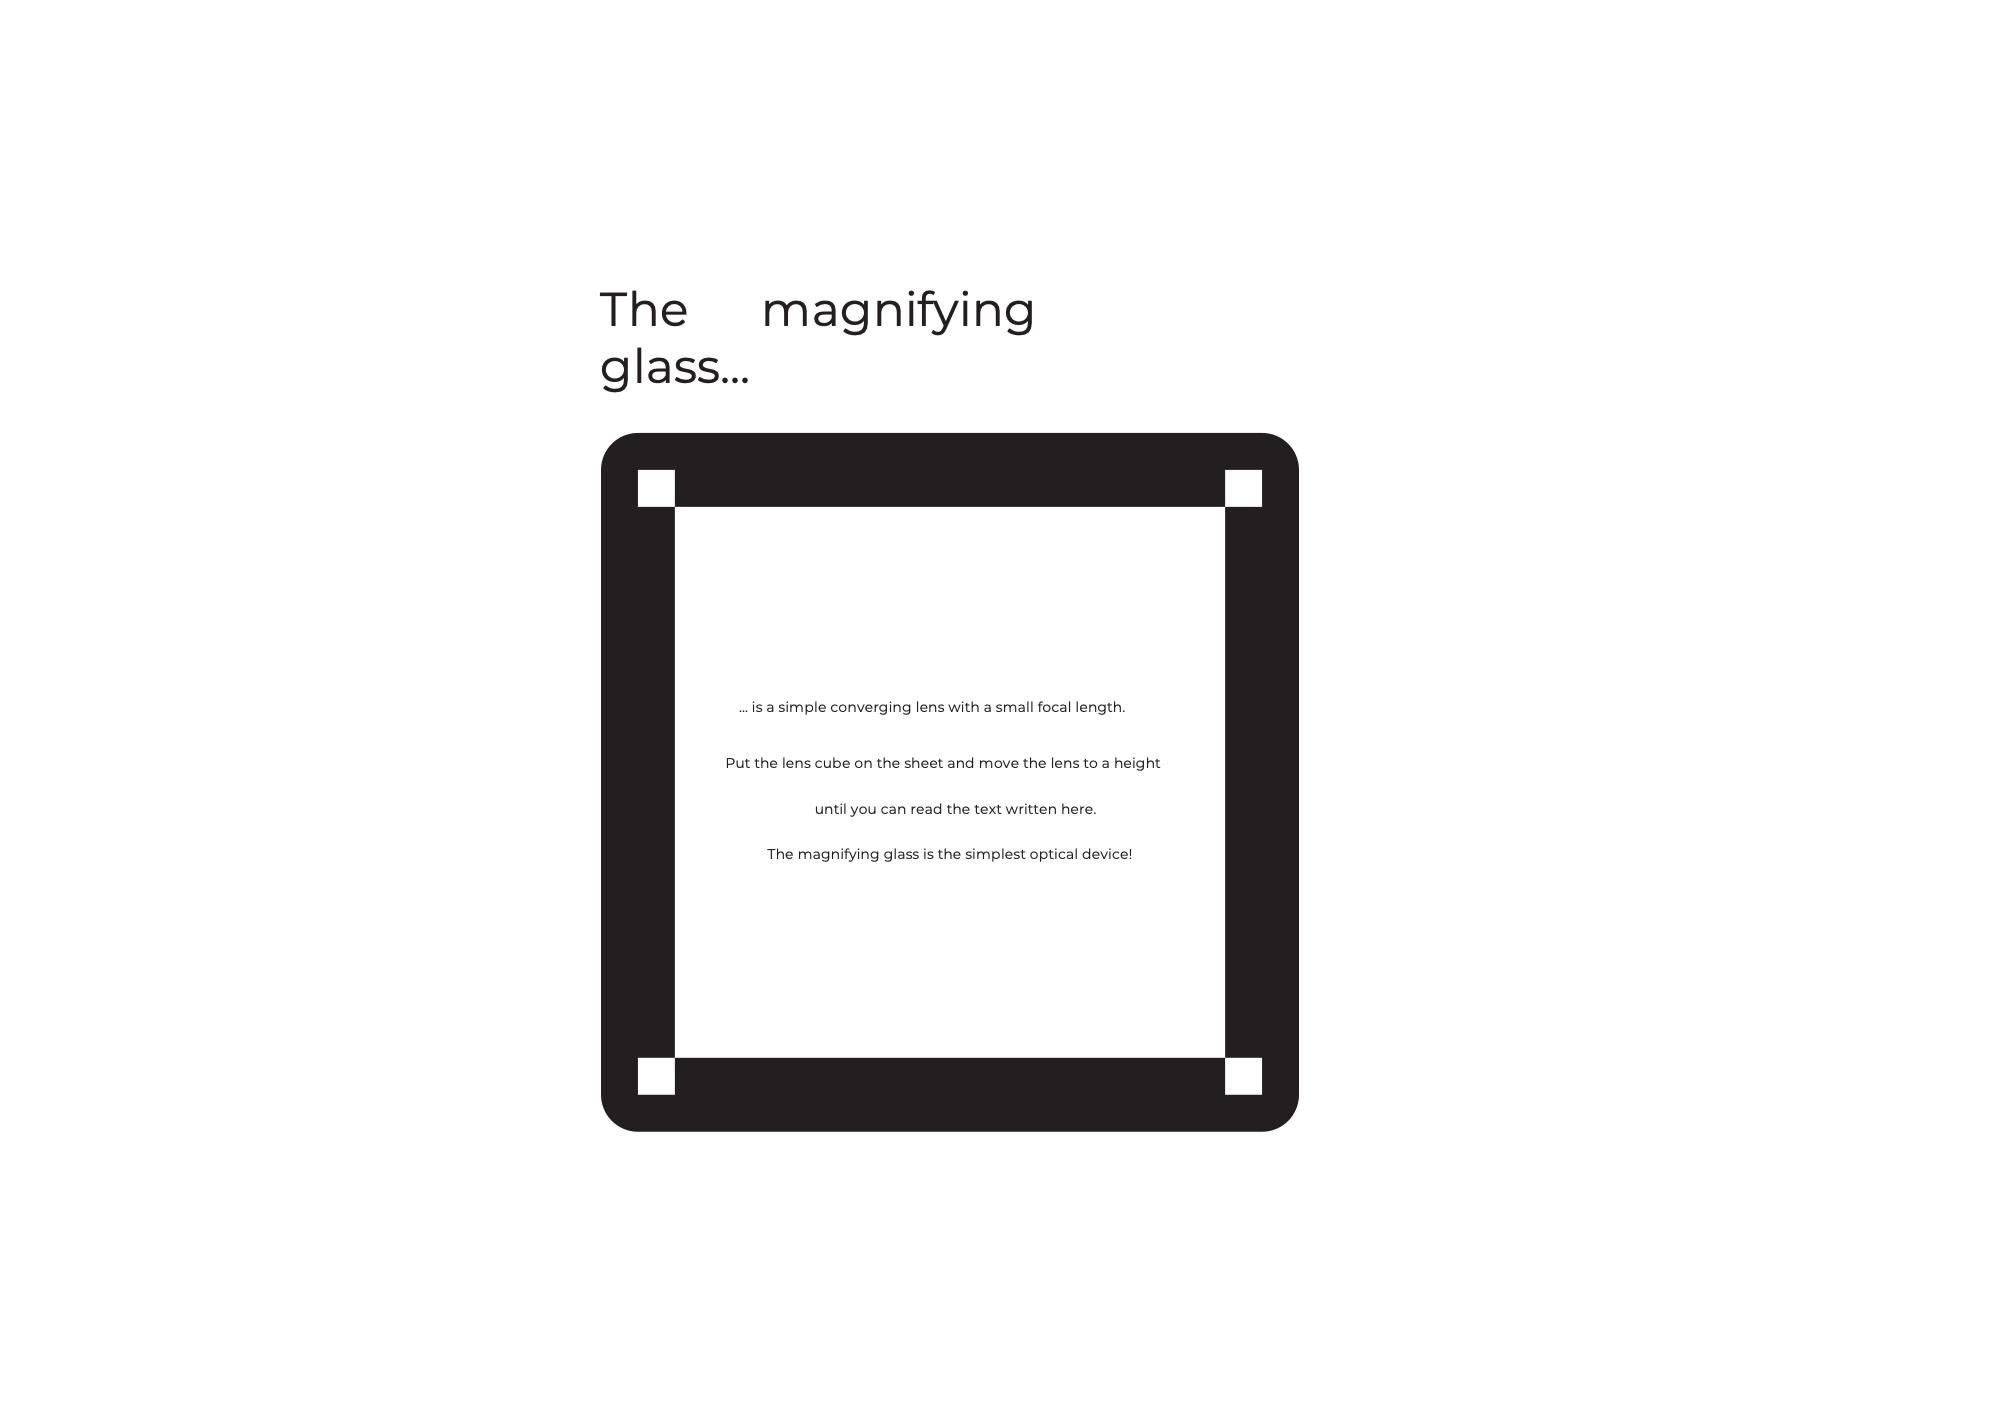
A lens in action can be found here:
That's what converging lenses do
With the converging lenses, the image and the magnification depend on the position of the object.
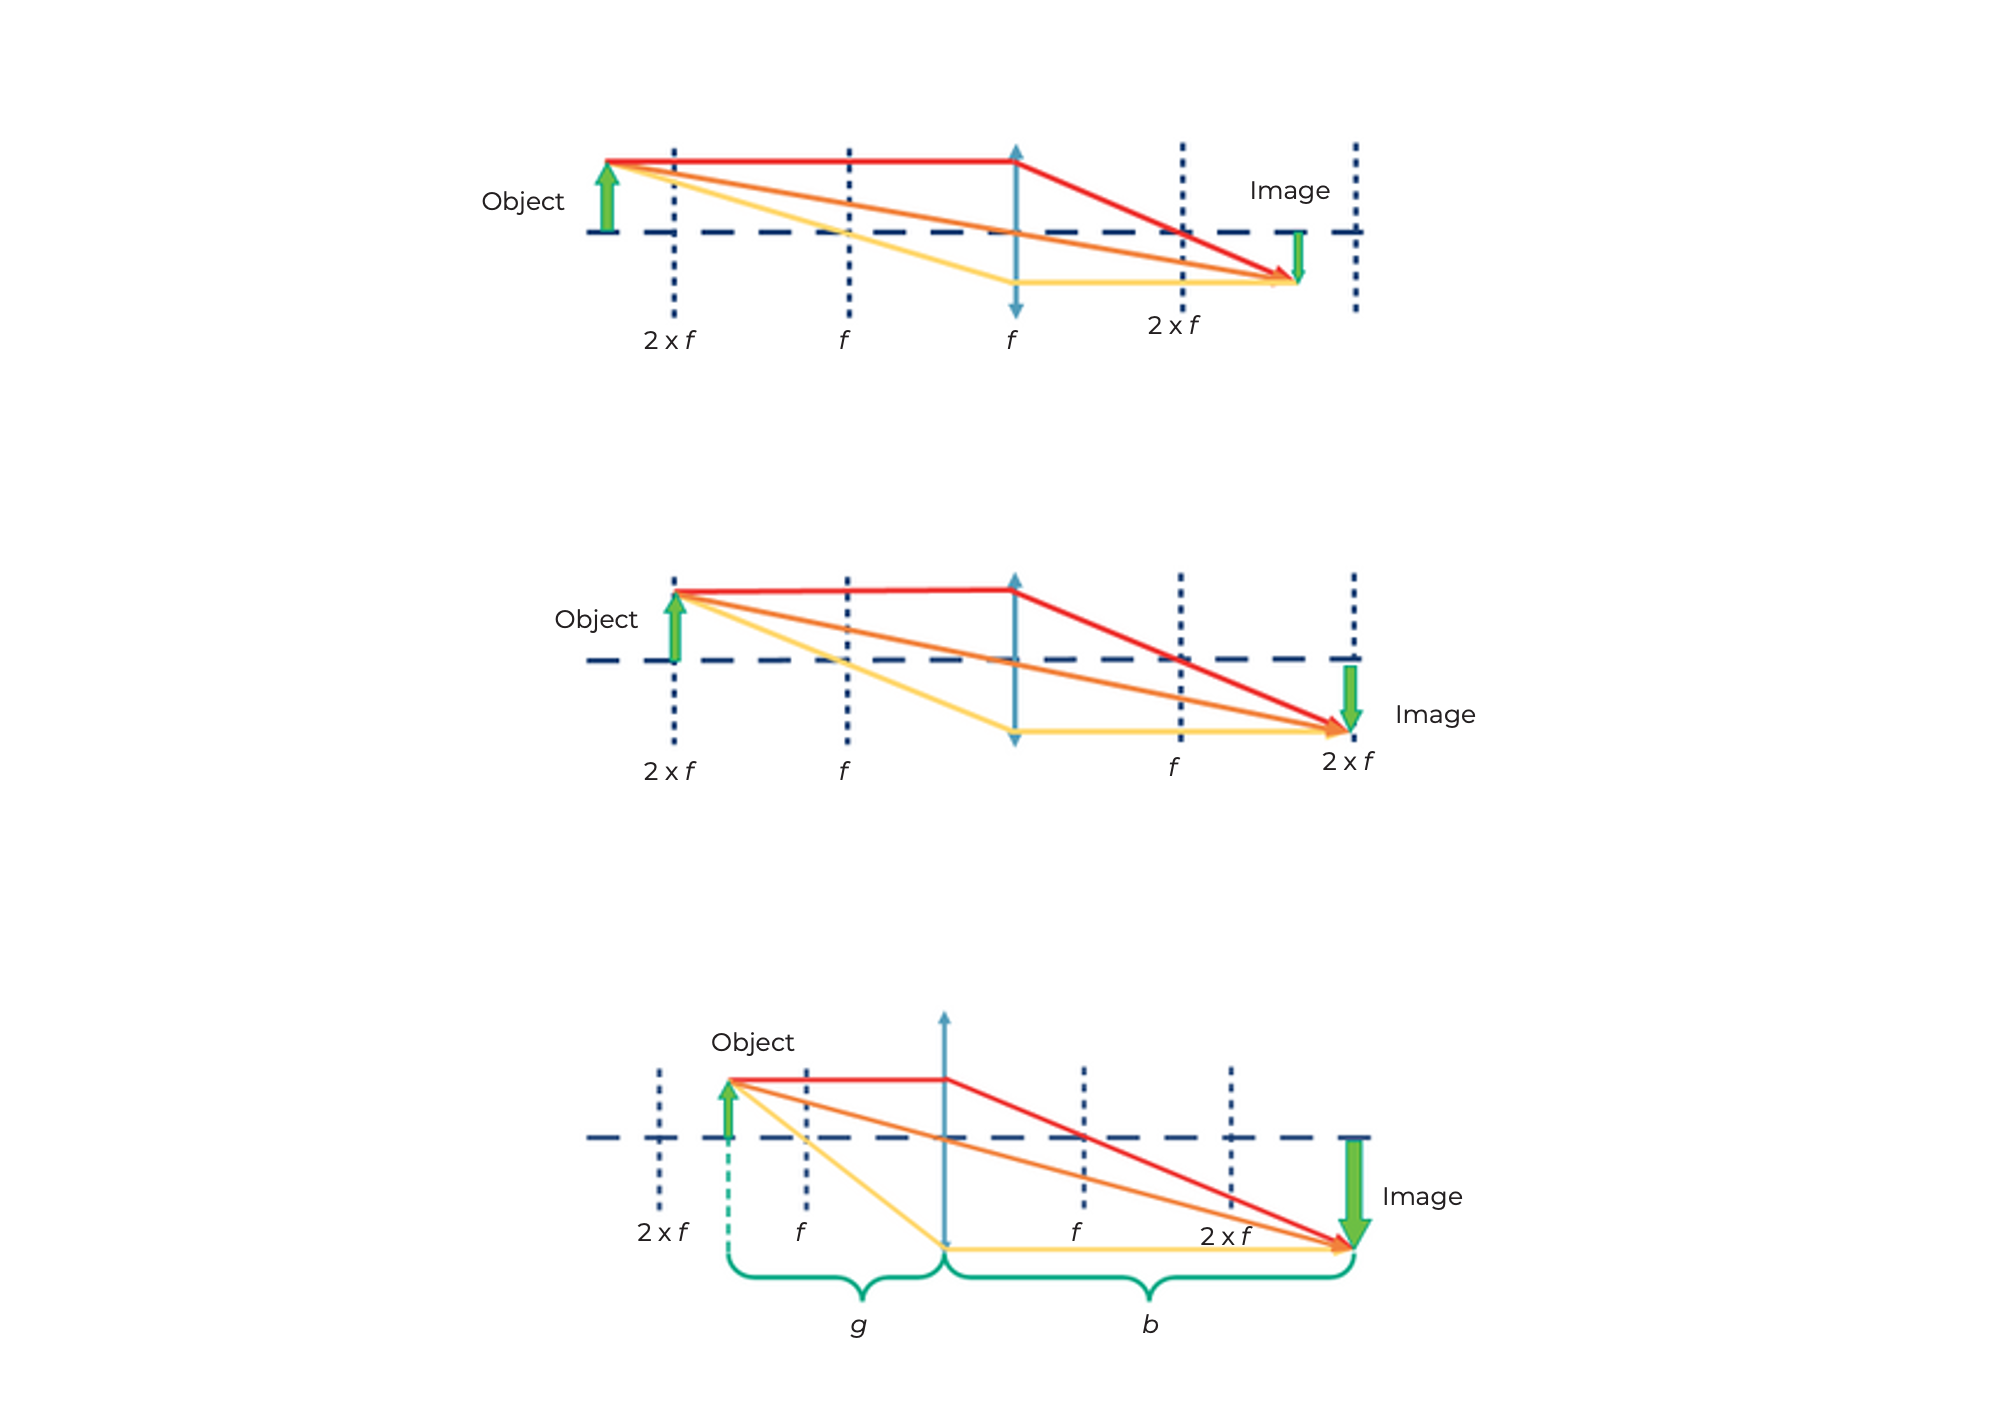
If the distance between the object and the lens is more than twice the focal length of the lens, then the image is...
- Vice versa
- Swapped sides
- Reduced
- Real
If the distance between the object and the lens is exactly twice the focal length of the lens, then the image is...
- Vice versa
- Swapped sides
- Same size
- Real
If the distance between the object and the lens is more than the focal length and less than twice the focal length of the lens, then the image is...
- Vice versa
- Swapped sides
- Magnified
- real
Object distance (g)
The distance between the object and the lens plane is called g.
Image width (b)
The distance between the lens plane and the image formed by the lens is denoted as b.
The converging lens can produce a real image. The real image can then be seen on a screen.
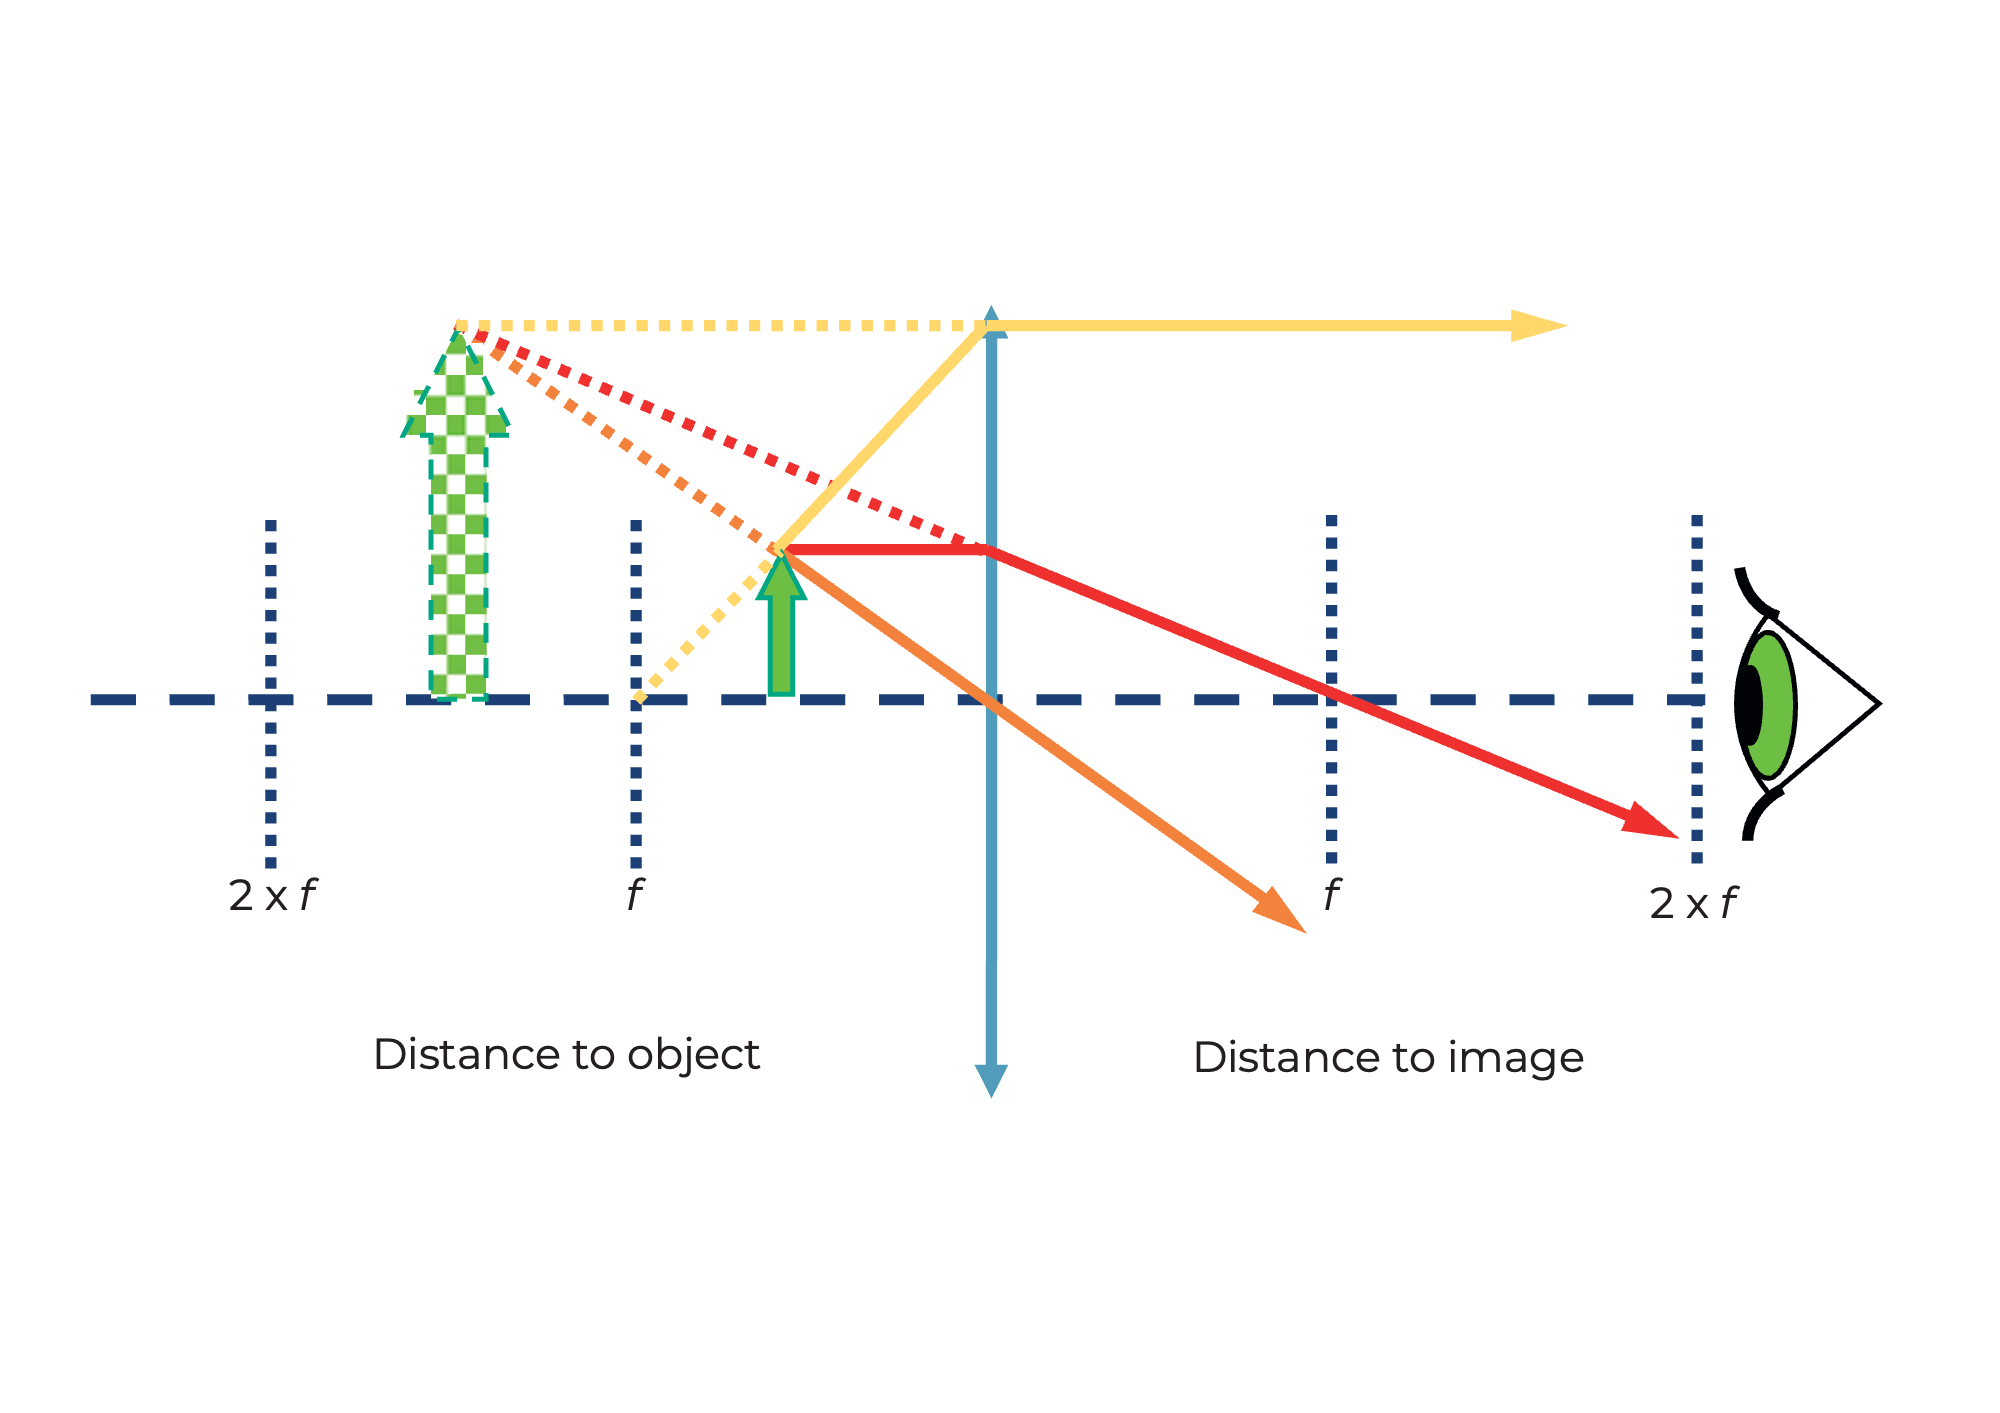
That's why the magnifying glass enlarges
Magnifying glass effect!
If the distance between the object and the lens is less than the focal length of the lens, then the image is...
- upright
- right side up
- Magnified
- Virtual
Calculate the magnification of the magnifying glass using the following formula:
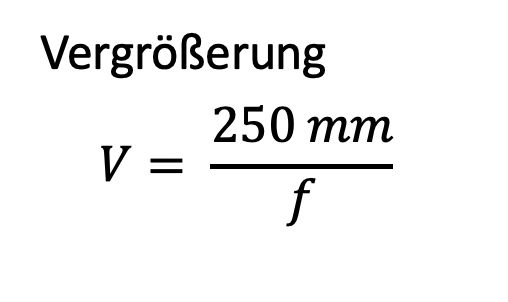
250 𝑚𝑚 is the distance of clear visual range - i.e. the distance between the object and the eye at which most people can read well. More on this later in the “accommodation” of the eye.
How does a cinema projector work?
Take the UC2 lens cube with focal length 𝑓 =40 𝑚𝑚 and place it behind the sample holder cube. The distance between the object and the lens (i.e. the object distance g) should be approx. 50 mm. If you now illuminate the object with the flashlight, you will see it sharply at a distance of approx. 200 mm on the wall. A cinema projector has a film strip instead of the object and of course a much stronger light source.
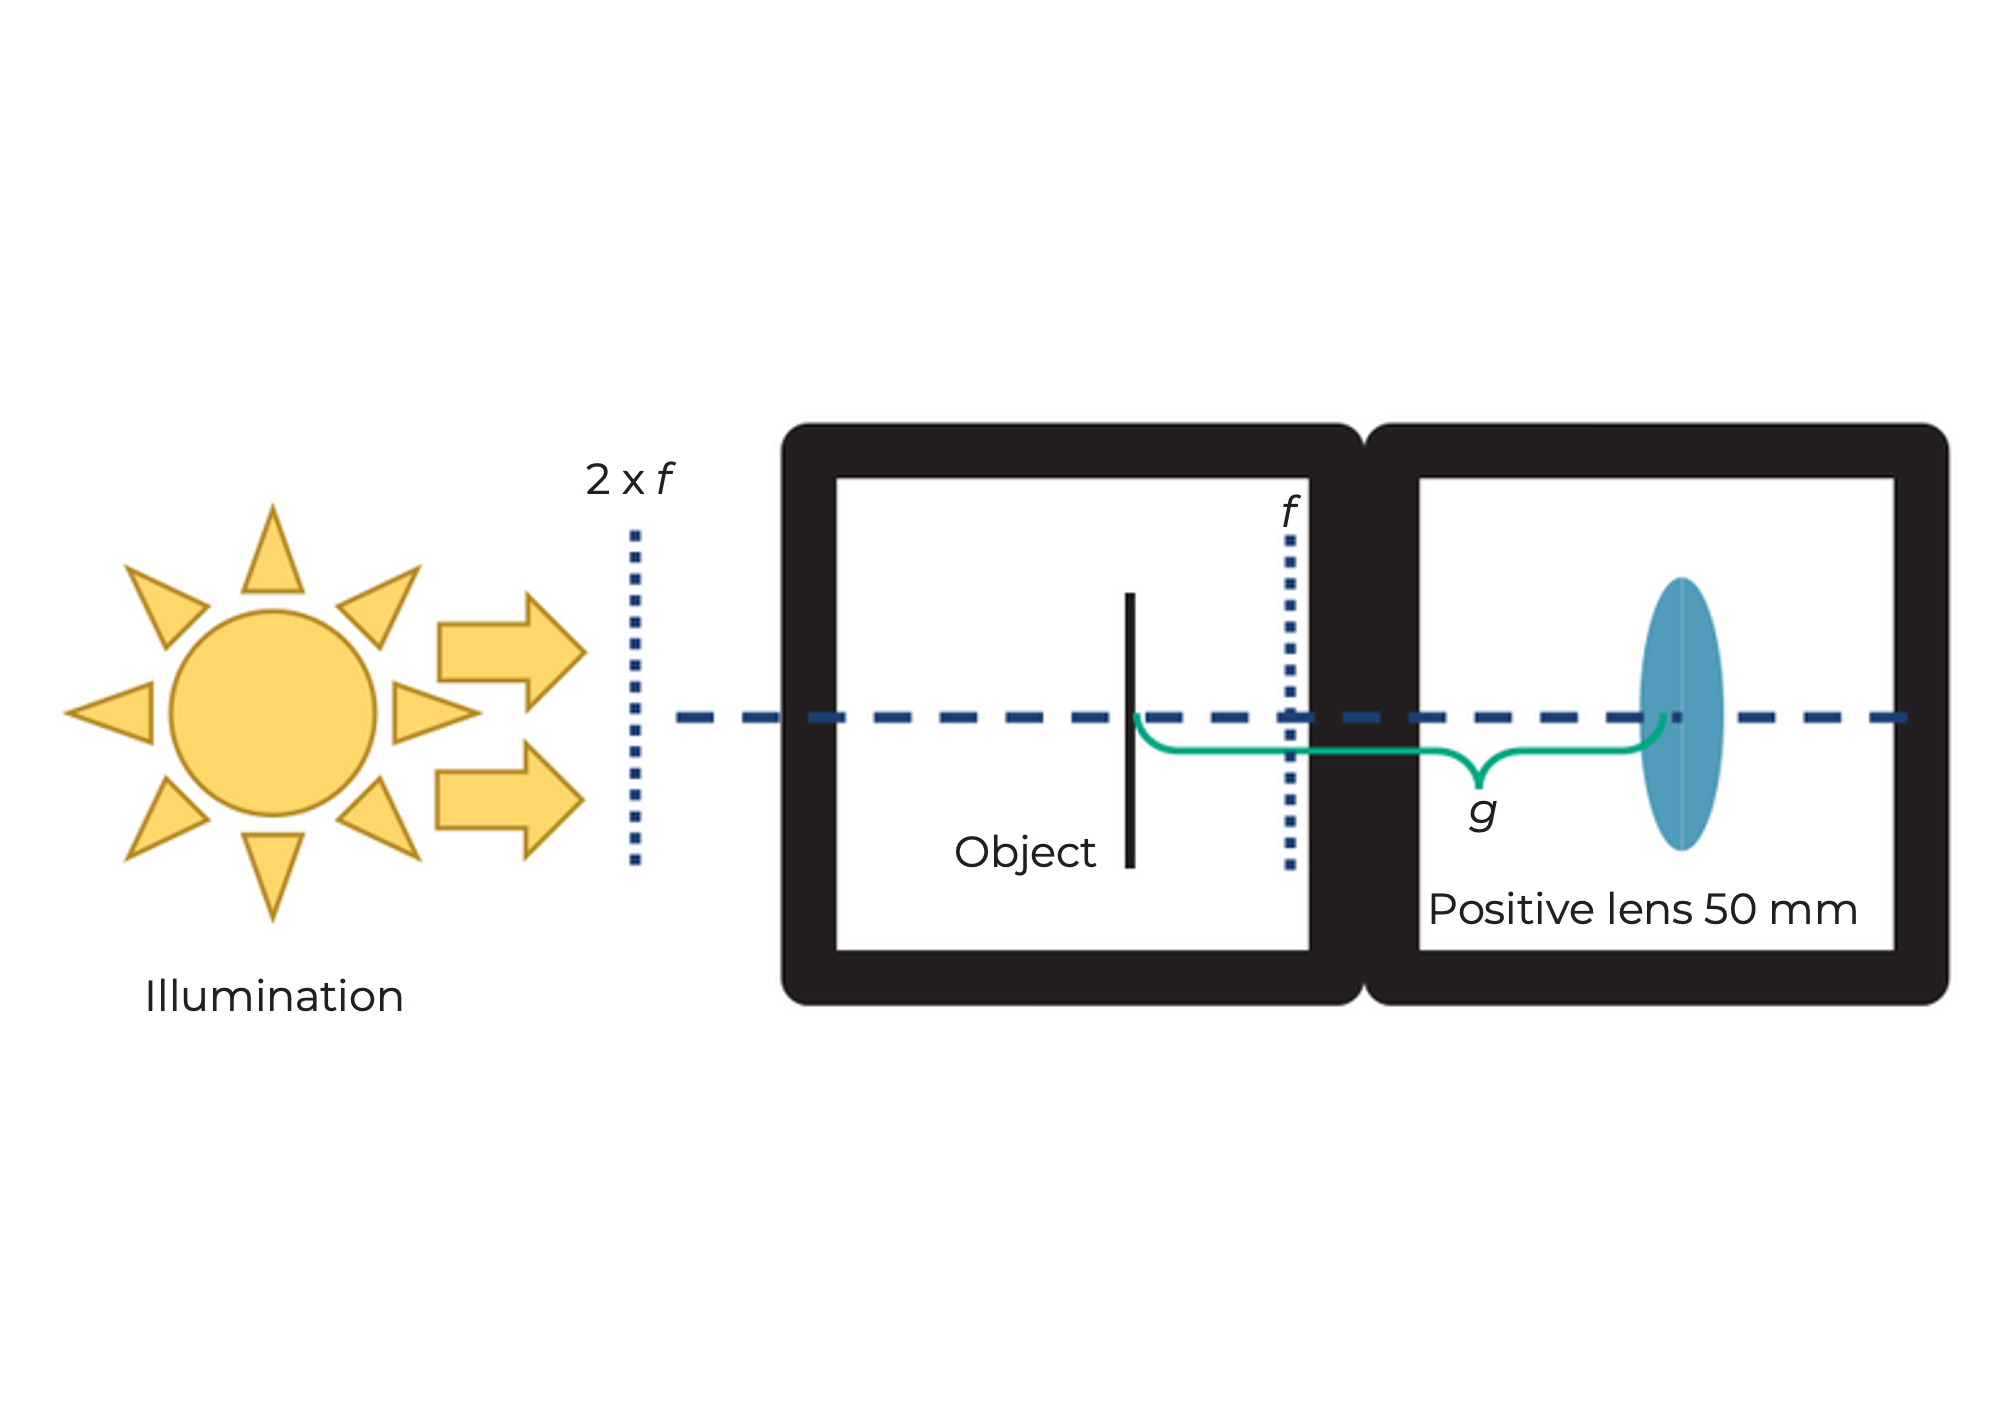
How does a cinema projector work?
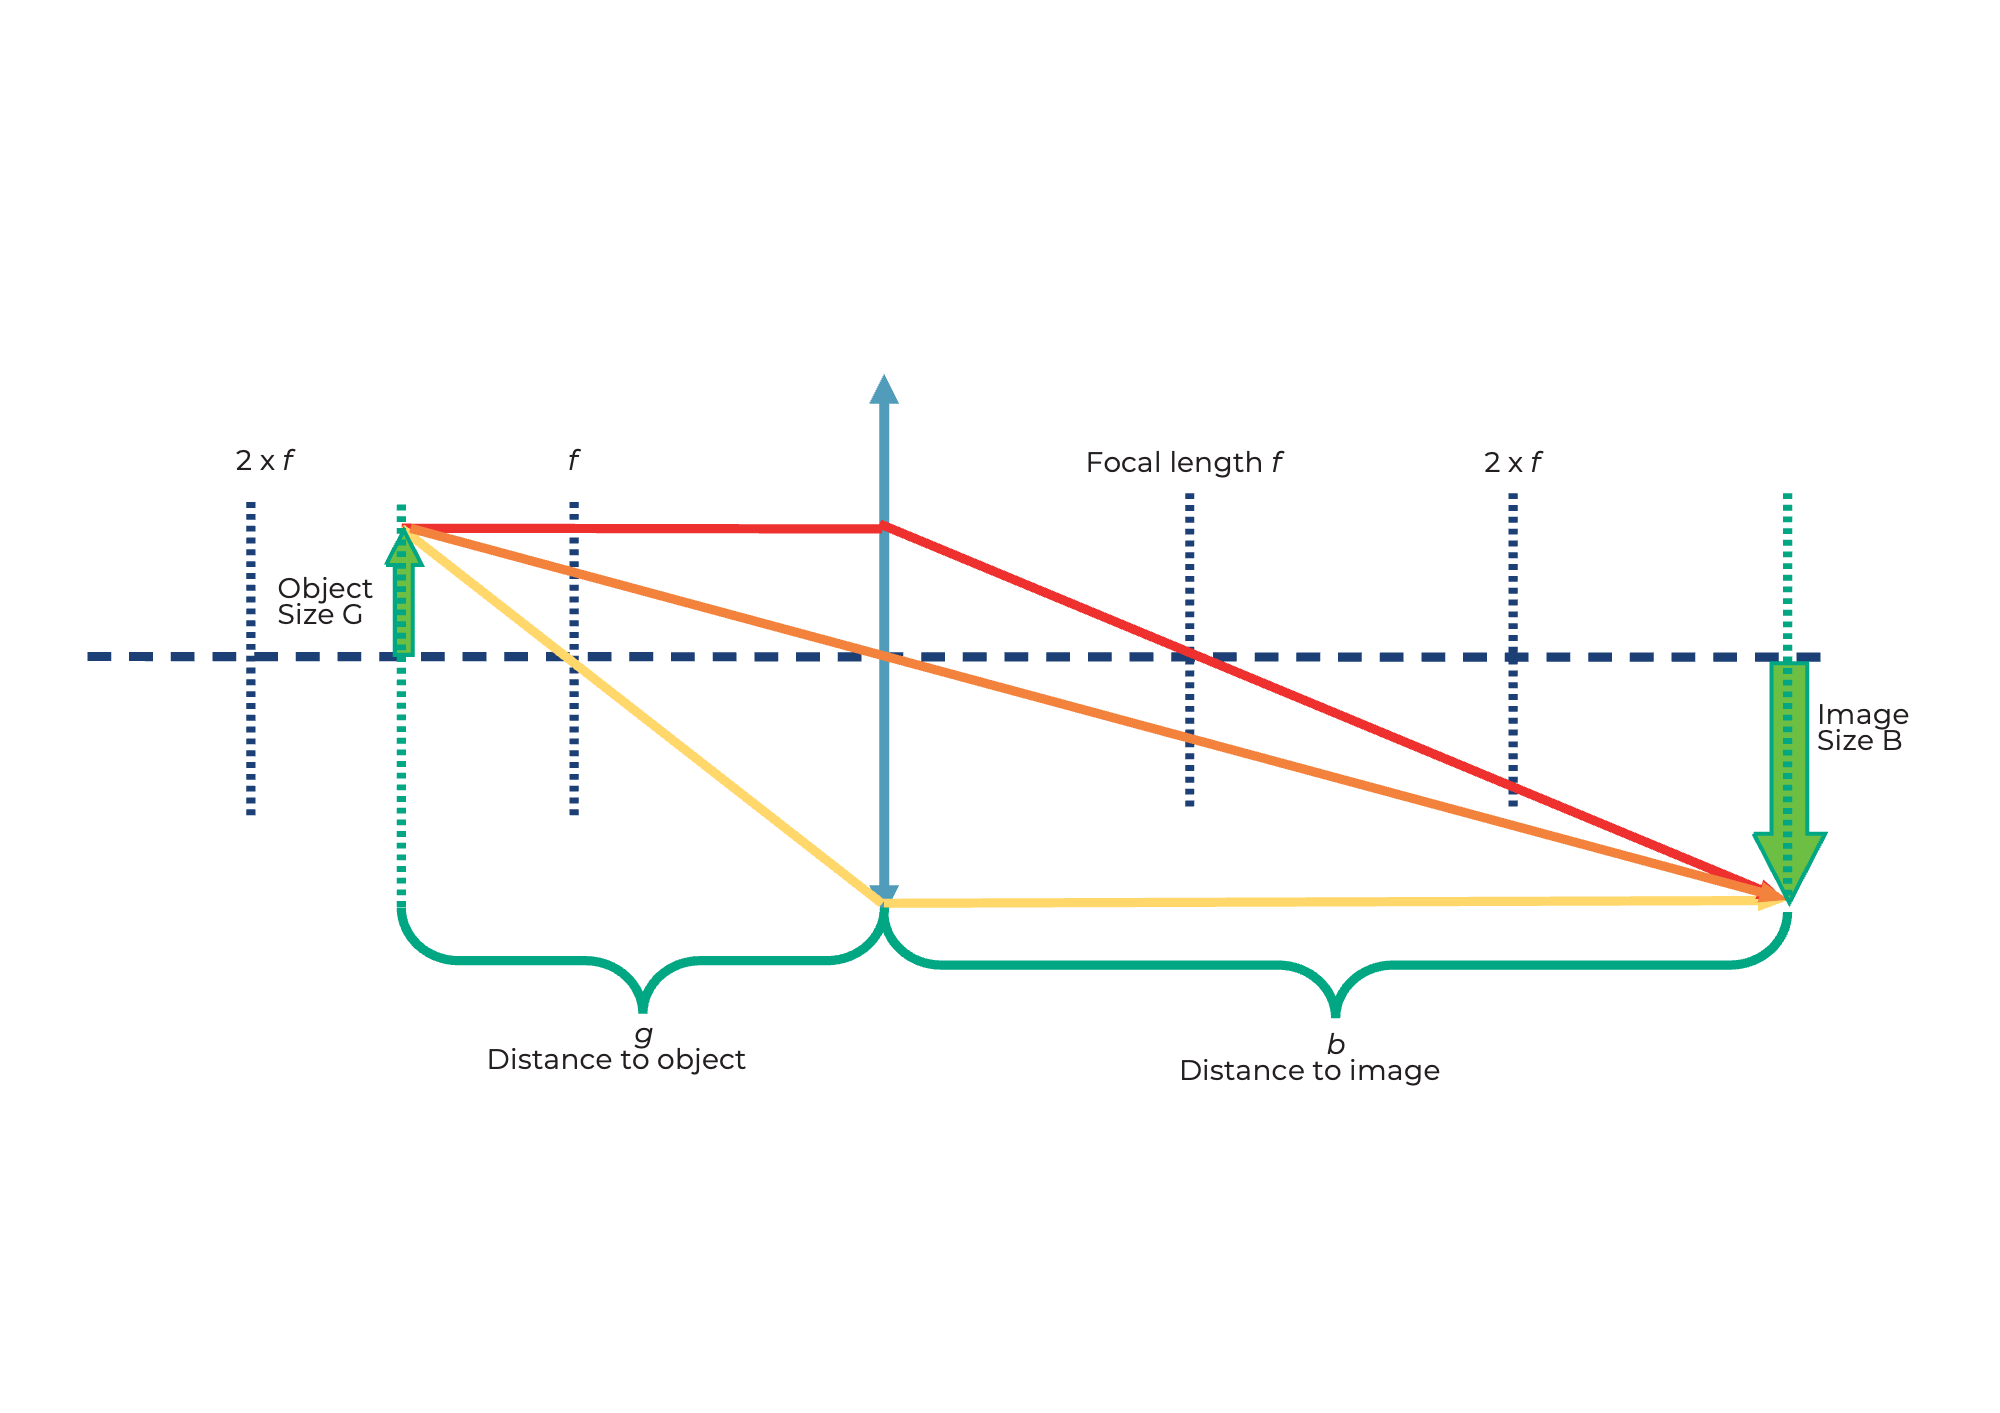
Where is the picture?
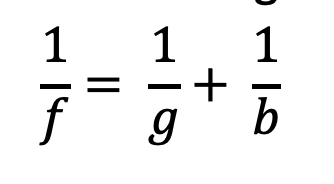
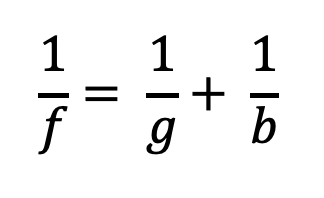
When an object is imaged through a converging lens, the position and size of the image depend on the distance (g) of the object to the lens and its focal length (f).
The lens equation describes the relationship between image distance (b) and object distance (g):
How big is the picture?
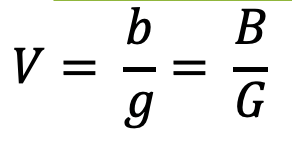
The magnification of the object on the screen can easily be calculated using the following formula:
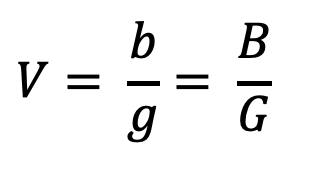
How the projector works

Check if your observation agrees with the calculation
Calculate the magnification of the projector for the different values of g and b.
Our lens has a focal length of f= 40 mm.
For g = 50mm → b = 200mm
For g = 60 mm → b = 120 mm\
For g = 65 mm → b = 104 mm\
Tutorial: Determining the Focal Distance of a Positive Lens
Materials needed:
- Light source (e.g., room's illumiation)
- Positive lens
- Screen (e.g. table, piece of paper, etc.)
Instructions:
- Position the positive lens so that it faces the light source. Align a screen parallel to the focal plane of the lens.
- Modify the distance between the lens and the screen.
- Carefully observe and record the position at which the light source forms a clear image on the surface of the screen.
