Quickstart Guide: Using Raspberry Pi with ImSwitch and UC2-ESP
The Raspberry Pi serves as a bridge between the UC2-ESP board and a USB3 camera, running the ImSwitch software inside a Docker container. The system allows you to control the microscope through a web interface accessible from a phone or laptop.
Note: This setup is experimental! You can try a demo version of the latest ImSwitch here:
Getting Started
Raspberry Pi Login Credentials
- Username:
UC2 - Password:
youseetoo
The system runs Raspberry Pi OS Lite and includes a Docker integration for ImSwitch. You can log in via SSH to start the ImSwitch server.
ImSwitch Docker Installation Guide
WiFi Hotspot
- SSID:
openuc2-RANDOMNUMBER - Password:
youseetoo
To configure the hotspot using RaspAP:
- Open a browser and go to http://10.3.141.1/
- Login with:
- Username:
admin - Password:
secret
- Username:
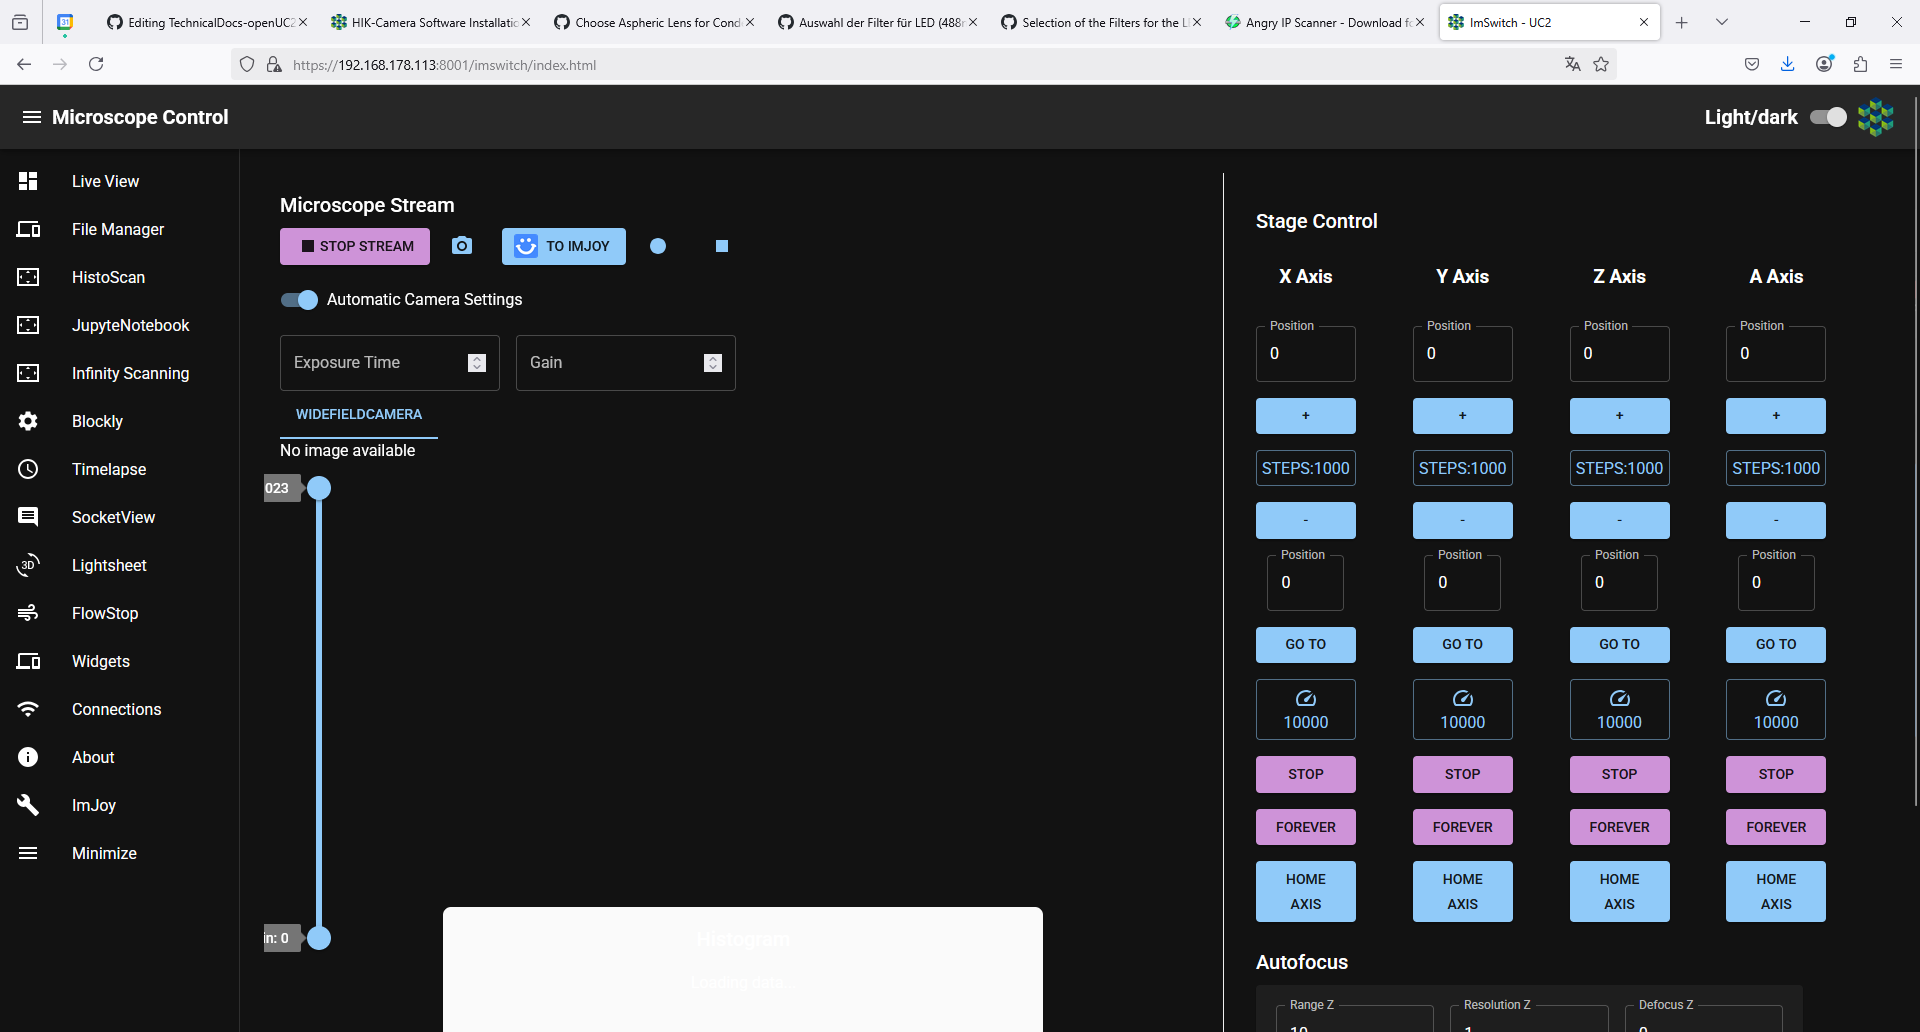
Accessing ImSwitch
If the Docker container starts automatically, access ImSwitch at:
- https://10.3.141.1:8001/imswitch/index.html
- Ignore self-signed certificate warnings (this will be fixed later).
Connecting via SSH
To manually start ImSwitch:
ssh uc2@10.3.141.1  # Password: youseetoo
cd ~/Desktop
./launch_docker_container.sh
Modifying ImSwitch Configuration
To adjust settings, edit the configuration file:
nano ~/ImSwitchConfig/config/imcontrol_options.json
For example, changing the active setup file:
{
    "setupFileName": "example_uc2_vimba.json",
    "recording": {
        "outputFolder": "./ImSwitch/ImSwitch/recordings",
        "includeDateInOutputFolder": true
    }
}
More details: ImSwitchConfig GitHub
Hardware Setup
- Connect UC2-ESP Board via USB to the Raspberry Pi
- Connect USB3 Camera to Raspberry Pi
To access ImSwitch via a browser:
Installing Raspberry Pi OS & ImSwitch
There are two ways to set up the Raspberry Pi for ImSwitch:
- Manual Installation (for full control over package installation)
- Pre-built Image (faster setup using a ready-made Raspberry Pi image)
Option 1: Manual Installation
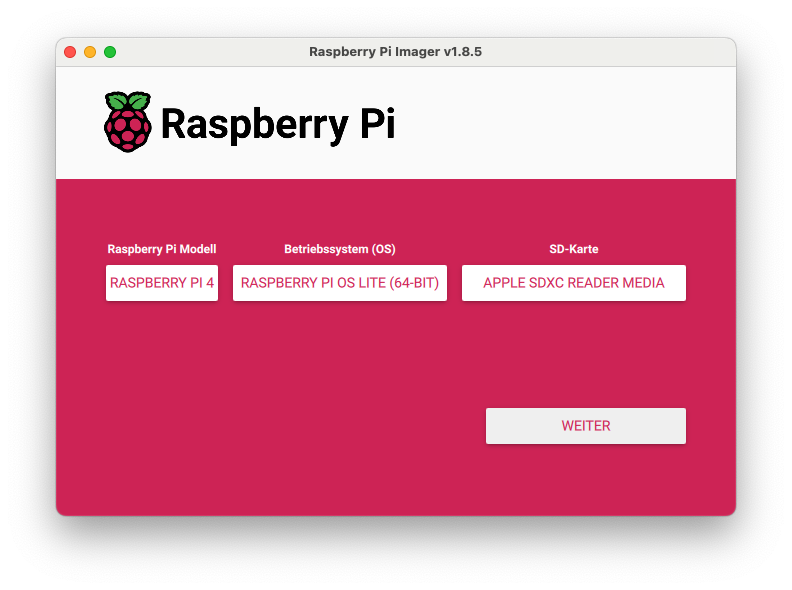
Step 1: Install Raspberry Pi OS
- Download and install the Raspberry Pi Imager: Download Here
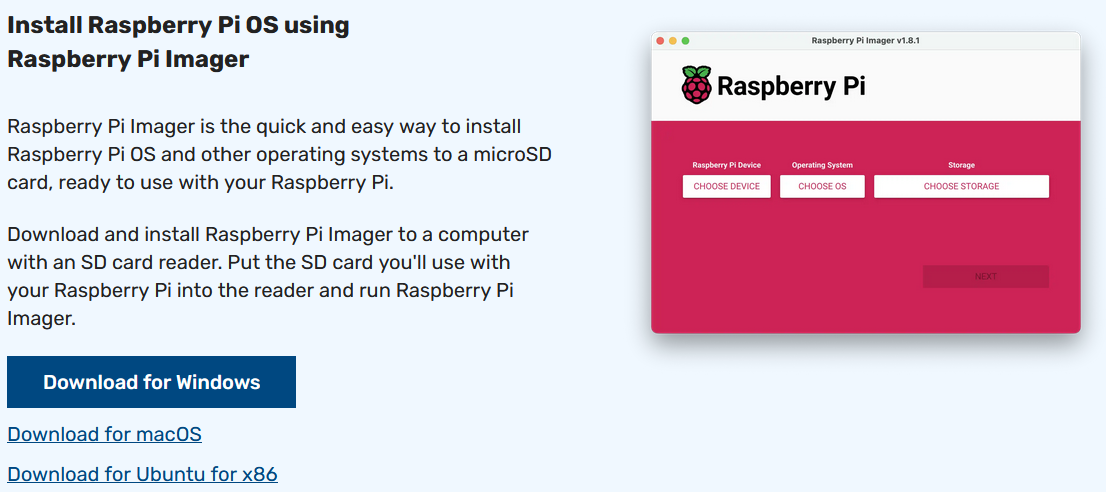
- Flash Raspberry Pi OS 64-bit Bookworm Lite onto an SD card (64GB recommended for Raspberry Pi 5).
- Configure settings:
- Enable SSH
- Set WiFi SSID and password
- Insert the SD card into the Raspberry Pi and boot it up.

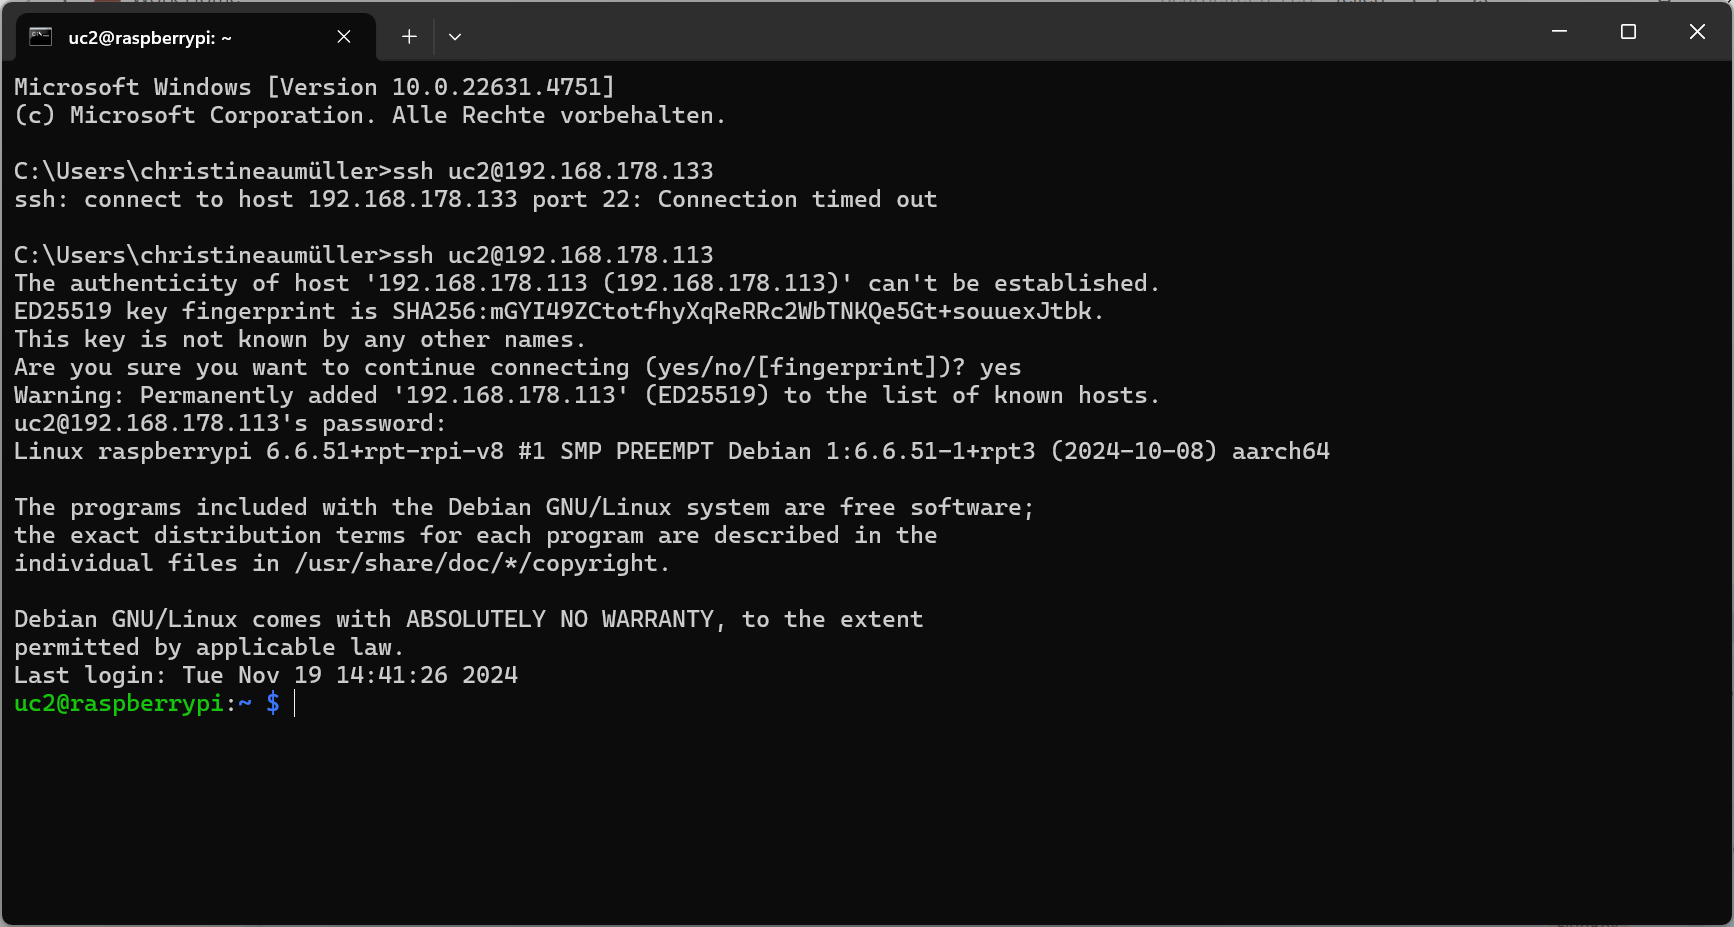
Step 2: Connect to Raspberry Pi
- Wait ~5 minutes for booting.
- Find the Raspberry Pi’s IP address using:
- Angry IP Scanner
- A monitor connected via micro-HDMI
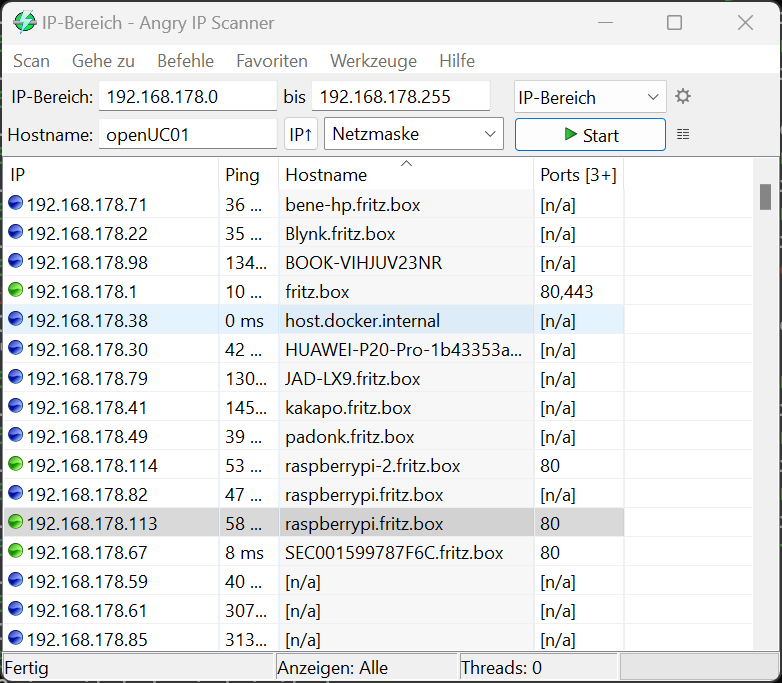
- Log in via SSH:
ssh uc2@IP-OF-YOURRASPI
Step 3: Install ImSwitch
- Run the following commands:
mkdir Downloads
mkdir Desktop
sudo apt-get install git -y
cd ~/Downloads
git clone https://github.com/openUC2/ImSwitchDockerInstall
cd ImSwitchDockerInstall
chmod +x install_all.sh
./install_all.sh
This will:
- Install Docker
- Install necessary camera drivers (Allied Vision, HIK, Daheng)
- Set up ImSwitch via Docker
- Create startup files for launching ImSwitch
Start ImSwitch:
bash ~/Desktop/launch_docker_container.sh
- Access the interface at:
https://IP-OF-YOUR-RASPI:8001/imswitch/index.html
- Update ImSwitch when needed:
bash ~/Desktop/update_docker_container.sh
Option 2: Using the Pre-Built Forklift Image
This is a compiled image for the Raspberry Pi 5 to deploy ImSwitch in Docker.
It is based on the following repository that builds the image file based on Raspberry Pi OS lite using GitHub Actions:
The image is built from the following workflow:
Requirements
- microSD Card with >32GB
- Raspberry Pi 4 or preferably Pi 5 (8GB RAM recommended)
- microSD Card reader
If you prefer a faster setup, you can use this pre-built image that includes all necessary software and drivers. This image was created with the Forklift Project and automates all setup steps.
How to Use the Pre-Built Image:
- Download the image from Zenodo: Zenodo Image Link
- Extract the image (~3GB as a ZIP, ~11GB uncompressed).
- Flash it to an SD card using Raspberry Pi Imager.
Flashing the Image
Use the Raspberry Pi Imager to flash the image onto an SD card, then insert the SD card into the Raspberry Pi and boot it.
- Select your Raspberry Pi model.
- Choose the downloaded image file as the OS type.
- Select the SD card as the target.
- Do not specify additional user-specific settings.
Default Credentials
- SSID:
openUC2-unknown - WiFi Password:
copepode - Username:
pi - User Password:
youseetoo
Note: The Forklift image is updated automatically and ensures all software is correctly configured.
If you want to have Internet on the Raspberry Pi, you can either plug the LAN port into a router with internet - then the wifi that is shared by the access point is automatically briding that connection. Alternatively, you can use an Android phone in USB access point mode and share the internet connection by that mean.
:::error In case the GUI hangs - this might be due to an older version that expected internet to load javascript libraries/fonts. It times out after 60s and renders the ImSwitch webapp - please update the software. :::
For a detailed breakdown of the image creation process, see: ImSwitch OS GitHub Setup Script
Connecting to the Raspberry Pi
- Wait until the Raspberry Pi boots and you see the SSID
openUC2-unknown. - Connect to the SSID and navigate to
http://192.168.4.1:9090to access Cockpit.
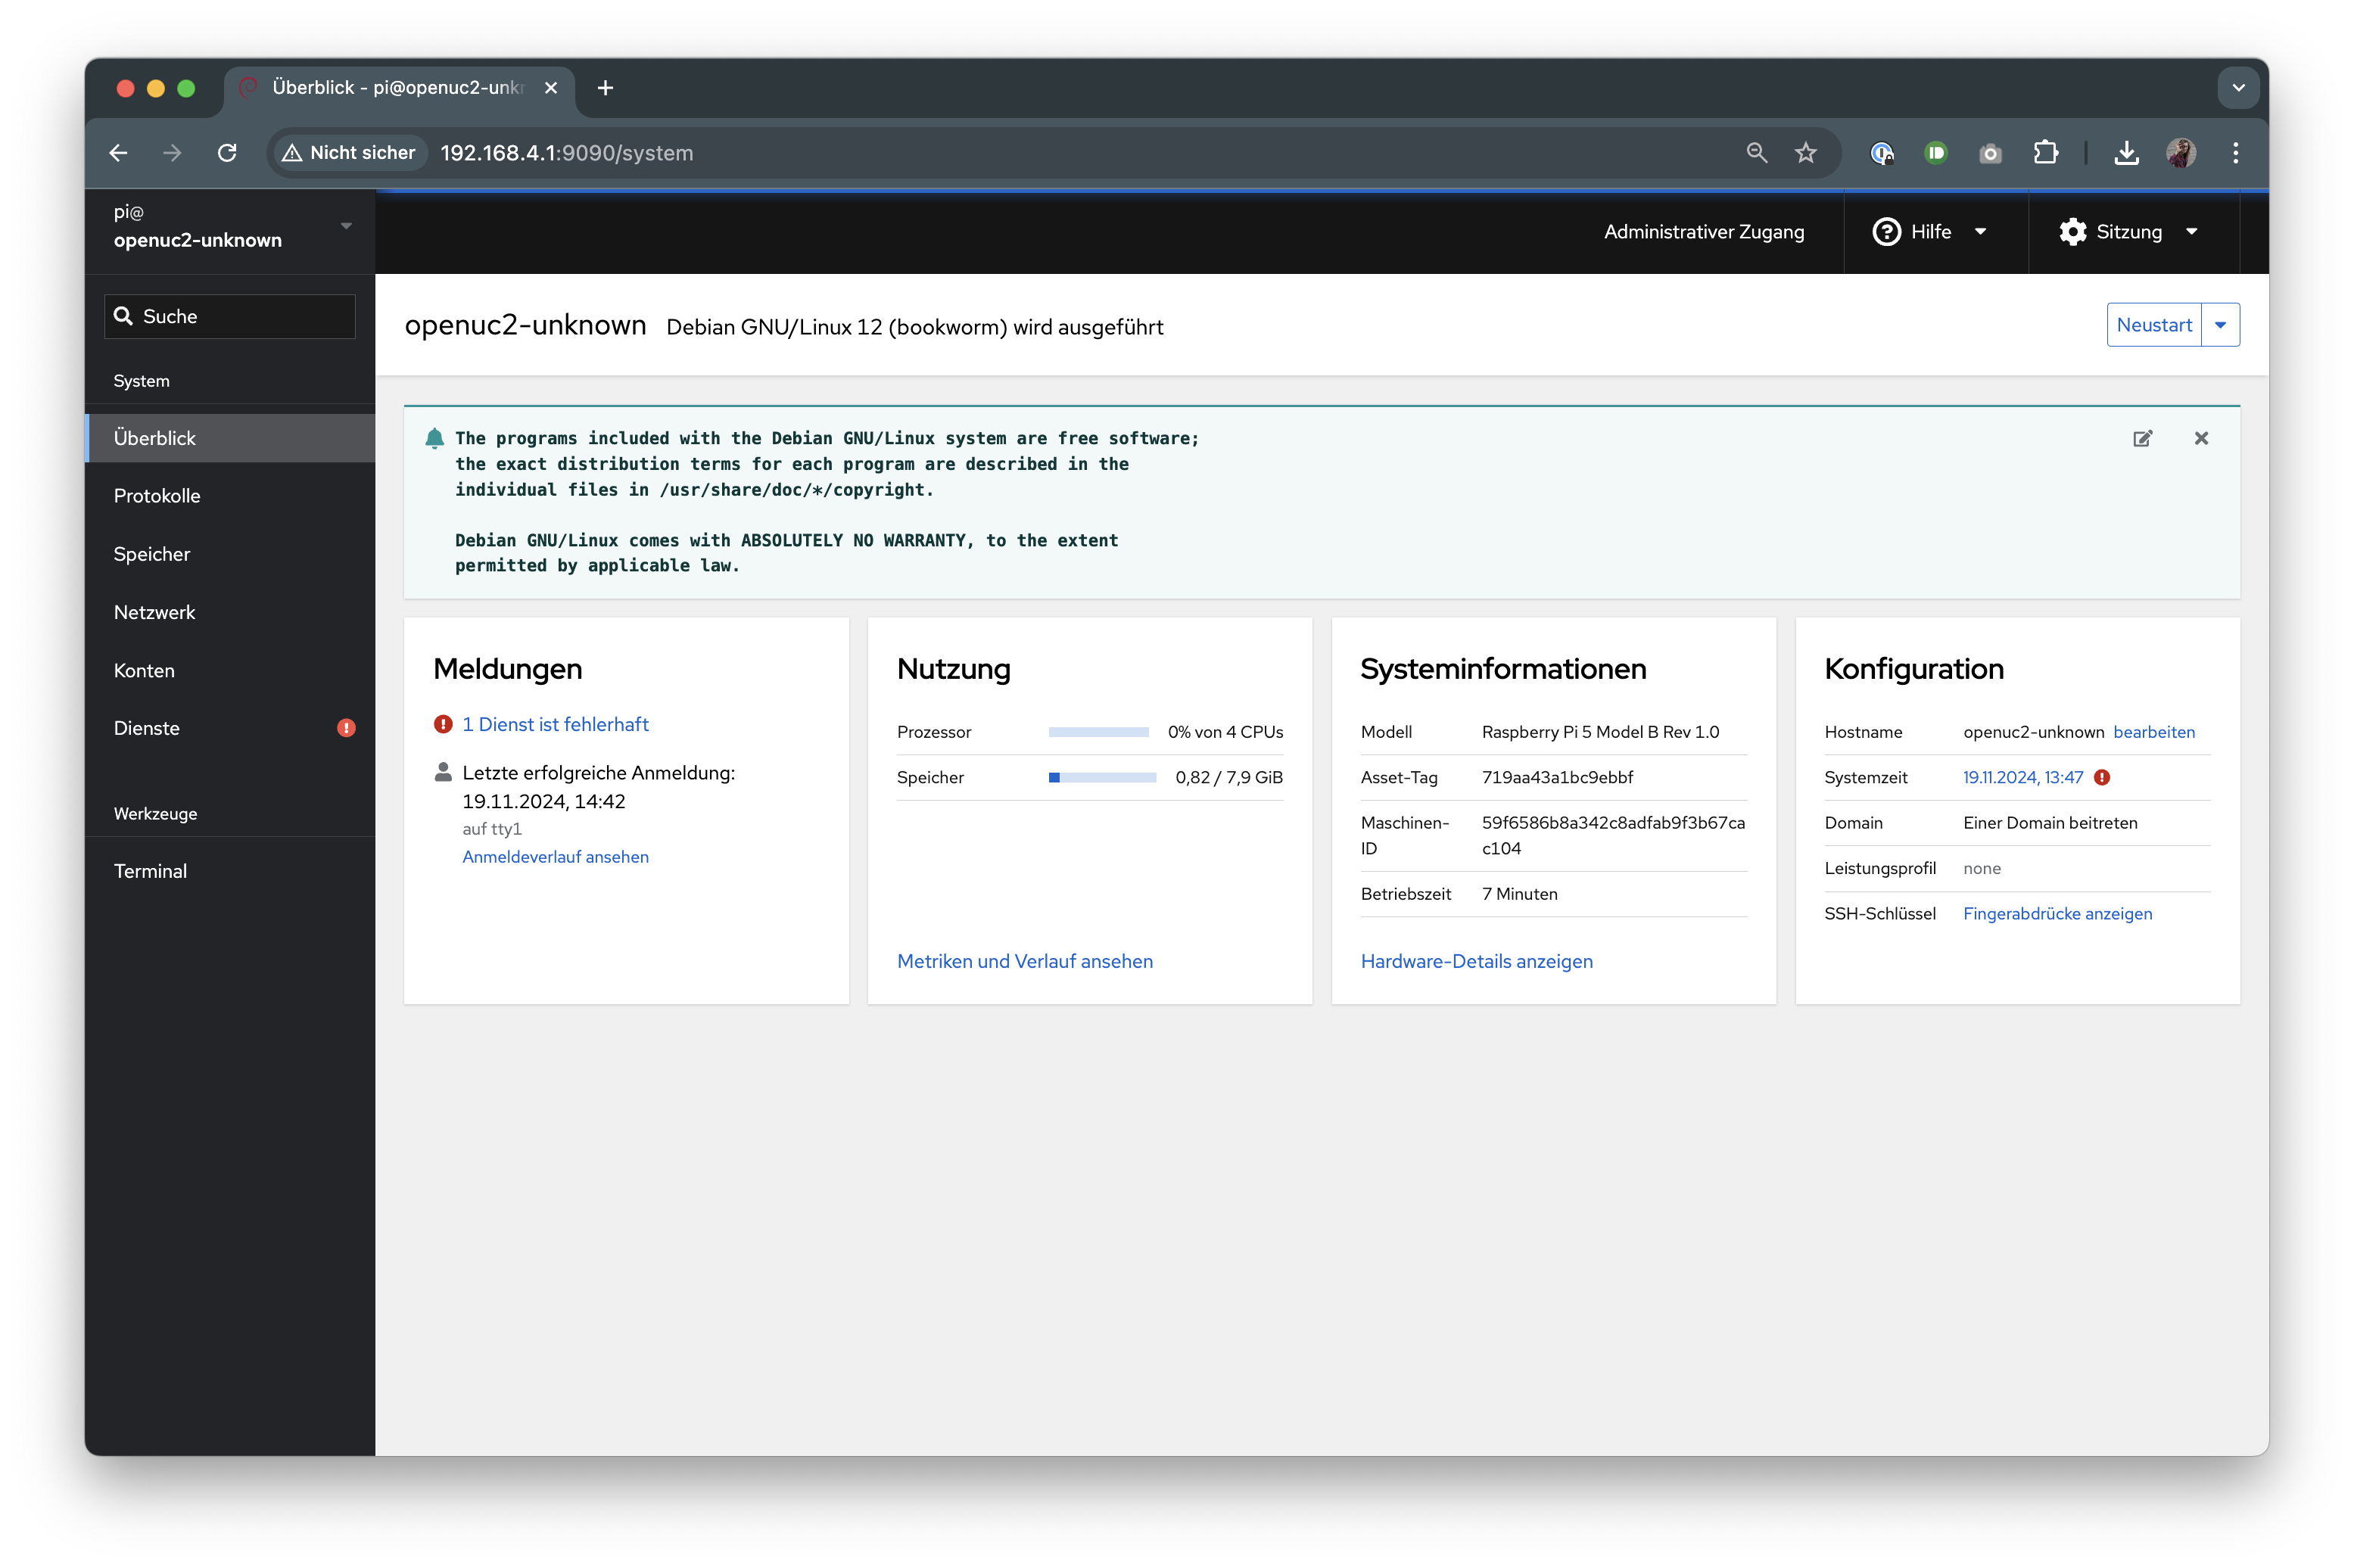
- Cockpit Login Credentials:
- Username:
pi - Password:
youseetoo
- Username:
- Connect to ImSwitch by navigating to
https://192.168.4.1:8001/imswitch/index.html. Accept the HTTPS warning (the certificate is self-signed for now).
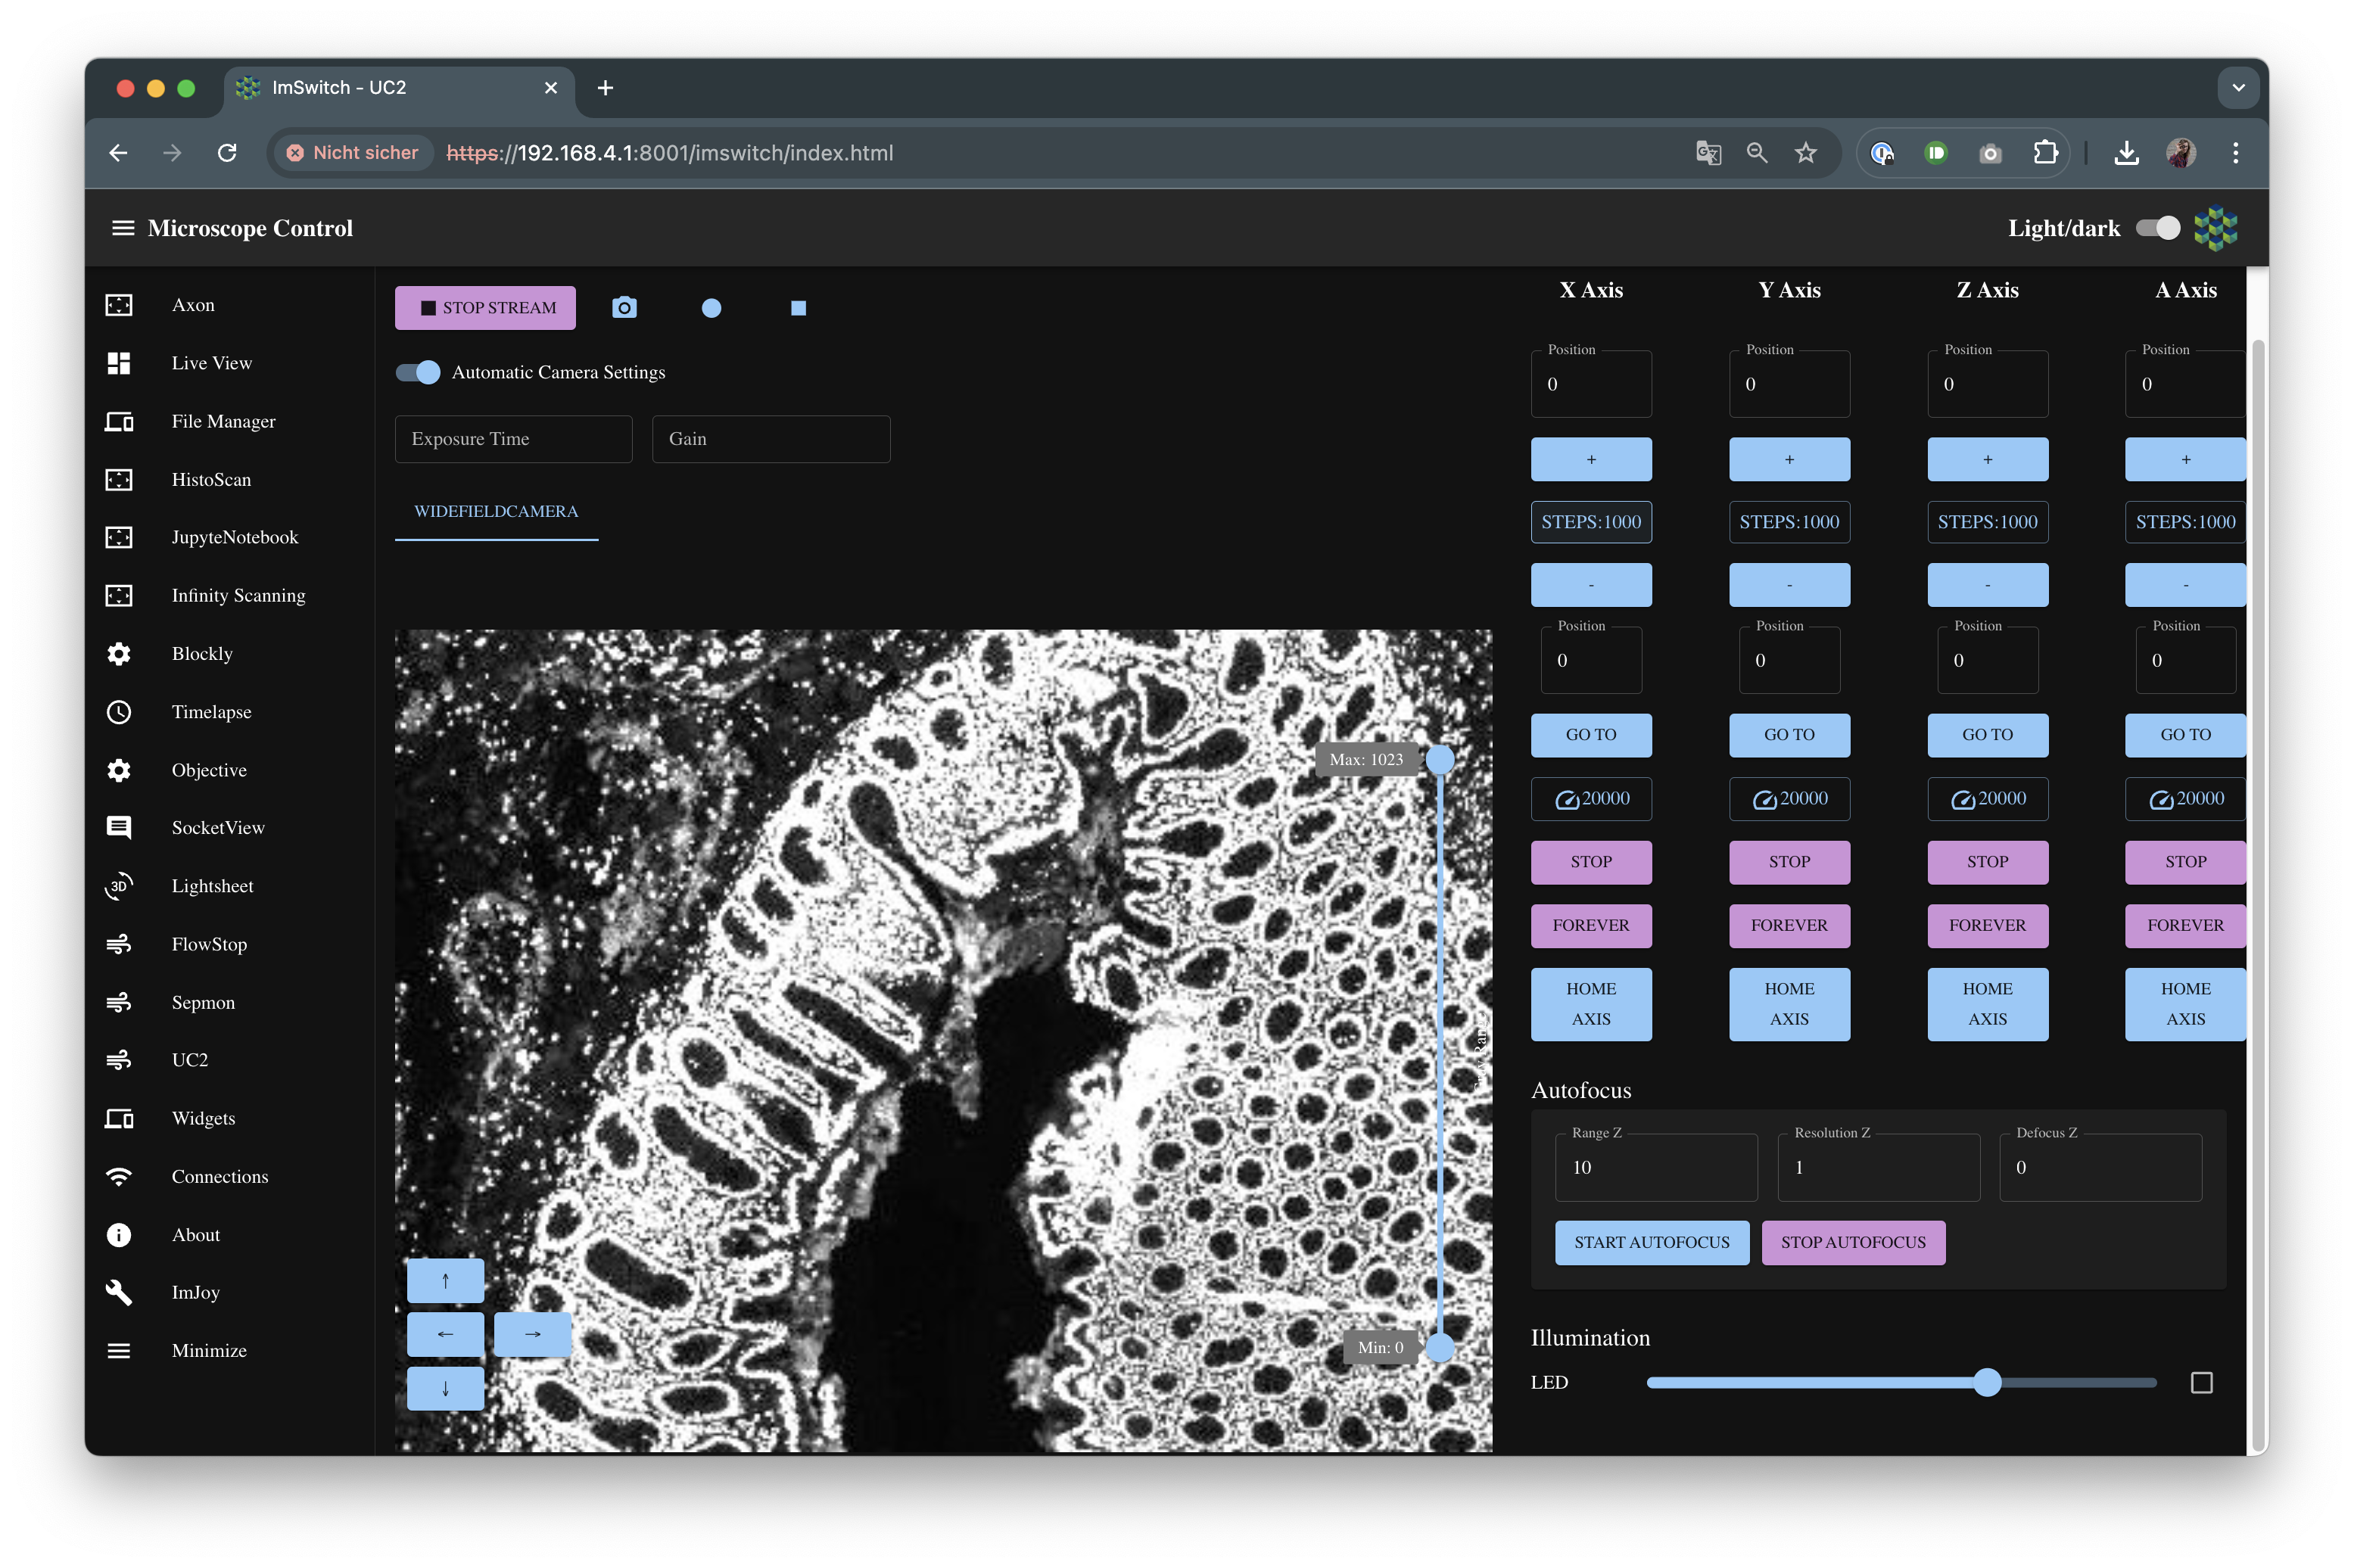
Configuring ImSwitch
The default configuration is in Demo Mode. For hardware-specific configurations, refer to the ImSwitch Configuration Guide.
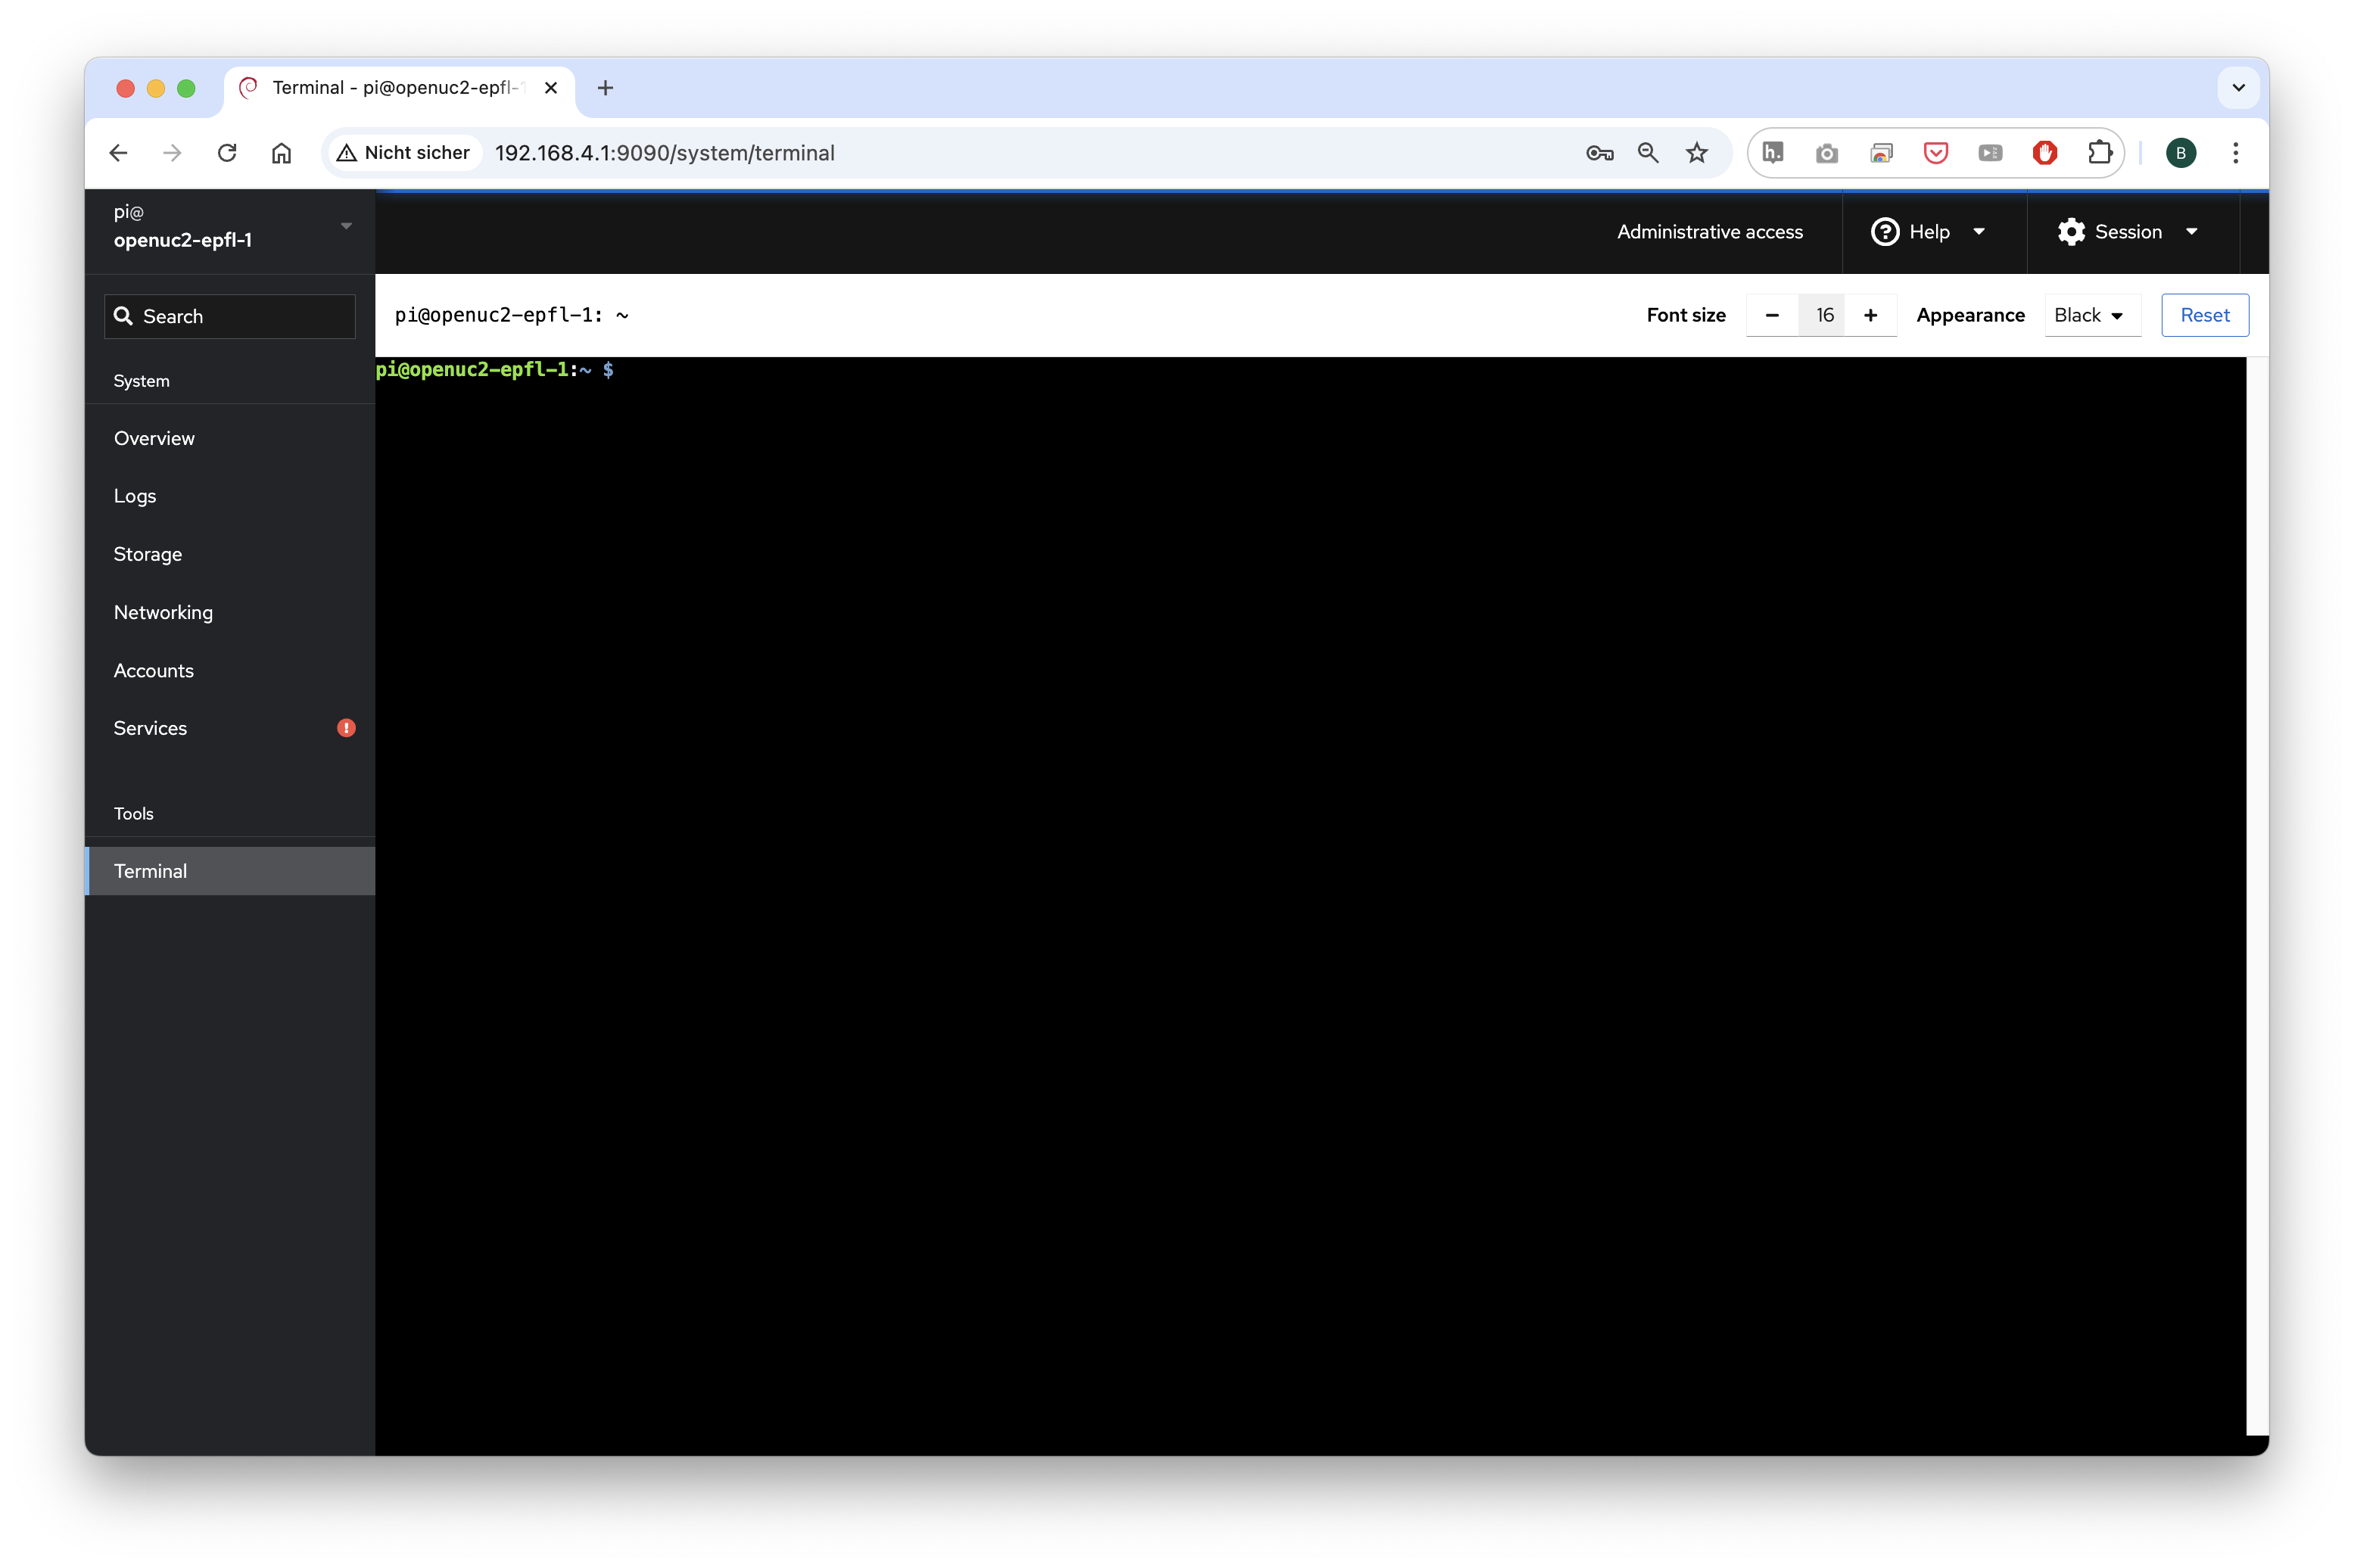
Configure ImSwitch using the Cockpit
Once you are connected to the Raspberry Pi, you can go to http://192.168.4.1:9090 and move over to the terminal. This is the command line interface that does the same thing as the SSH connection you would otherwise do via e.g. ssh pi@192.168.4.1 (with youseetoo) as a password. Below you will find the commands that are helpful to stop/relaunch docker and add configurations manually:
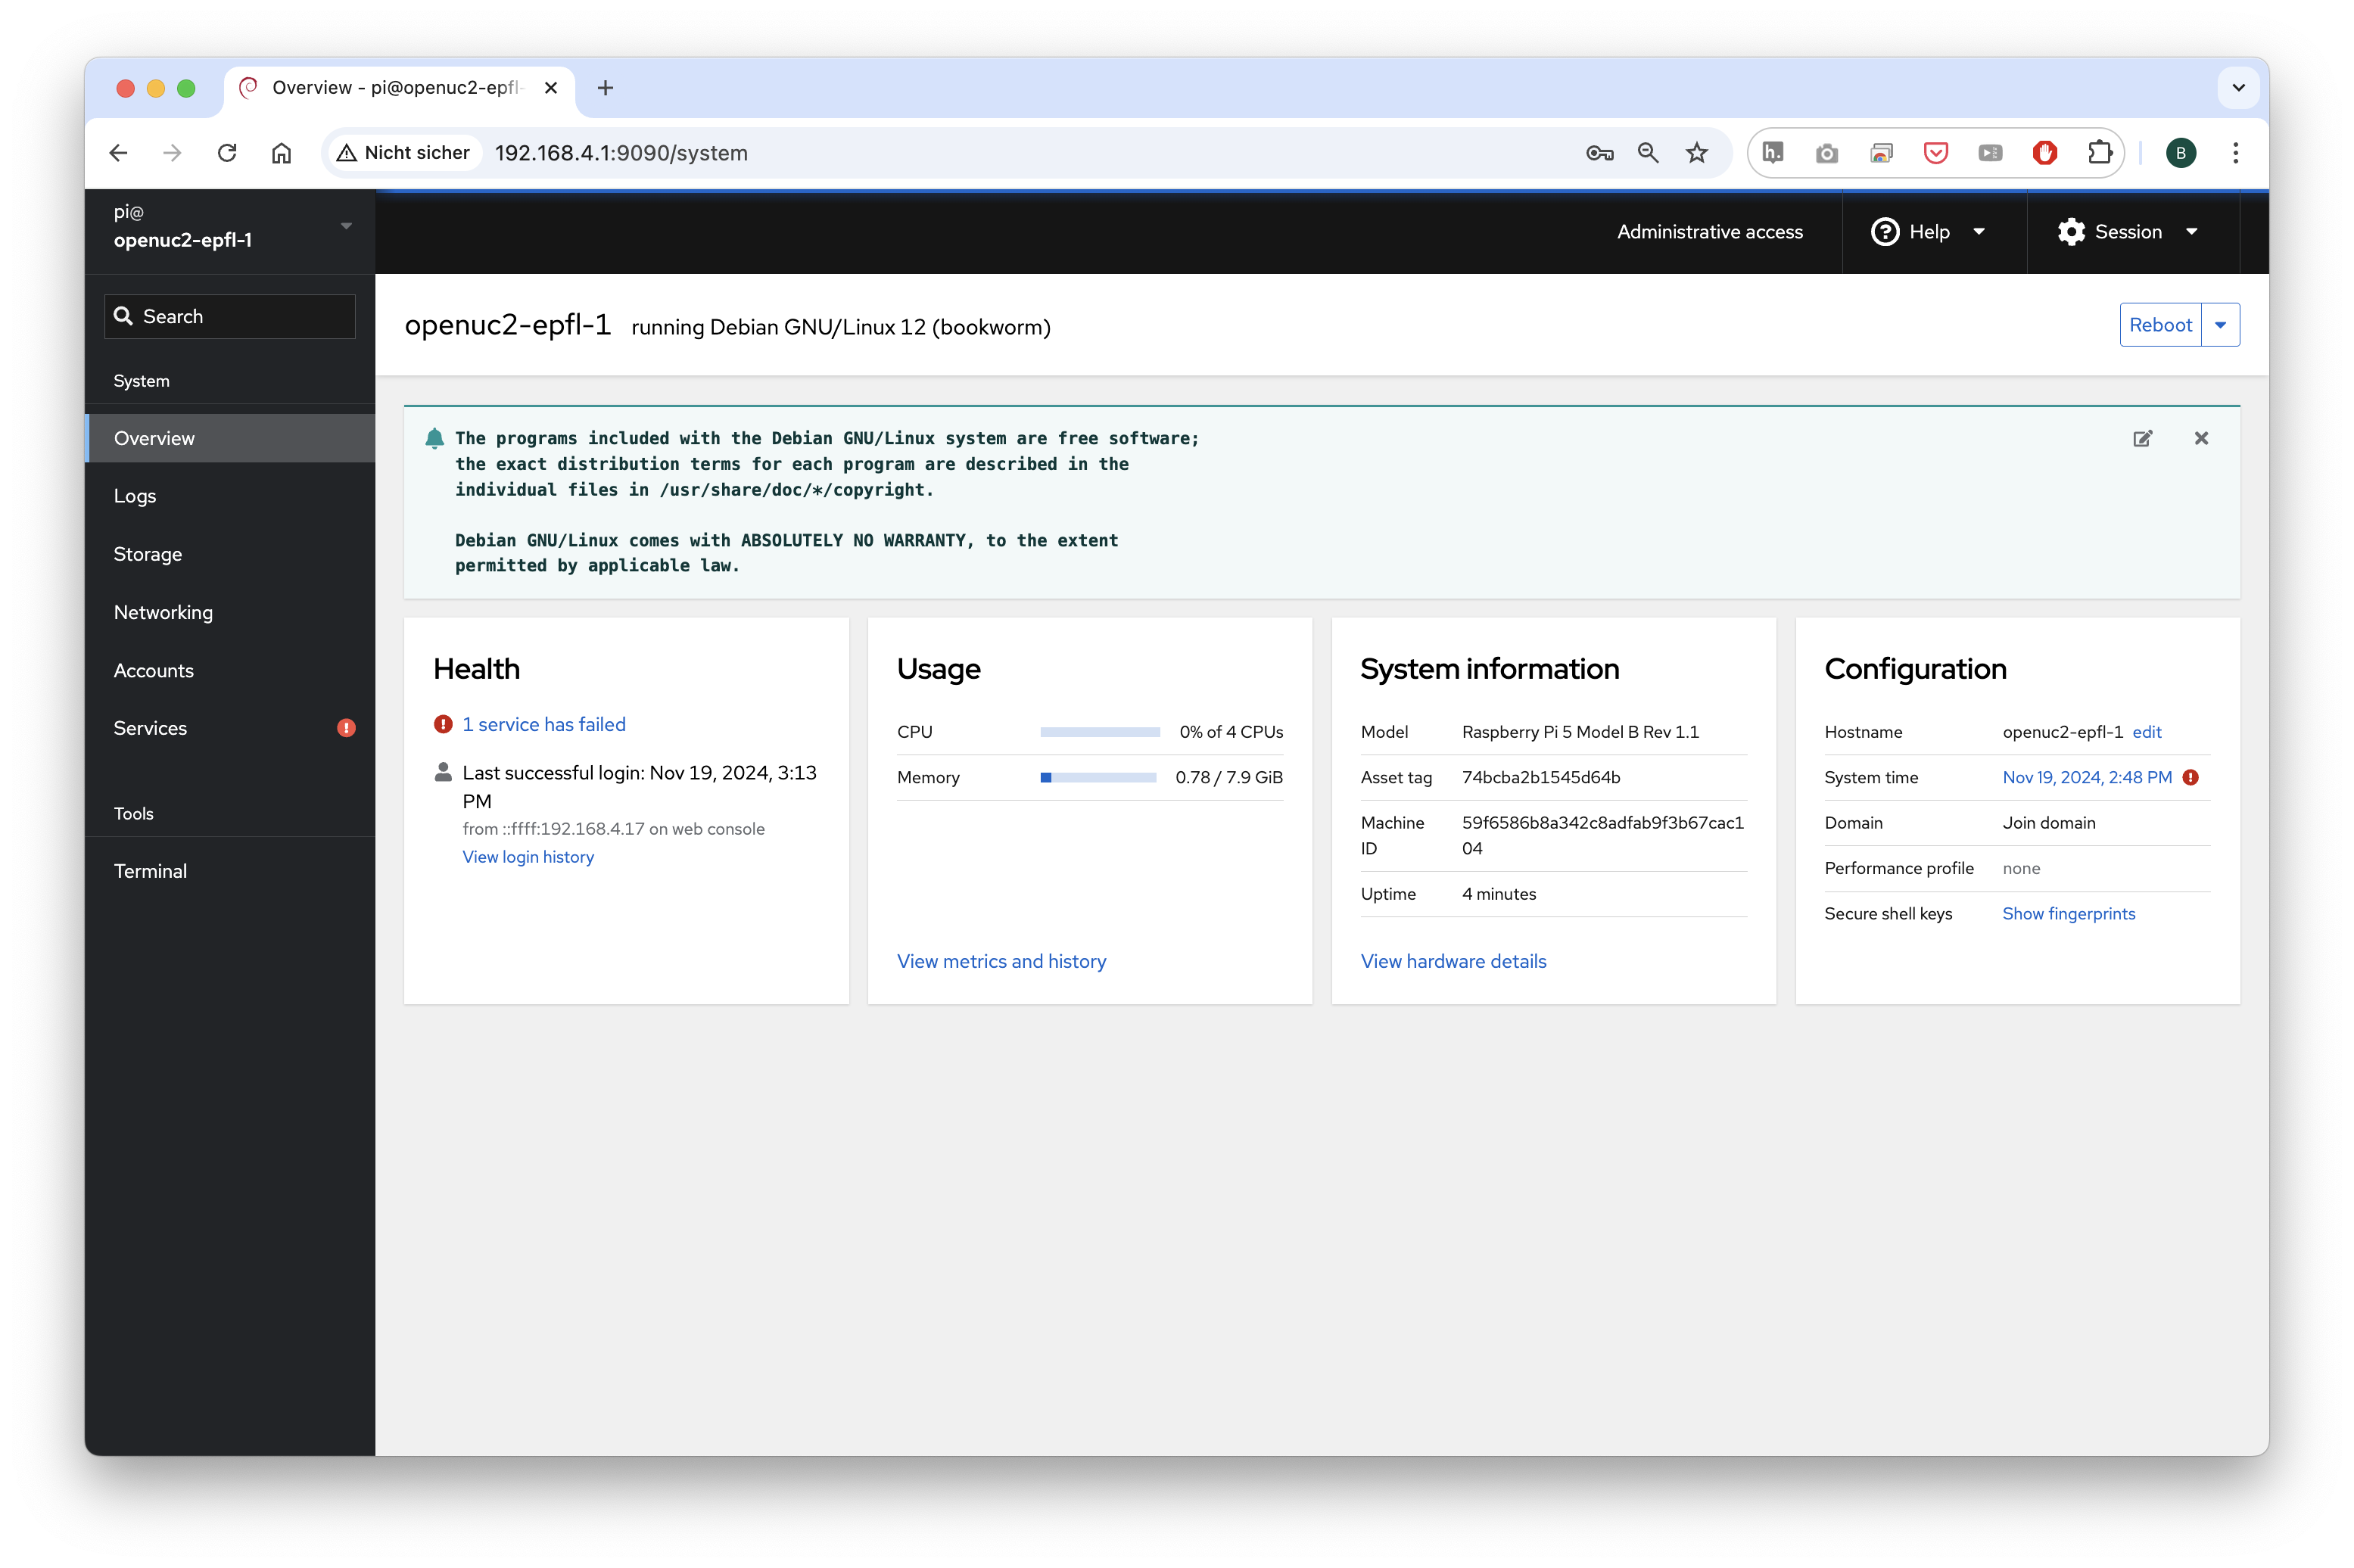
Stop ImSwitch running in Docker
pi@odocker ps # find out the  hash of the currently running docker container
docker stop *HASH* # stop container
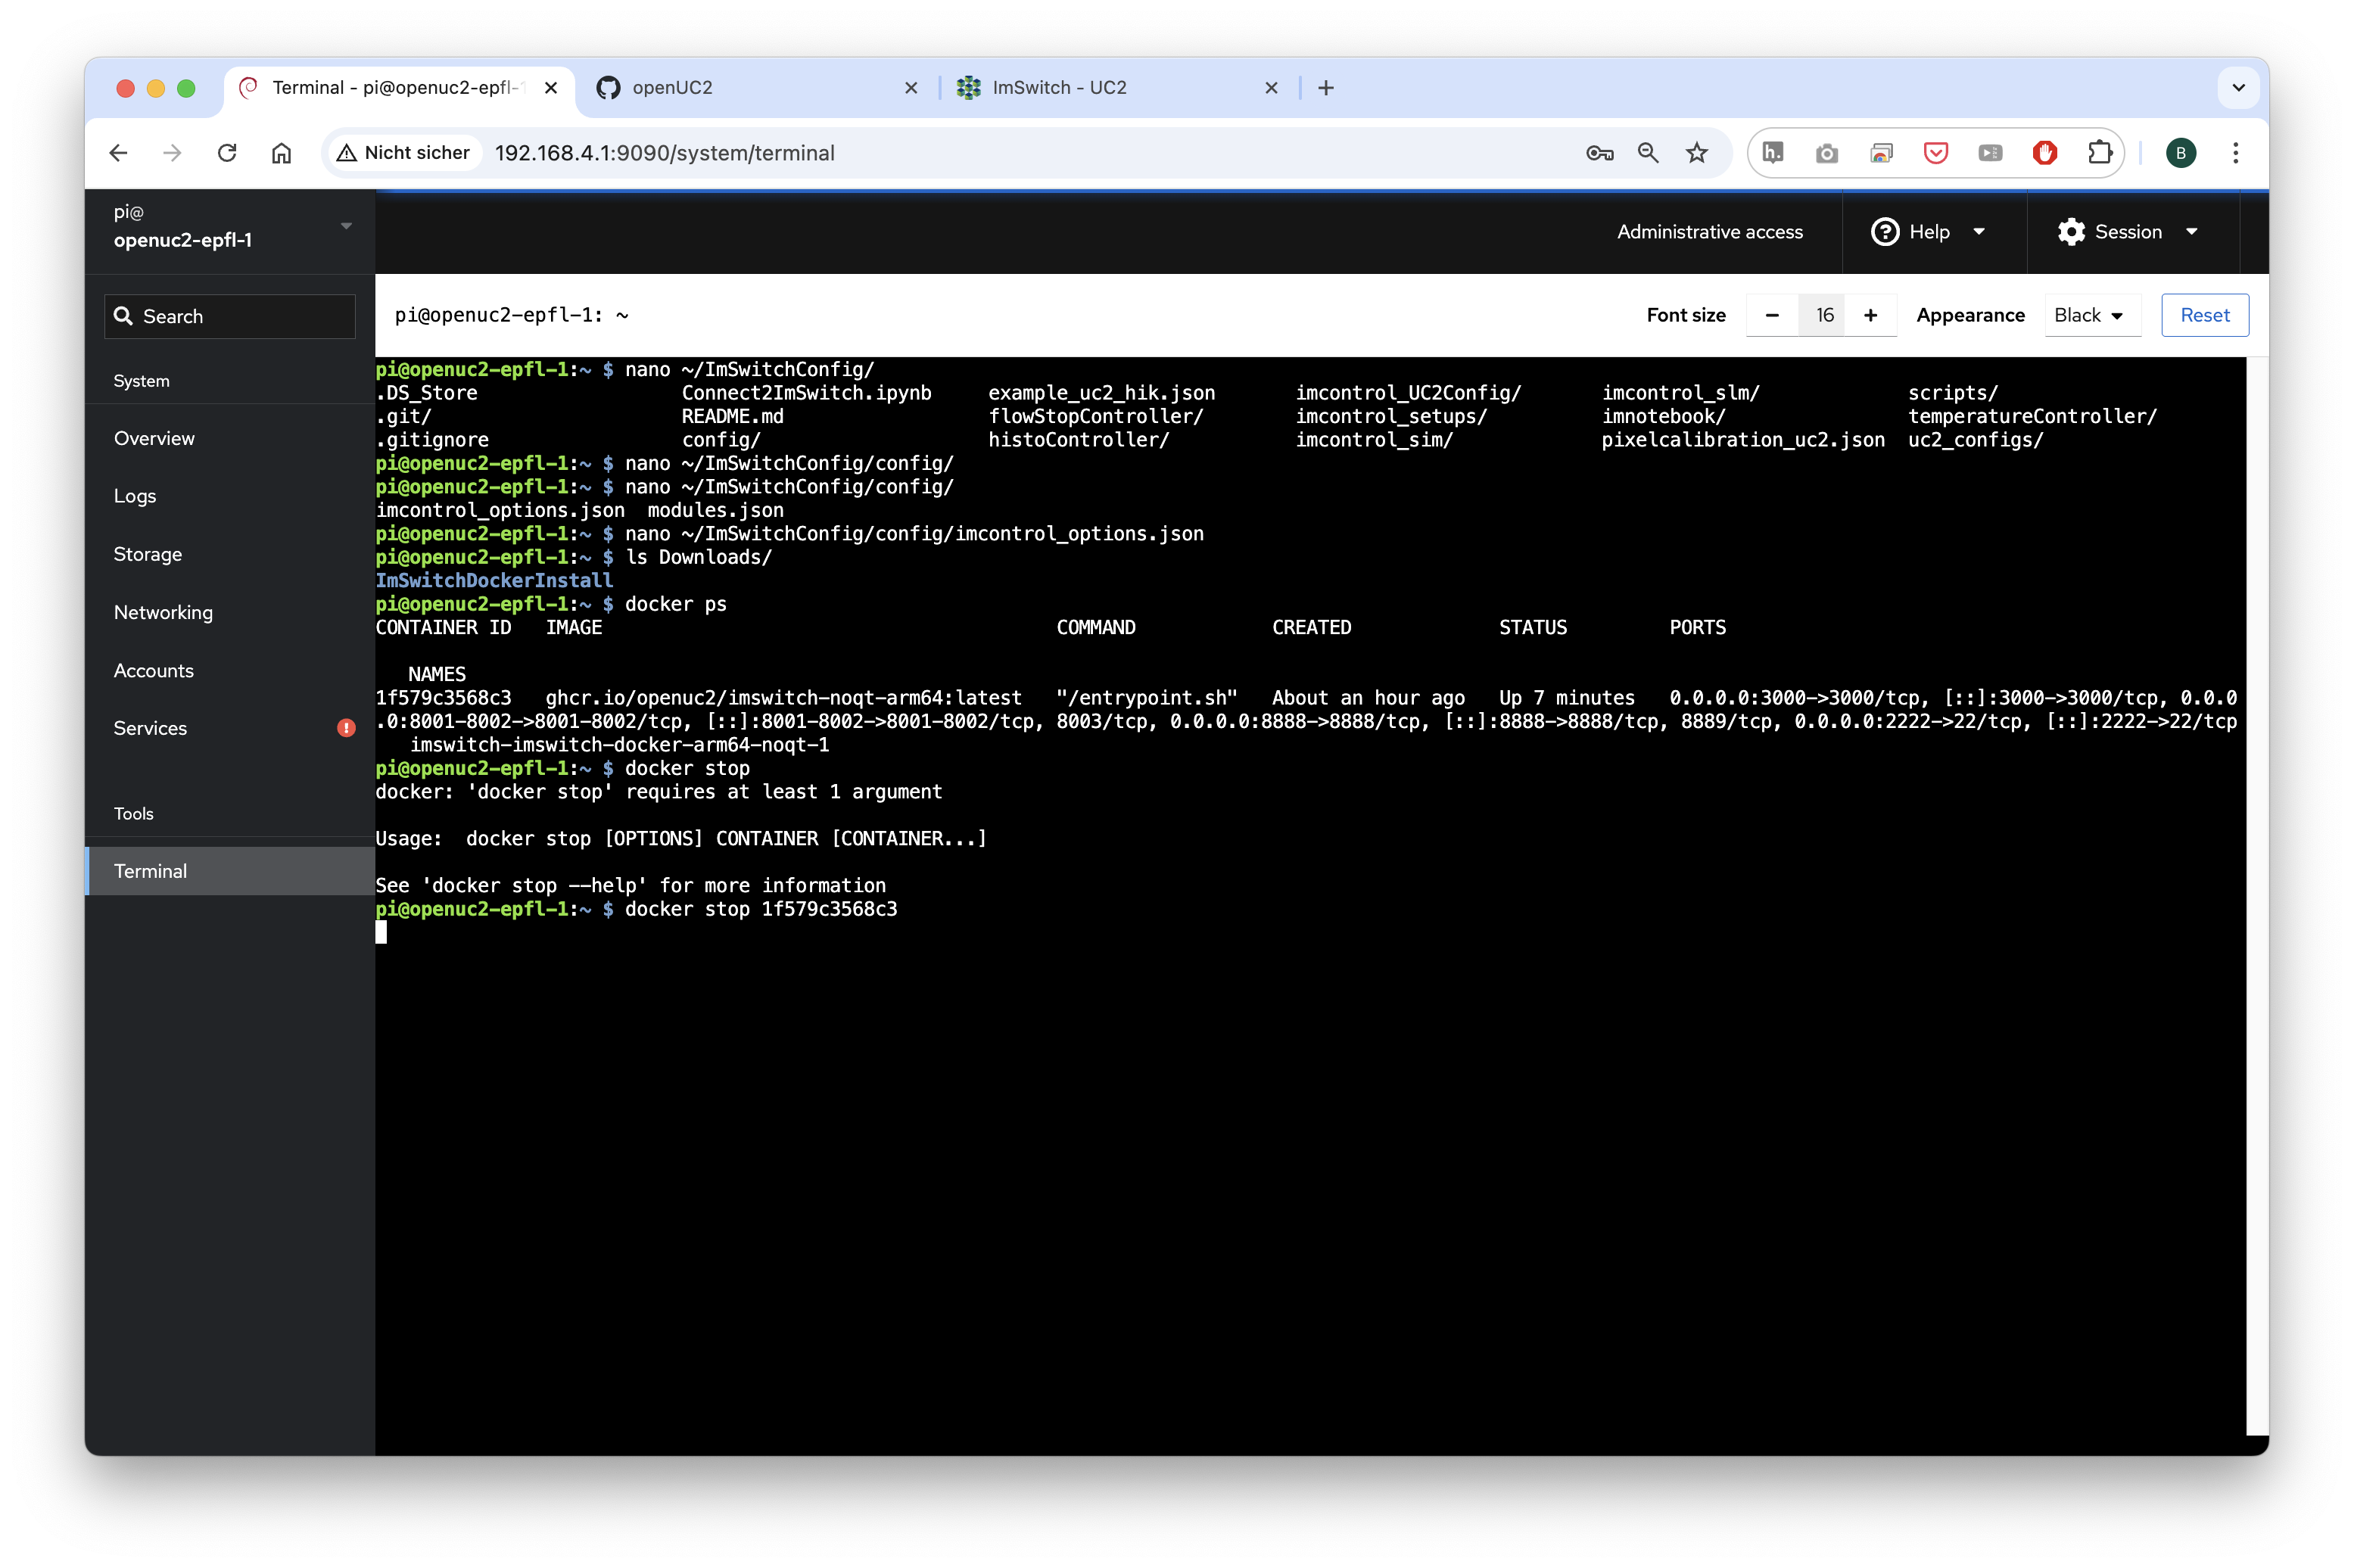
Update Docker manually
pi@openuc2-epfl-1:~ $ ~/Desktop/update_docker_container.sh
Start Docker Container Manually
pi@openuc2-epfl-1:~ $ ~/Desktop/launch_docker_container.sh
Get logs back from a started Container
Assuming blissful_wecoff is the name of the docker container docker ps
docker logs -f blissful_wescoff
Get an interactive shell
docker exec -it blissful_wescoff /bin/bash
Edit ImSwitch configuration files
More information can be found here: ImSwitch Configuration Guide.
Edit the file that is pointing to the currently active configuration file:
pi@openuc2-epfl-nano ImSwitchConfig/imcontrol_setups/epfl_hik.json # => this is the active configuration
Edit the configuration file that you would like to use with ImSwitch (e.g. cameras, stages, controllers...)
nano ImSwitchConfig/config/imcontrol_options.json # => name for the active configuration
Enter content by copy pasting that into the files when using the nano editor (e.g. HIK camera with UC2 electronics):
{
    "positioners": {
        "ESP32Stage": {
          "managerName": "ESP32StageManager",
          "managerProperties": {
            "rs232device": "ESP32",
            "isEnable": false,
            "enableauto": true,
            "stepsizeZ": 0.3125,
            "stepsizeA": 0.3125,
            "initialSpeed": {"X": 15000, "Y":  15000,"Z": 15000, "A": 15000}
          },
          "axes": [
            "A",
            "X",
            "Y",
            "Z"
          ],
          "forPositioning": true
        }
      },
    "rs232devices": {
    "ESP32": {
      "managerName": "ESP32Manager",
      "managerProperties": {
        "host_": "192.168.43.129",
        "serialport": "/dev/cu.SLAB_USBtoUART",
        "baudrate":115200,
        "debug":1
      }
    }
  },
  "lasers": {
    "LED": {
      "analogChannel": null,
      "digitalLine": null,
      "managerName": "ESP32LEDLaserManager",
      "managerProperties": {
        "rs232device": "ESP32",
        "channel_index": 1
      },
      "wavelength": 635,
      "valueRangeMin": 0,
      "valueRangeMax": 1023
    }
  },
  "detectors": {
    "WidefieldCamera": {
        "analogChannel": null,
        "digitalLine": null,
        "managerName": "HikCamManager",
        "managerProperties": {
            "isRGB": 0,
            "cameraListIndex": 0,
            "cameraEffPixelsize": 0.2257,
            "hikcam": {
                "exposure": 0,
                "gain": 0,
                "blacklevel": 100,
                "image_width": 1000,
                "image_height": 1000
            }
        },
        "forAcquisition": true,
        "forFocusLock": true
    }
    },
  "rois": {
    "Full chip": {
      "x": 600,
      "y": 600,
      "w": 1200,
      "h": 1200
    }
  },
  "autofocus": {
    "camera": "WidefieldCamera",
    "positioner": "ESP32Stage",
    "updateFreq": 10,
    "frameCropx": 780,
    "frameCropy": 400,
    "frameCropw": 500,
    "frameCroph": 100
  },
  "availableWidgets": [
    "Settings",
    "View",
    "Recording",
    "Image",
    "Laser",
    "Positioner",
    "UC2Config",
    "FlowStop"
    ],
  "nonAvailableWidgets":[
    "UC2Config",
    "LEDMatrix",
    "Hypha",
    "FlowStop",
    "Hypha",
    "FocusLock",
    "HistoScan",
    "STORMRecon",
    "DPC",
    "ImSwitchServer",
    "PixelCalibration",
    "FocusLock"]
}
Alternatively edit the config via UC2-Menu
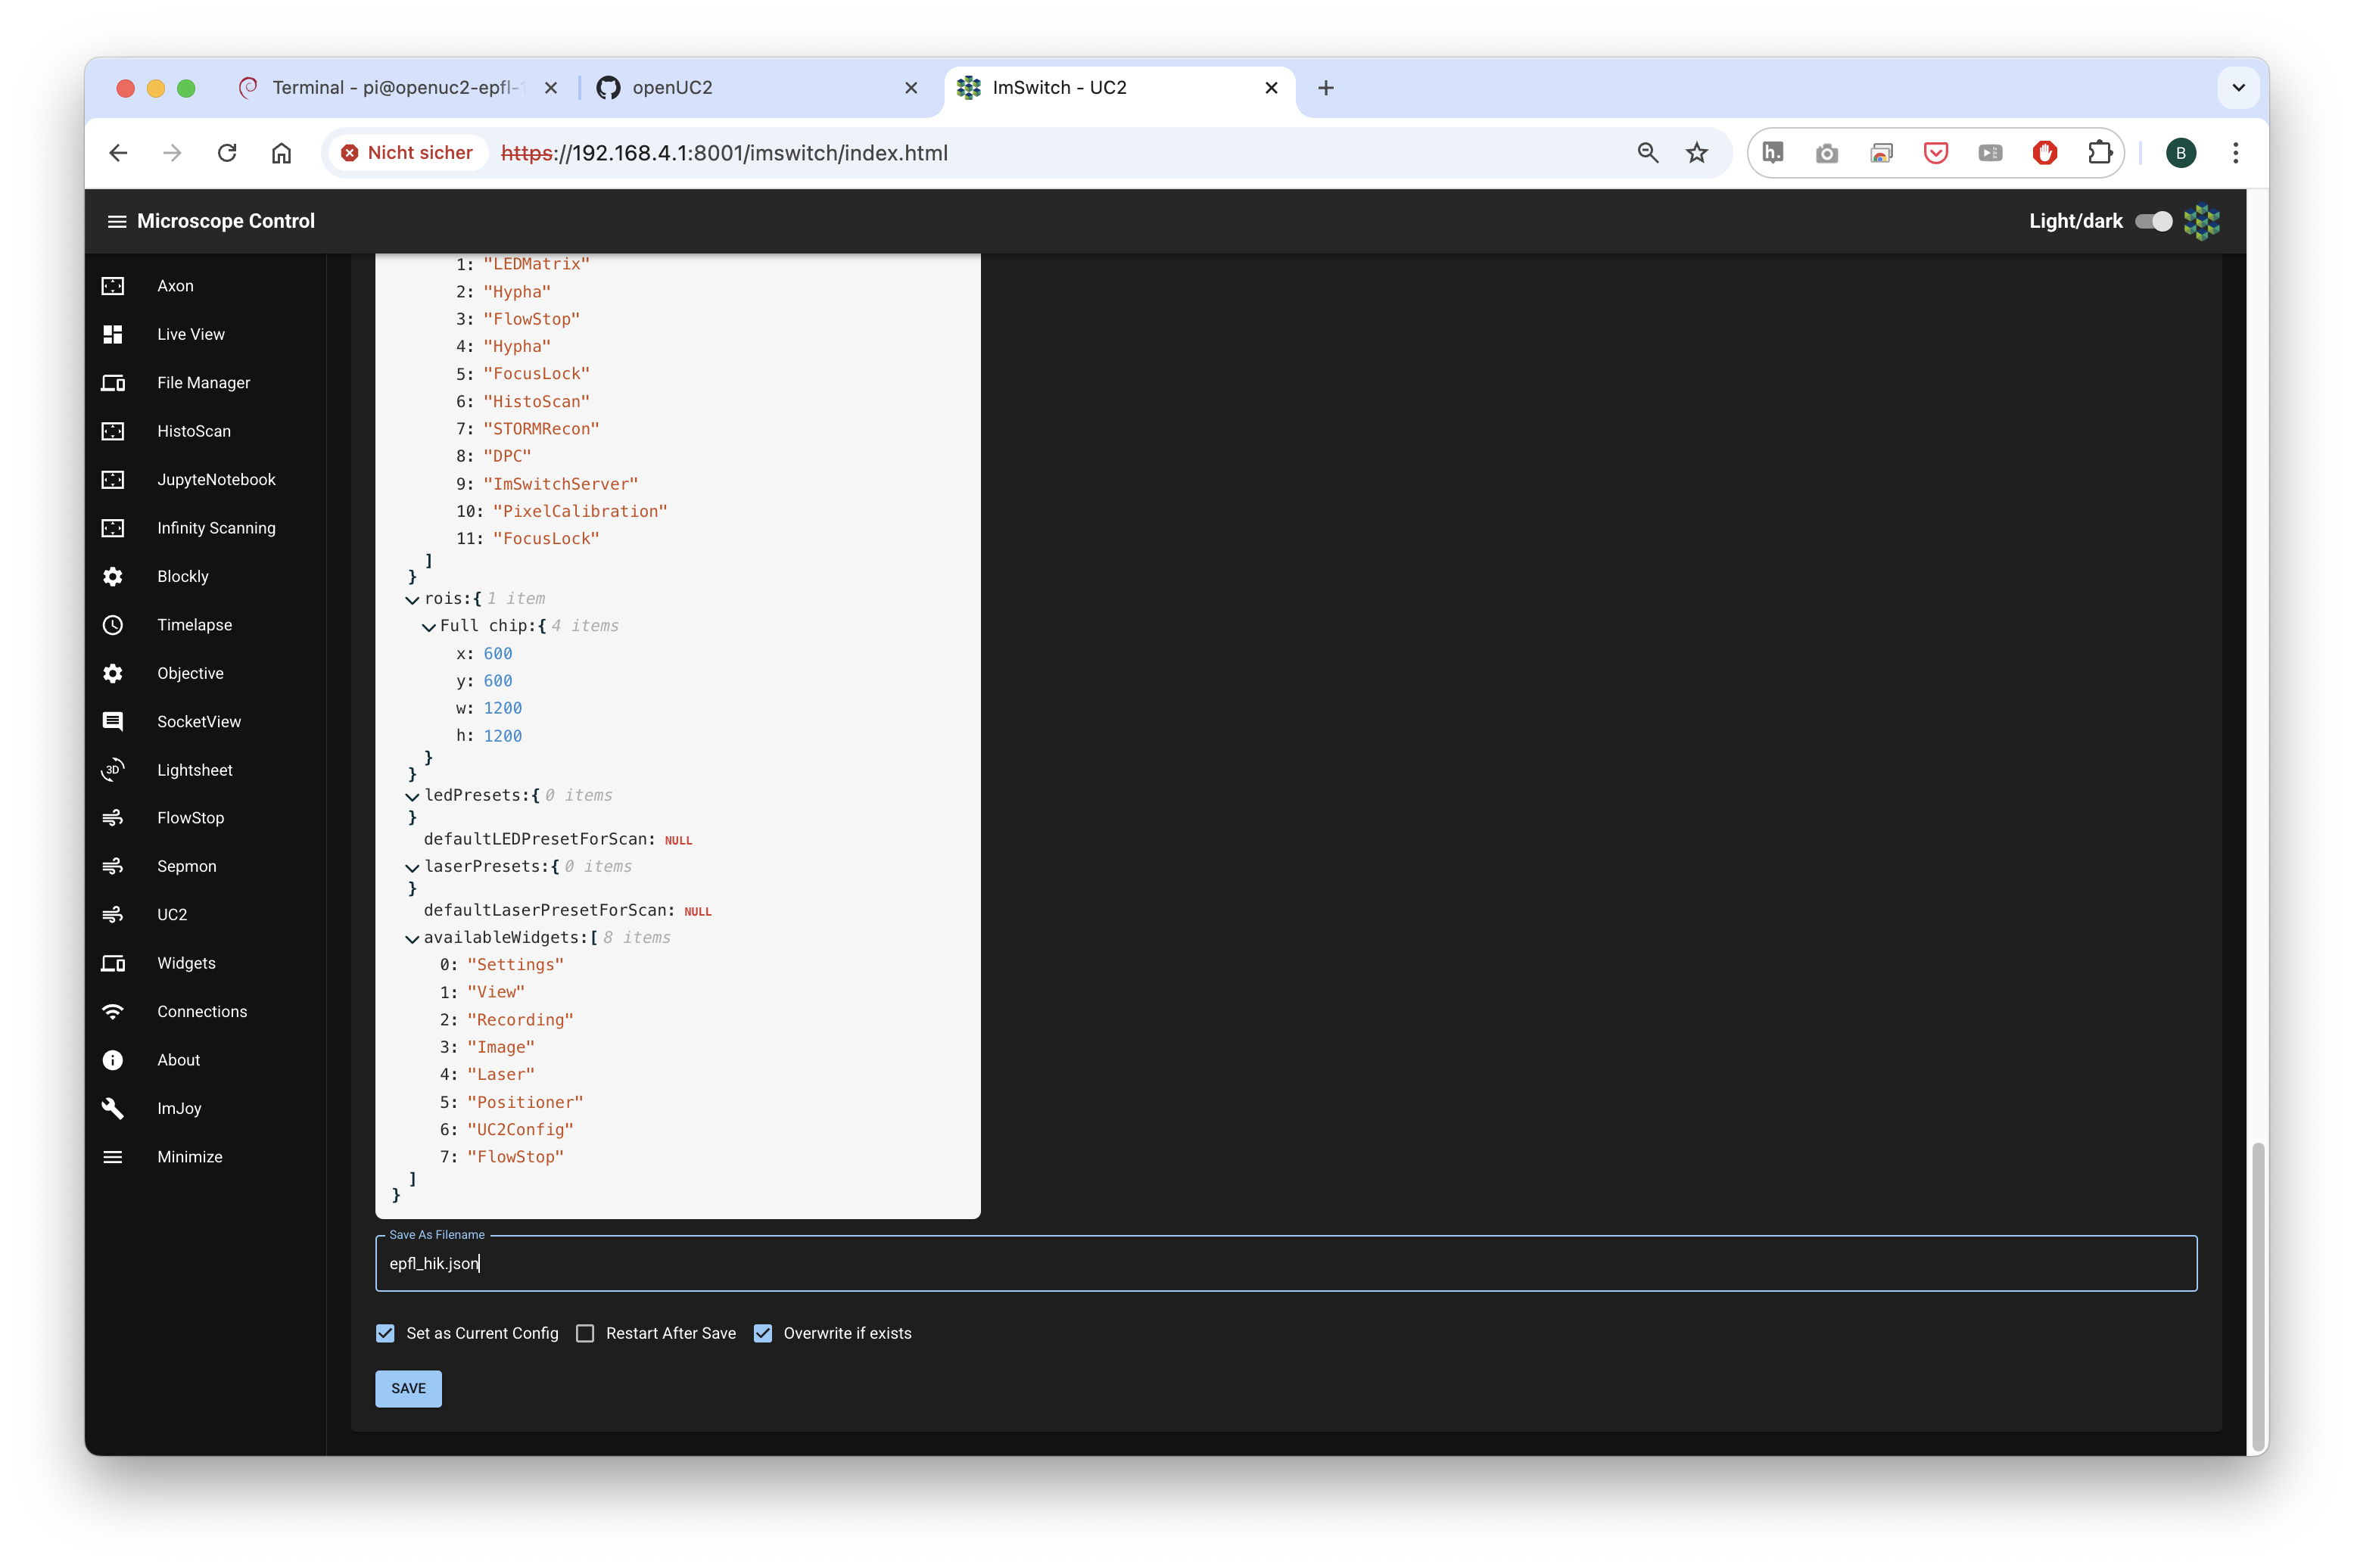
Overwrite and reboot. Wait for some time, eventually reconnect wifi and refresh the page. Done :)
Troubleshooting pallet configurations
If you are facing a problem with a wrong docker configuration (i.e. Docker Compose File is not correct), you can do a temporarily fix by editing the Docker compose file at ~/.local/share/forklift/pallet/packages/imswitch/compose.yml on the Raspberry Pi, and then run forklift pallet stage --no-cache-img and reboot. The location ~/.local/share/forklift/pallet is in fact the git repo of the https://github.com/openUC2/pallet repo.
Enabling Tailscale on ImSwitch OS
The filename of the file containing the tailscale auth token should be tailscale-auth-key. The file will need to exist on the boot partition in a new run subdirectory of the init-root directory.
Connect to Wifi
By default, the forklift configuration provides an access point and maps internet from the LAN to the AP conveniently. If you have an existing access point and you want to connect to that one using the raspberry pi can you can do that by following the follwoing steps.
Problem (one‑sentence)
Saved profile contains a malformed ssid= (often a trailing space added by nmtui). NetworkManager then scans for a name that does not exist and returns WLAN konnte nicht gefunden werden.
Quick‑fix workflow
| Goal | Command / action |
|---|---|
| List saved connections | sudo nmcli con show |
| Locate profile file | sudo grep -l 'ssid=openUC2' /etc/NetworkManager/system-connections/* |
| Option A – repair file | bash sudo nano /etc/NetworkManager/system-connections/<file>.nmconnection # correct ssid=openUC2 exactly sudo chmod 600 /etc/NetworkManager/system-connections/<file>.nmconnection sudo systemctl restart NetworkManager |
| Option B – delete & recreate (simpler) | bash sudo nmcli con delete "<profile‑name>" sudo nmcli dev wifi connect "openUC2" password "YOUR‑PASSWORD" ifname wlan0 |
| Verify link | ip a show wlan0 → should now show an inet address |
Using nmtui instead of CLI
sudo nmtui→ Activate a connection → highlight your network → Add (or Edit)- Enter SSID exactly (
openUC2), security = WPA & WPA2 Personal, fill password. - Leave BSSID blank.
[X] Automatisch verbinden,[X] Für alle Benutzer verfügbar→ OK → quit nmtui.sudo systemctl restart NetworkManager(or justsudo nmcli con up wlan0).
If connection still fails run sudo journalctl -u NetworkManager -b | grep wlan0—look for SSID_NOT_FOUND (name wrong), NO_SECRETS (password wrong), or continuous authentication loops (router’s WPA mode).
Accessing the Filebrowser:

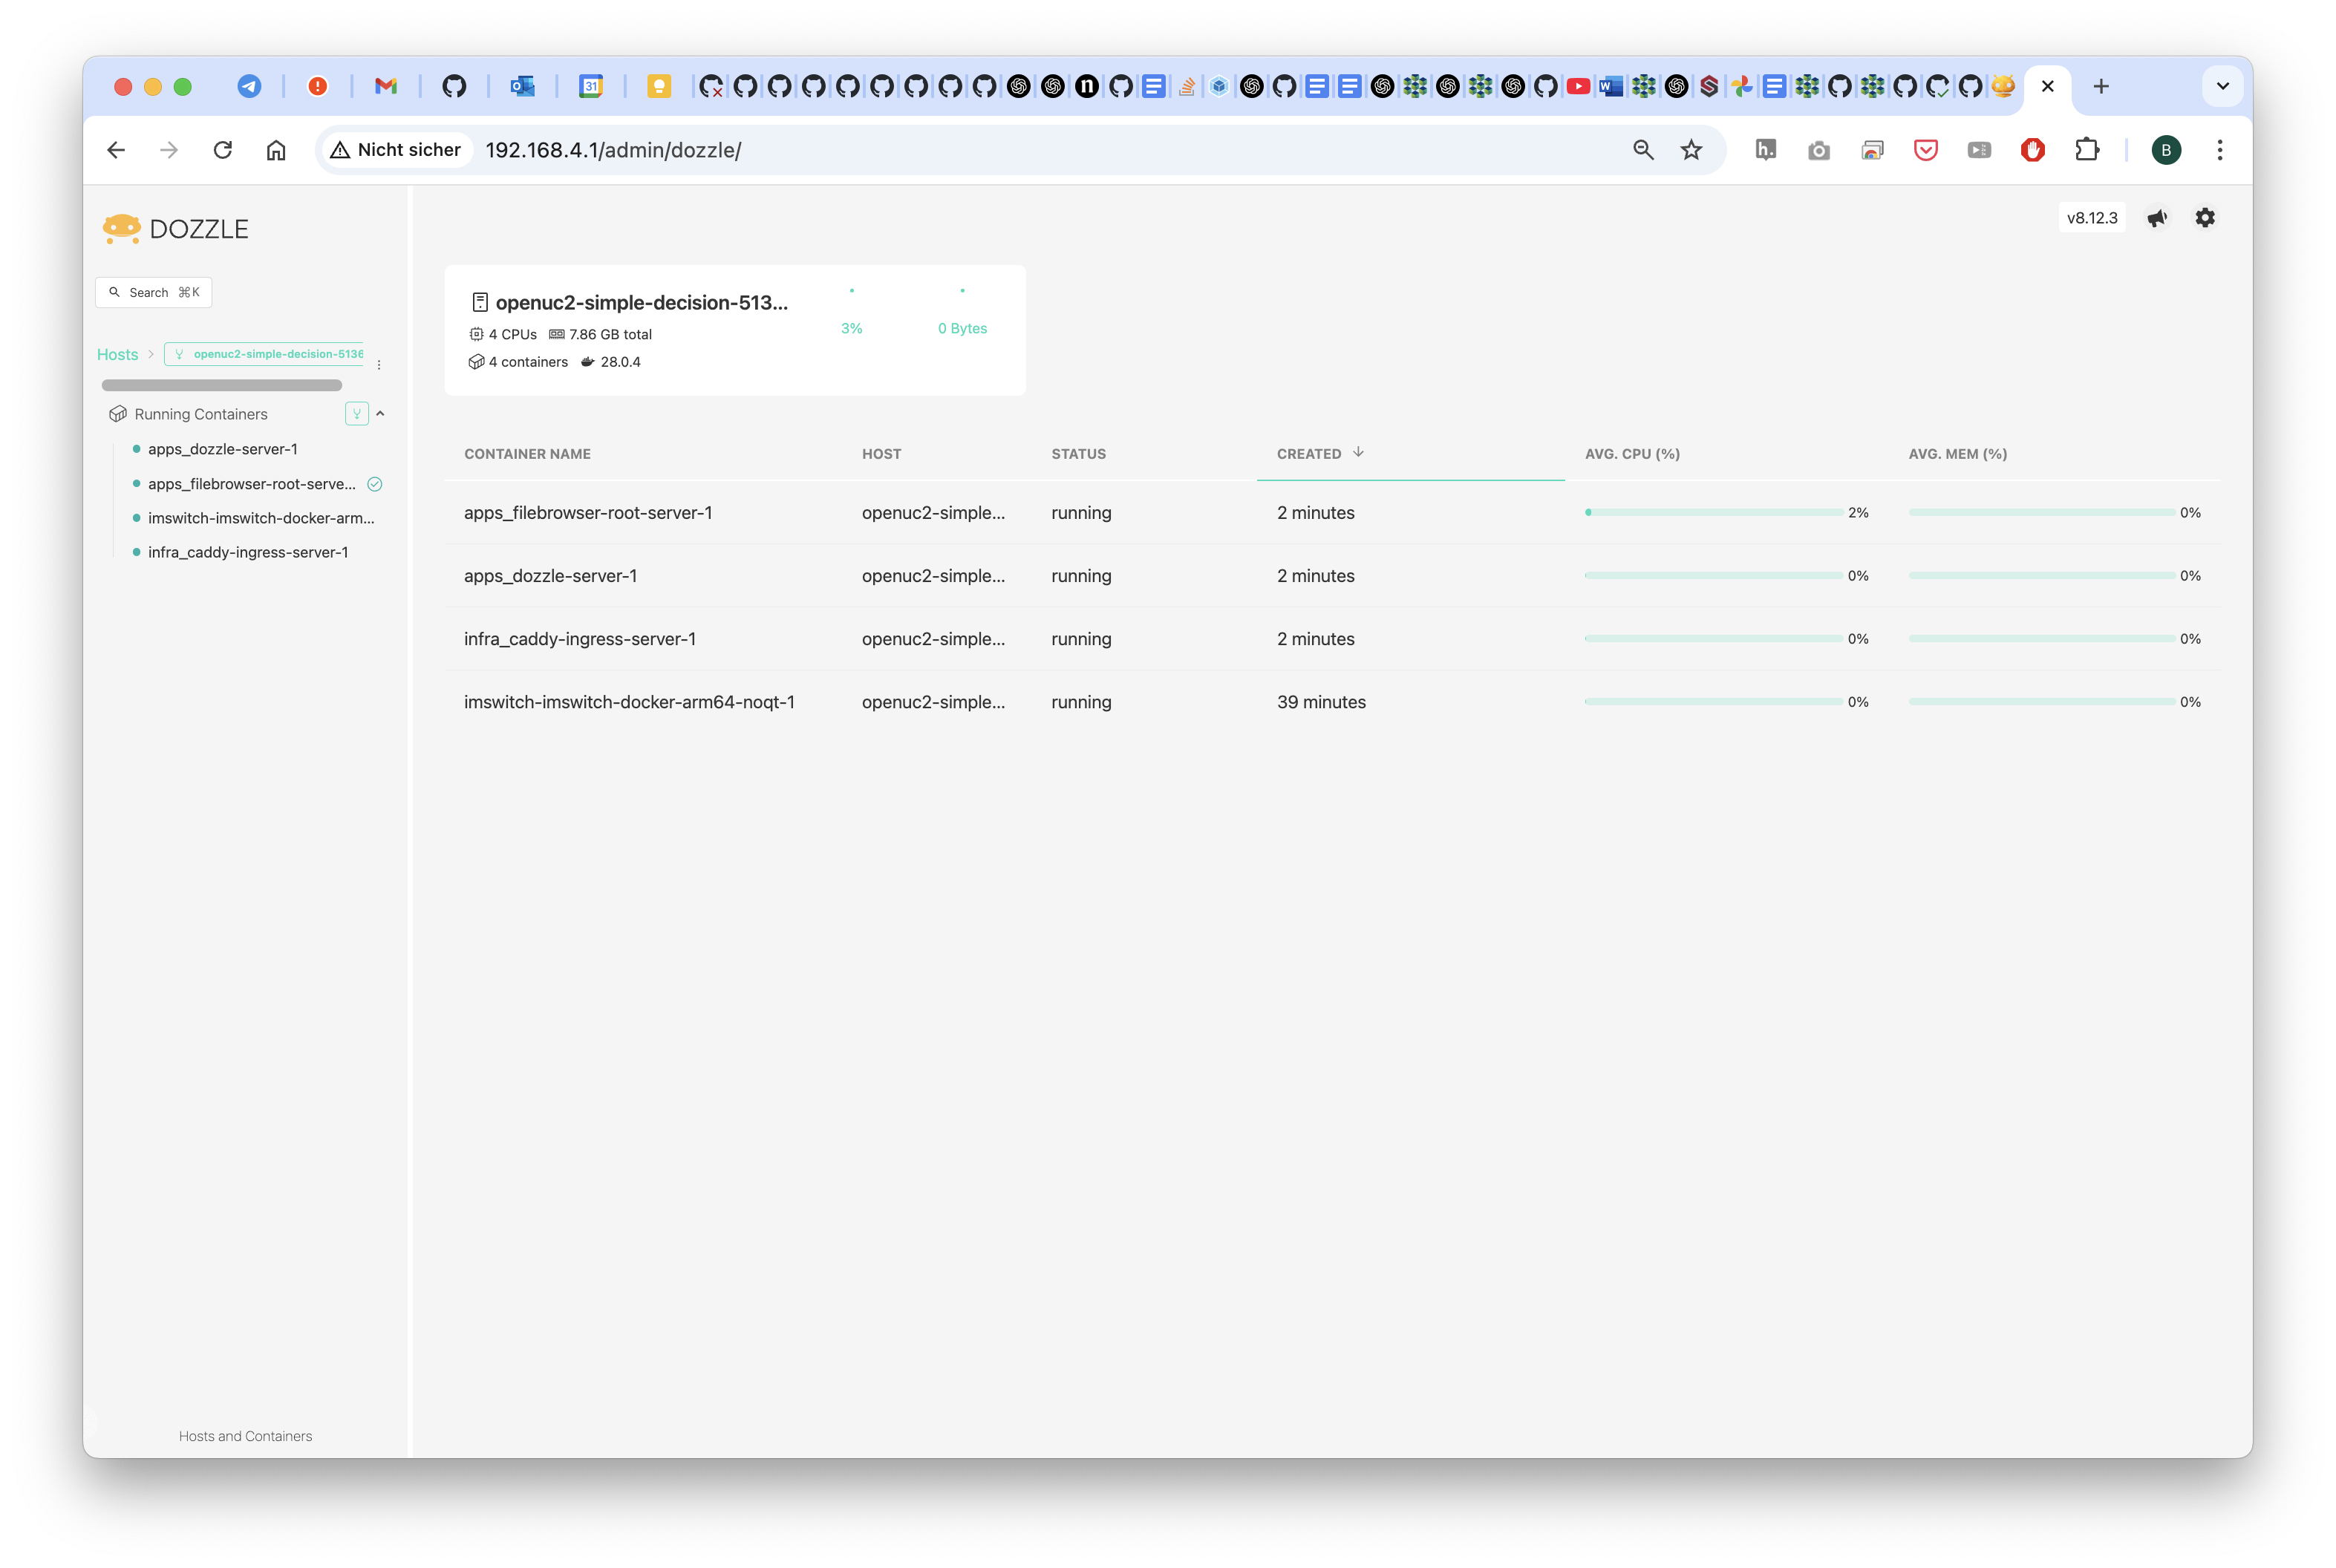
Managing the Docker Containers with Dozzle:
Summary
- The manual installation allows full customization of Raspberry Pi OS and software.
- The pre-built image provides a quick and reliable setup, including all necessary drivers.
For additional details, visit: ImSwitch Documentation
Troubleshooting & Support
- If you encounter issues, check the logs using:
docker logs $(docker ps -q --filter ancestor=ghcr.io/openuc2/imswitch-noqt-arm64:latest)
- Join our community for help: OpenUC2 GitHub
Happy experimenting!