Quickstart Guide: Using Raspberry Pi with ImSwitch and UC2-ESP
The Raspberry Pi serves as a bridge between the UC2-ESP board and a USB3 camera, running the ImSwitch software inside a Docker container. The system allows you to control the microscope through a web interface accessible from a phone or laptop.
Note: This setup is experimental! You can try a demo version of the latest ImSwitch here:
- Live Demo (currently not active)
- React Demo
- ImSwitch API (may be outdated)
Overview Chart
The below diagramm visualizes the different modules that are connected to the openUC2 ecosystem. You can click on (most of) the bubbles to get to the dedicated repositories. You can find the draw.io template here
Getting Started
Raspberry Pi Login Credentials
- Username:
UC2 - Password:
youseetoo
The system runs Raspberry Pi OS Lite and includes a Docker integration for ImSwitch. You can log in via SSH to start the ImSwitch server.
ImSwitch Docker Installation Guide
WiFi Hotspot
- SSID:
openuc2-RANDOMNUMBER - Password:
youseetoo
To configure the hotspot using RaspAP:
- Open a browser and go to http://192.168.4.1/
- Login with:
- Username:
admin - Password:
secret
- Username:
Accessing ImSwitch
If the Docker container starts automatically, access ImSwitch at:
- https://192.168.4.1:8001/imswitch/index.html
- Ignore self-signed certificate warnings (this will be fixed later).
Connecting via SSH
To manually start ImSwitch:
ssh pi@192.168.4.1  # Password: youseetoo
cd ~/Desktop
./launch_docker_container.sh
Changing Wifi Settings, Creating an Access Point, or Connecting to a Network
Inside the ImSwitch Interface, you can manage WiFi settings:
Modifying ImSwitch Configuration
To adjust settings, edit the configuration file:
nano ~/ImSwitchConfig/config/imcontrol_options.json
For example, changing the active setup file:
{
    "setupFileName": "example_uc2_vimba.json",
    "recording": {
        "outputFolder": "./ImSwitch/ImSwitch/recordings",
        "includeDateInOutputFolder": true
    }
}
More details: ImSwitchConfig GitHub
Hardware Setup
- Connect UC2-ESP Board via USB to the Raspberry Pi
- Connect USB3 Camera to Raspberry Pi
Installing Raspberry Pi OS & ImSwitch
This is a compiled image for the Raspberry Pi 5 to deploy ImSwitch in Docker. It's built at github.com/openUC2/rpi-imswitch-os
Requirements:
- microSD Card with >32GB
- Raspberry Pi 5 (8GB RAM recommended)
- microSD Card reader
Installation:
- Download the image from Google Drive
- Flash it to an SD card using Raspberry Pi Imager.
Flashing the Image
Use the Raspberry Pi Imager to flash the image onto an SD card, then insert the SD card into the Raspberry Pi and boot it.
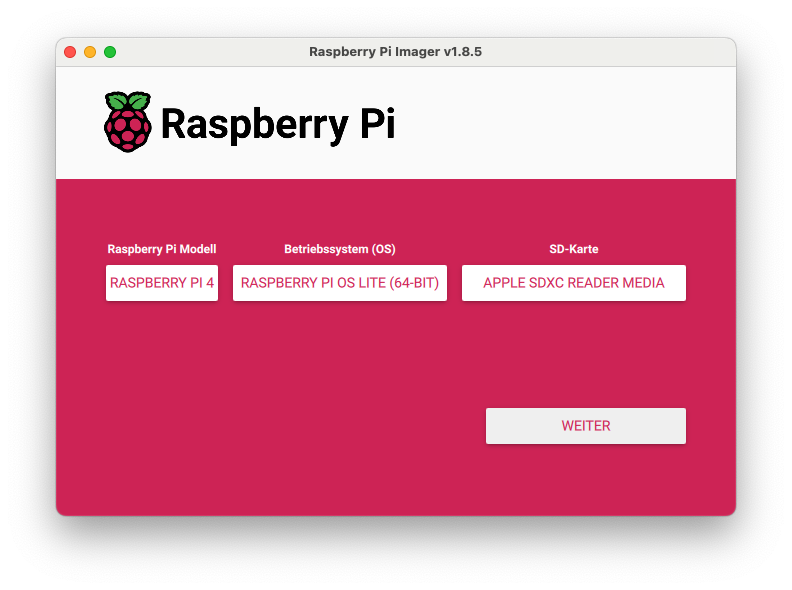
- Select your Raspberry Pi model.
- Choose the downloaded image file as the OS type.
- Select the SD card as the target.
- Do not specify additional user-specific settings.
Default Credentials
- SSID:
openUC2-XXXX(XXXcorresponds to a random number bsed on the MAC address) - WiFi Password:
youseetoo(now:youseetoo) - Username:
pi - User Password:
youseetoo
Updating Forklift configuration
This will pull the latest pallet and forklift configuration. Be aware, that system rleated conifgurations may be overwritte. The command is the following:
forklift pallet upgrade --force @main
Troubleshooting pallet configurations
If you are facing a problem with a wrong docker configuration (i.e. Docker Compose File is not correct), you can do a temporarily fix by editing the Docker compose file at ~/.local/share/forklift/pallet/packages/imswitch/compose.yml on the Raspberry Pi, and then run forklift pallet stage --no-cache-img and reboot. The location ~/.local/share/forklift/pallet is in fact the git repo of the https://github.com/openUC2/pallet repo.
Summary
- The manual installation allows full customization of Raspberry Pi OS and software.
- The pre-built image provides a quick and reliable setup, including all necessary drivers.
Troubleshooting & Support
- If you encounter issues, check the logs using:
docker logs $(docker ps -q --filter ancestor=ghcr.io/openuc2/imswitch-noqt-arm64:latest)
- Join our community for help: OpenUC2 GitHub
Happy experimenting!