The Course BOX Alignment Procedure (Finite Optics)
This is the alignment procedure of the experiments with finite-corrected optics. If you are looking for the infinity-corrected setups click here.
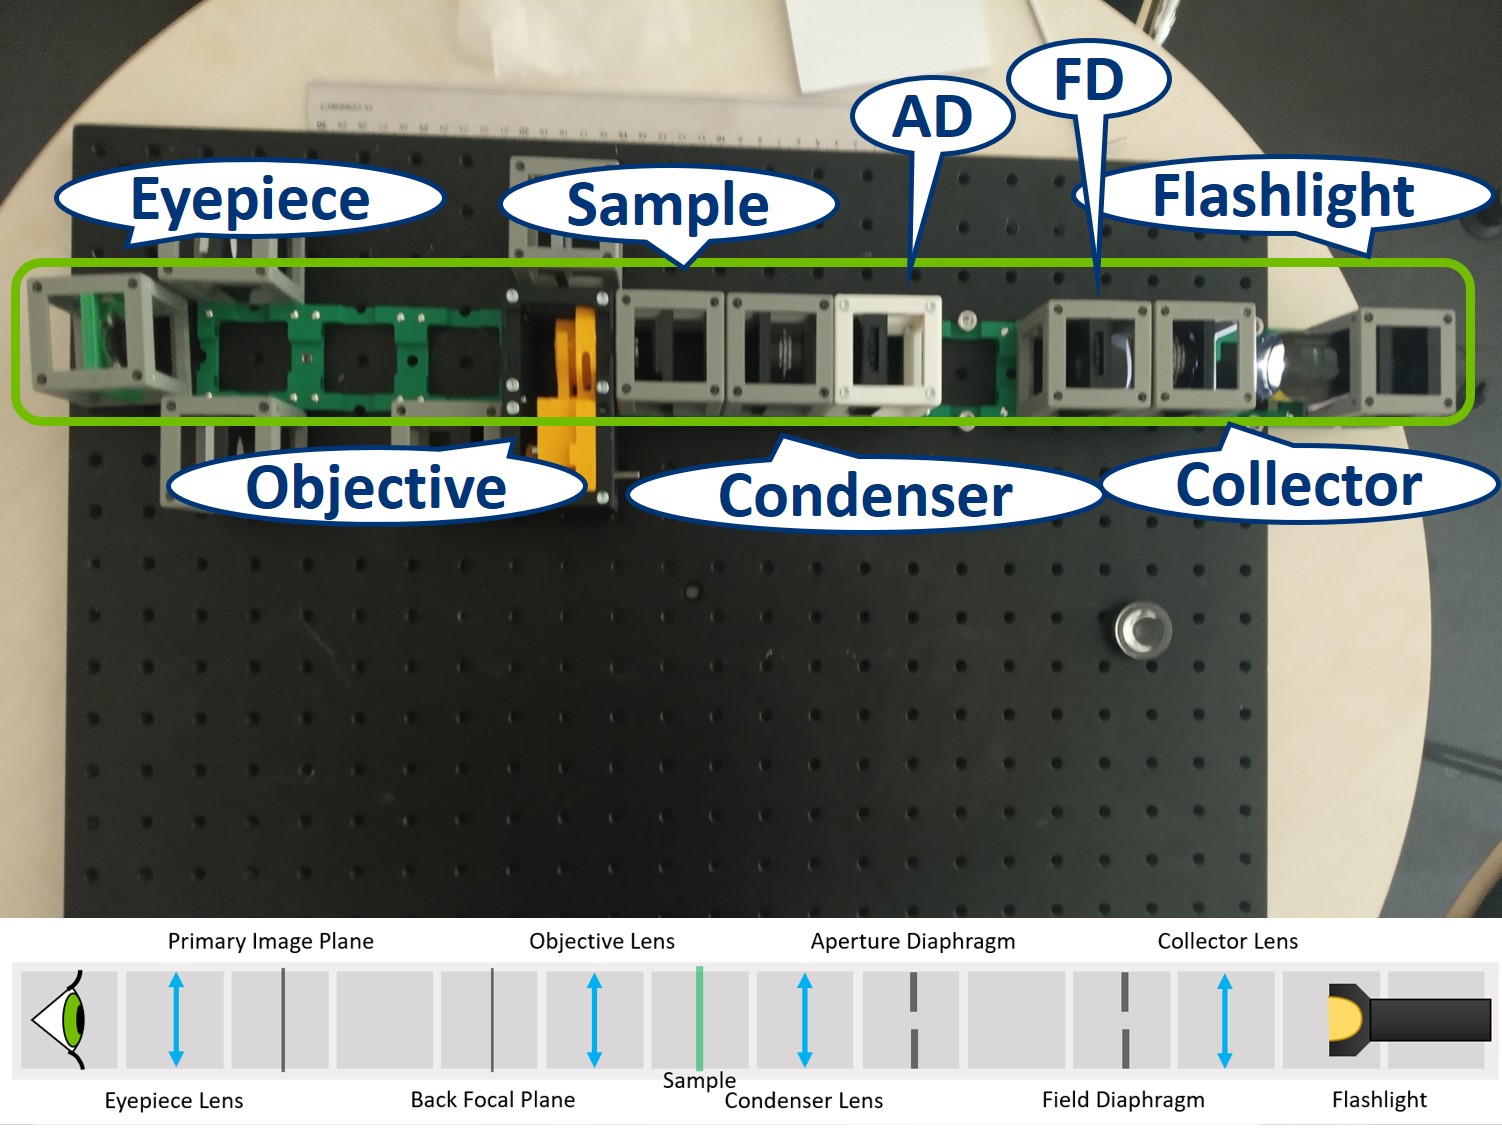
First experiment: Finite-corrected Microscope with Köhler Illumination
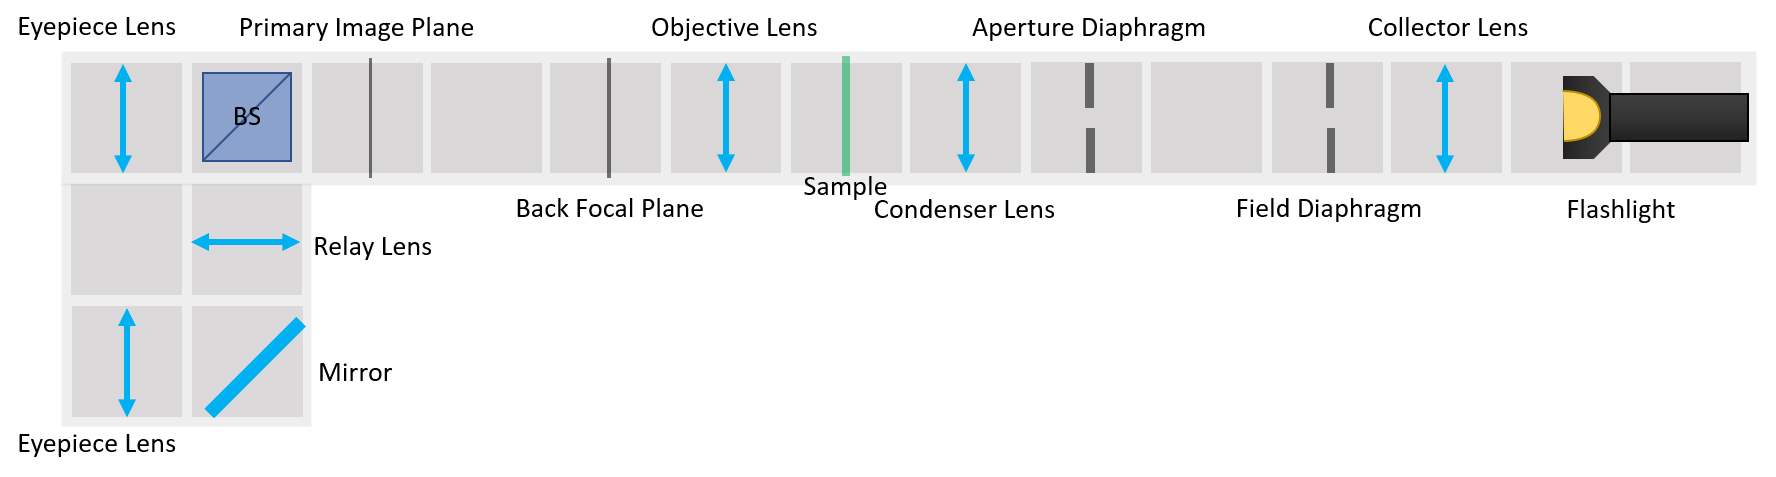
This experiment demonstrates the essential parts of a microscope and explains the concept of conjugate planes. The key components are: Light source, Collector lens, Field Diaphragm, Aperture Diaphragm, Condenser lens, Sample, Objective lens and Eyepiece lens.


Second experiment: Abbe Diffraction Experiment
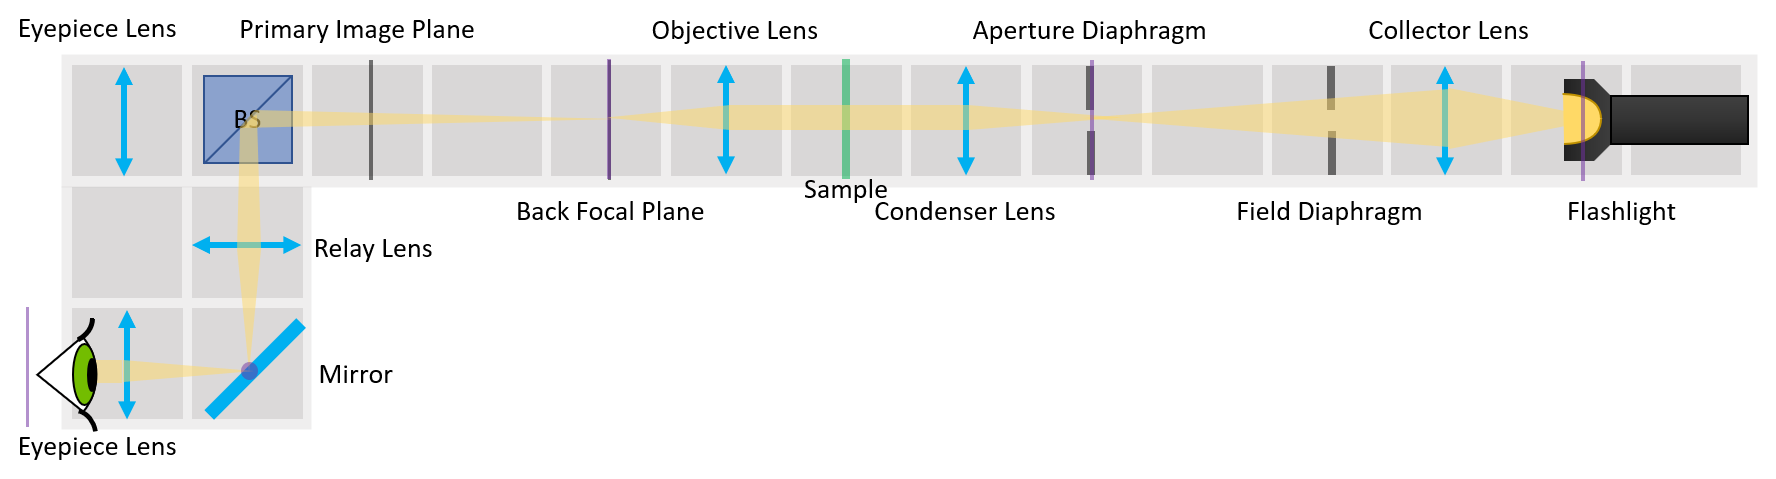
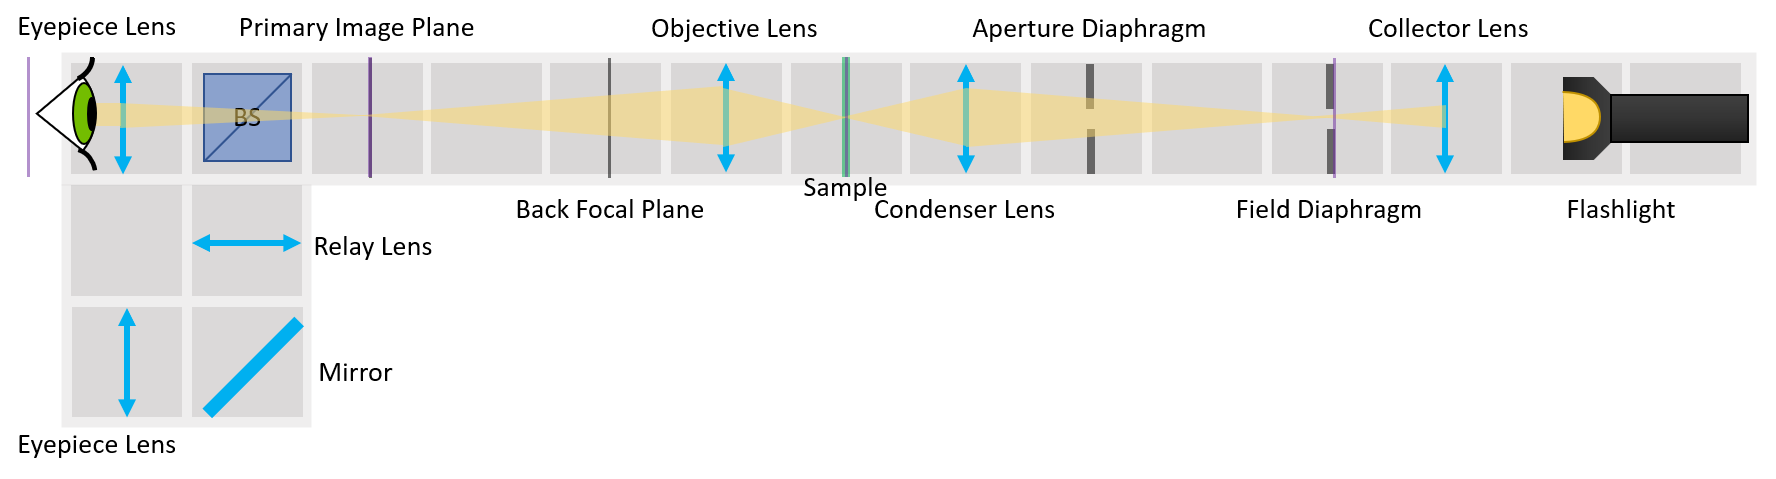
The famous Abbe Diffraction Experiments shows how diffraction of light by a specimen (and interference with the illuminating light) creates an image and how collection of diffracted light defines the resolution of the microscope. With this setup it is possible to view both sets of conjugate planes at the same time, with one's eye or a camera.
 This tutorial will lead you step-by-step through the alignment of the Finite-corrected Microscope, Köhler Illumination and Abbe Diffraction Experiment.
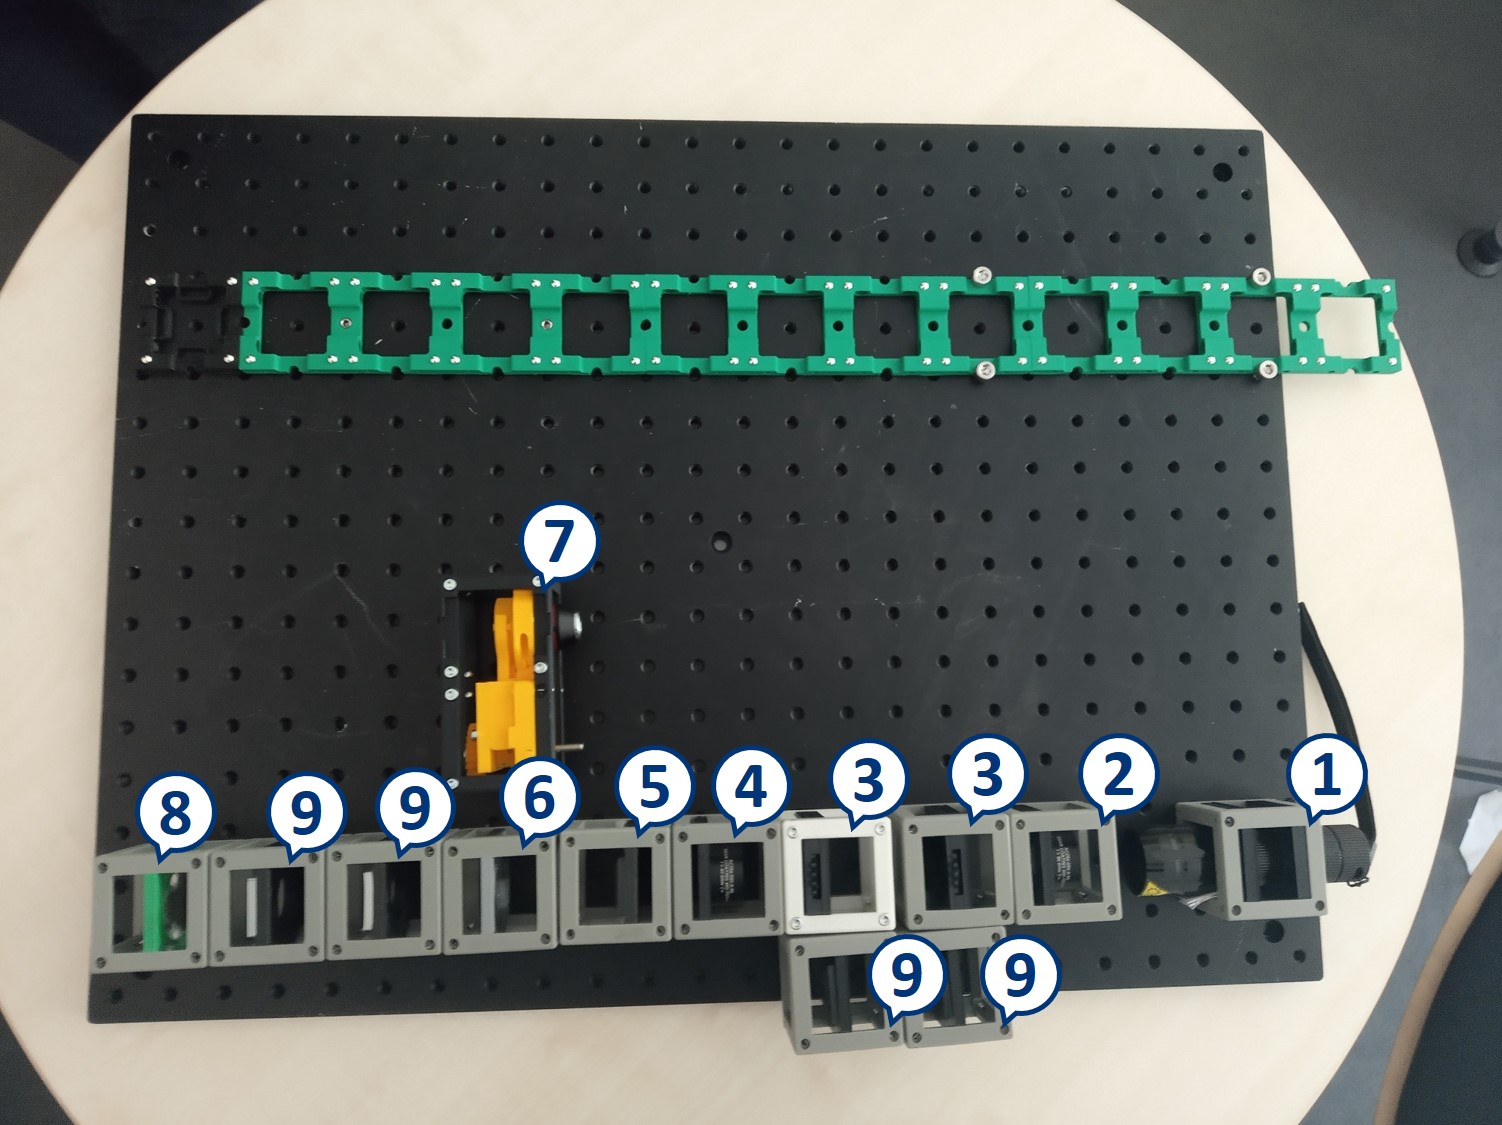
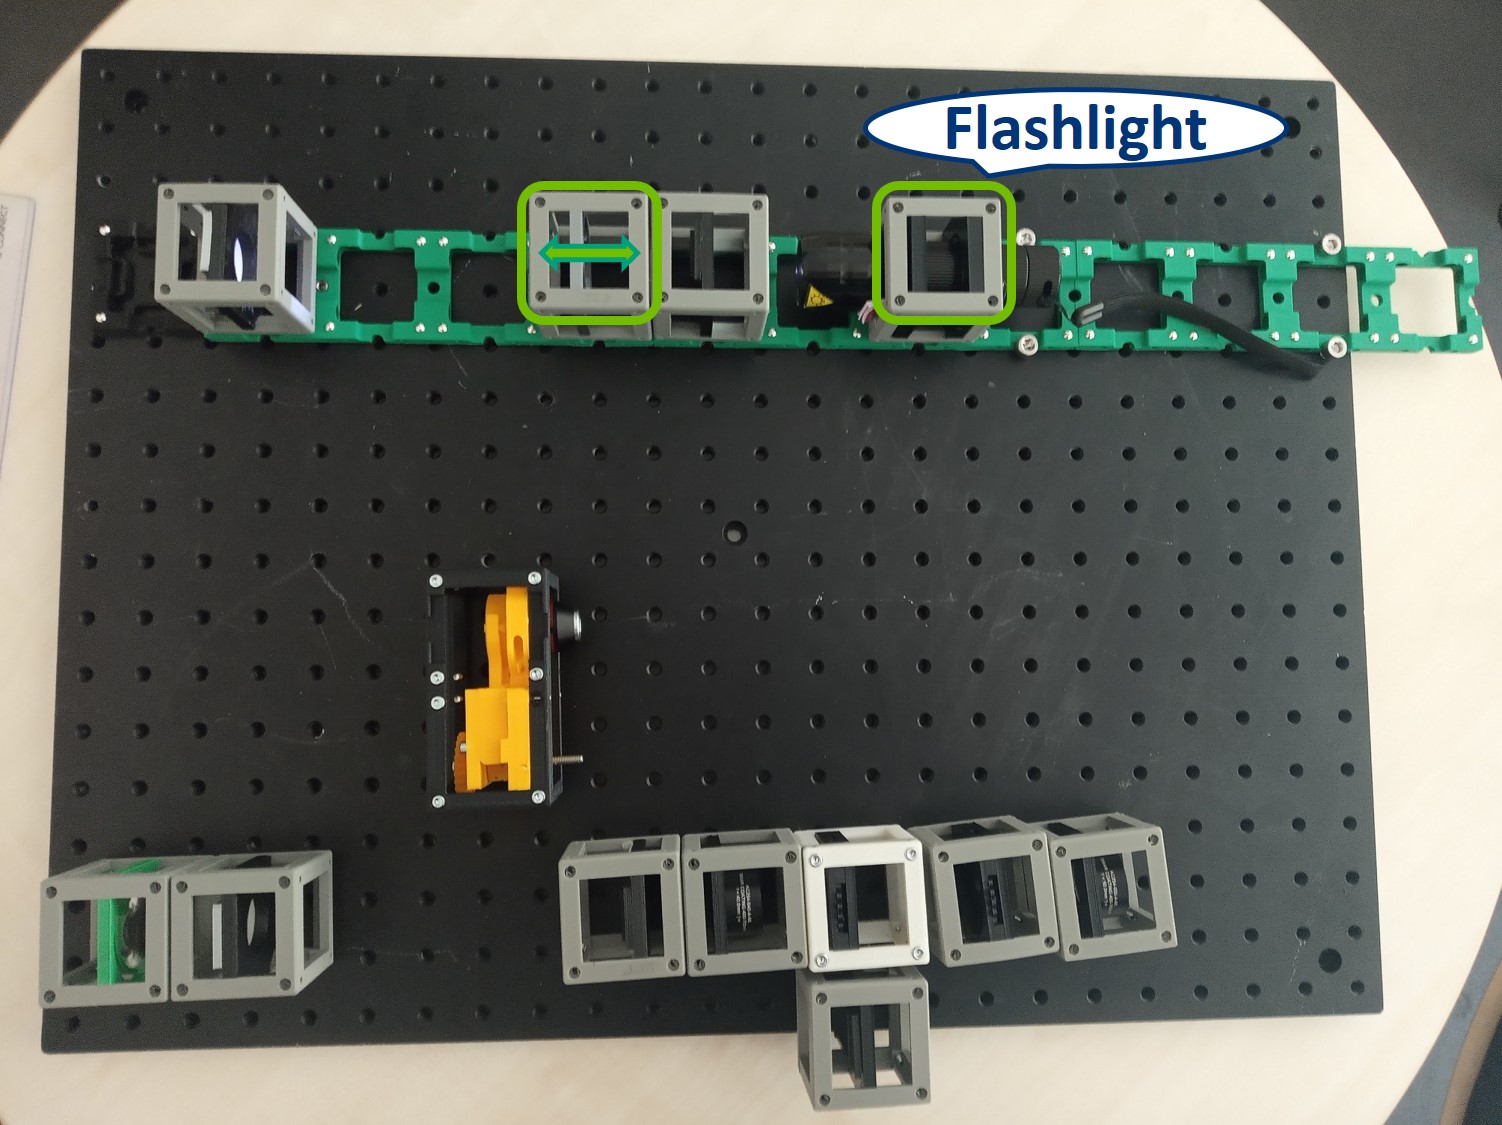
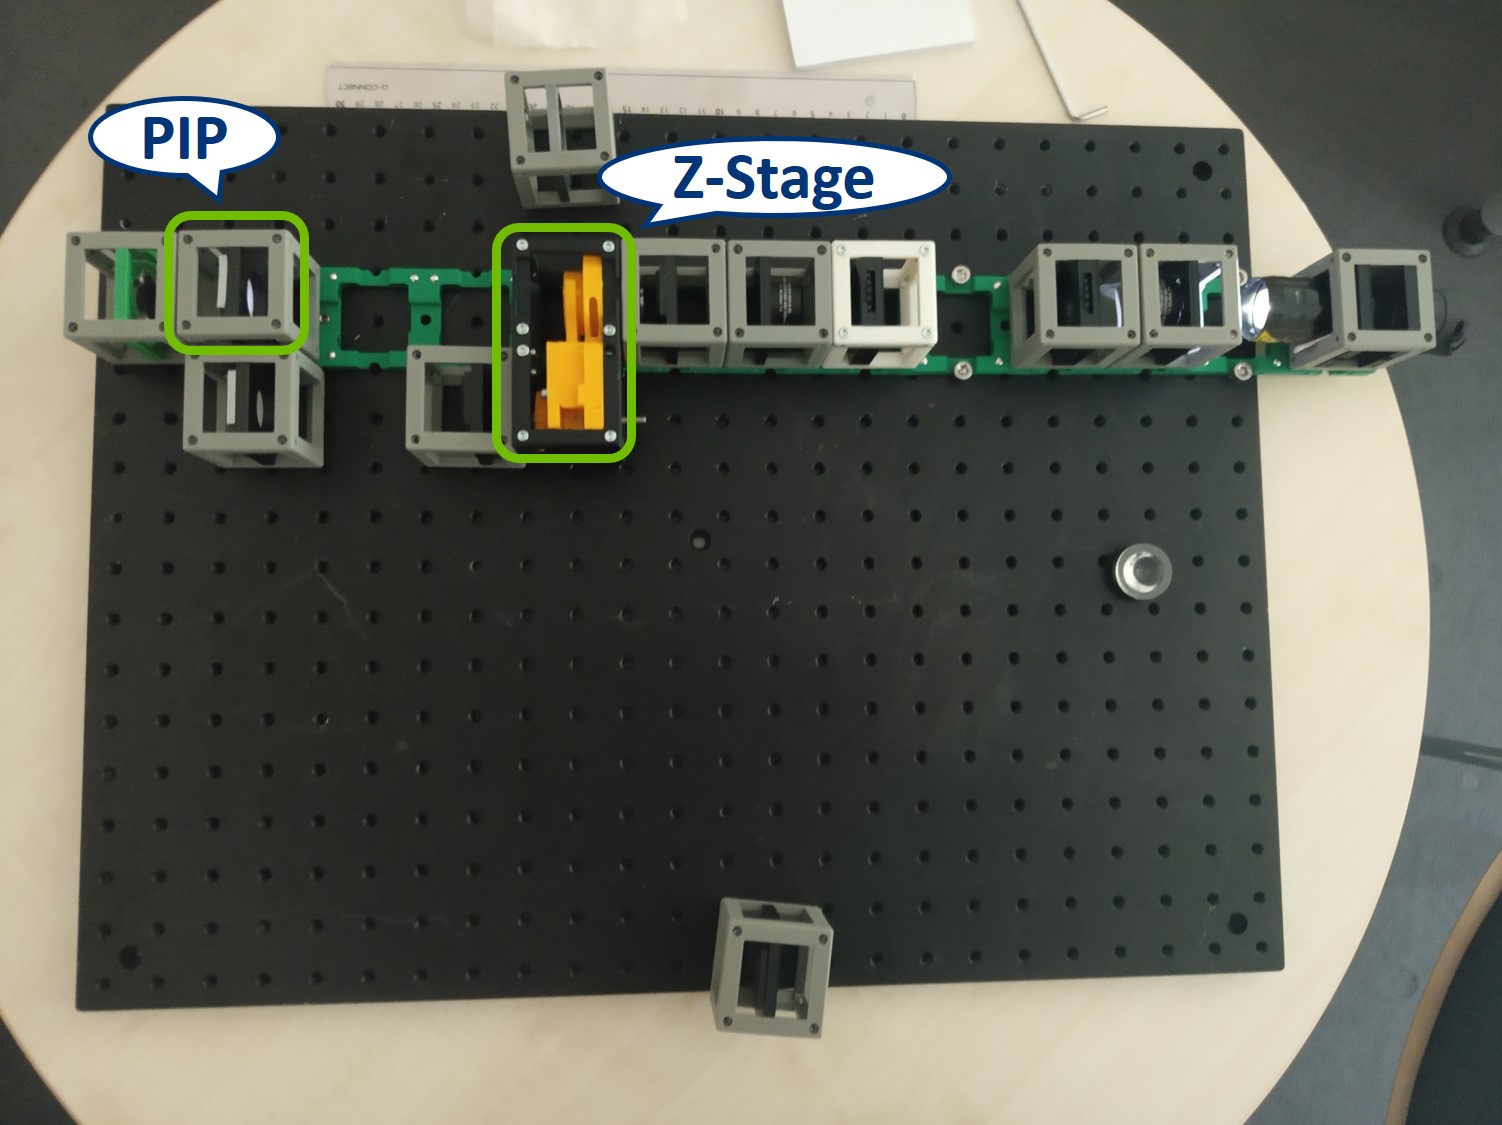
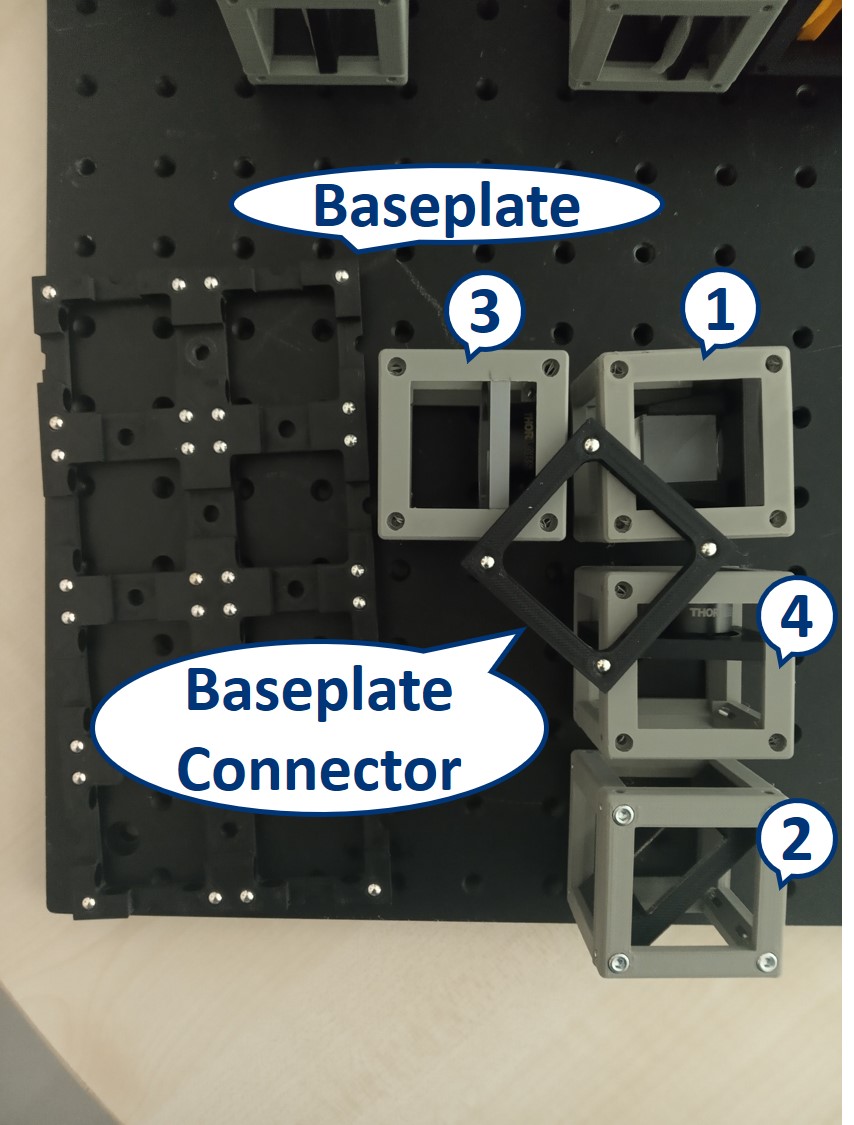
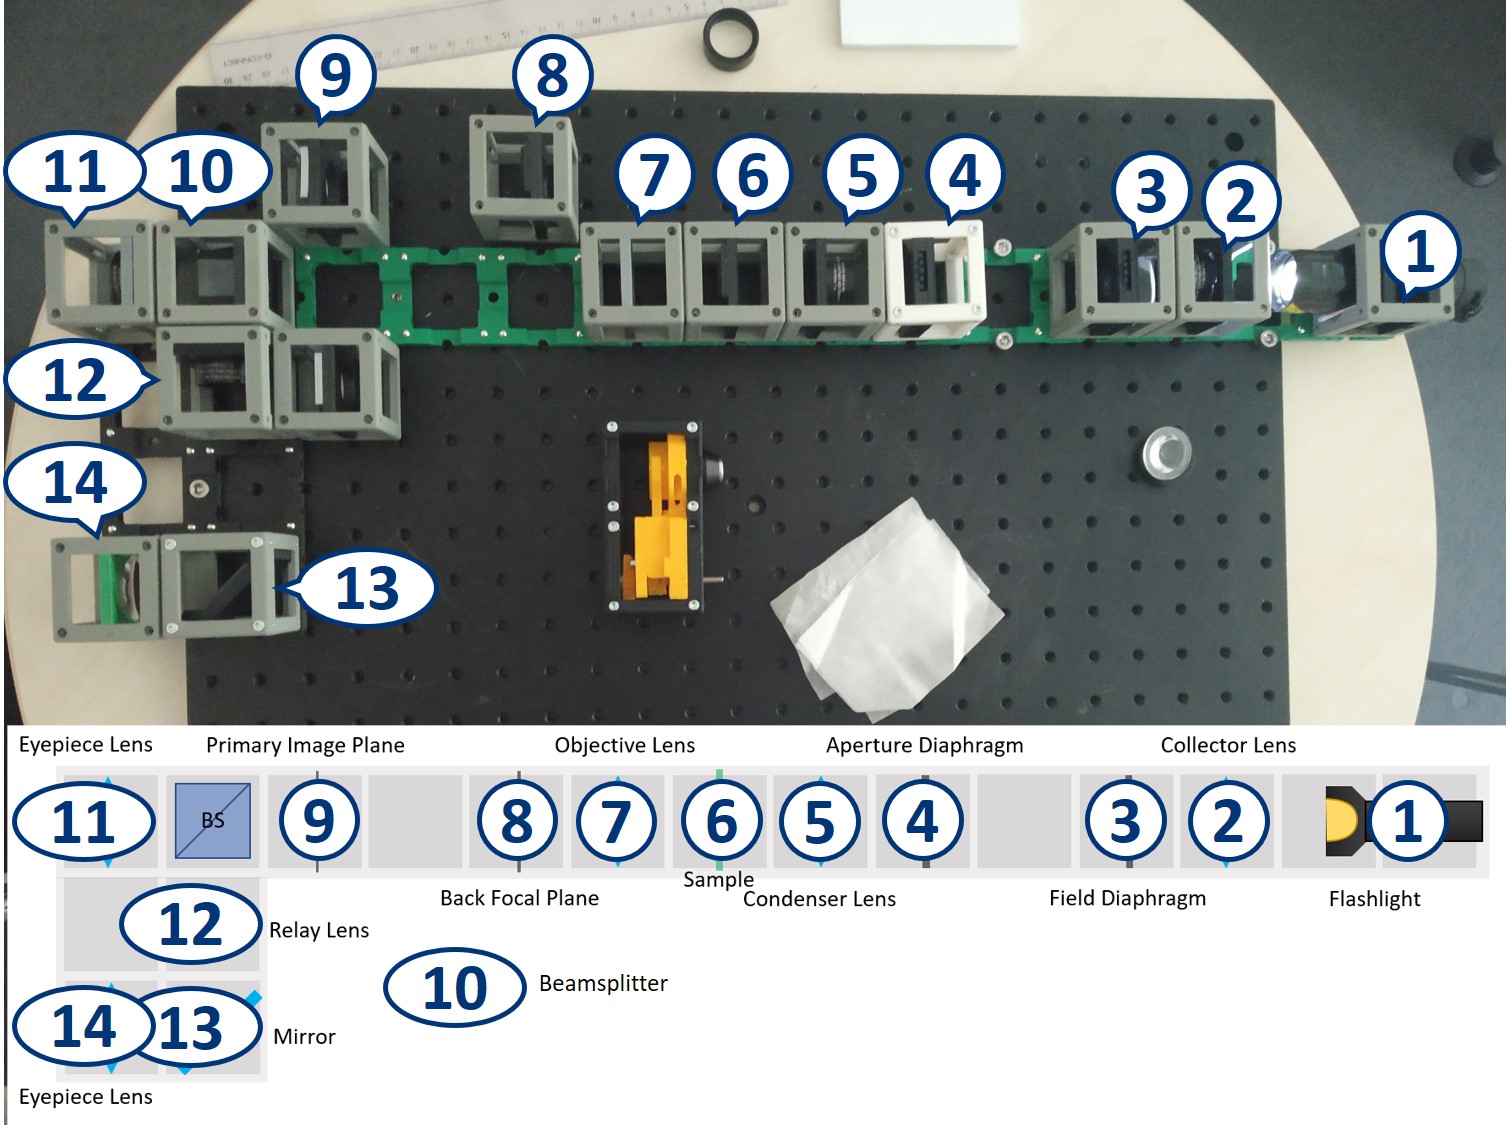
- Start with 1×13 baseplate and all the cubes:
- Flashlight Cube (1)
- Collector Lens Cube (2)
- 2× Circular Aperture Cube (3)
- Condenser Lens Cube (4)
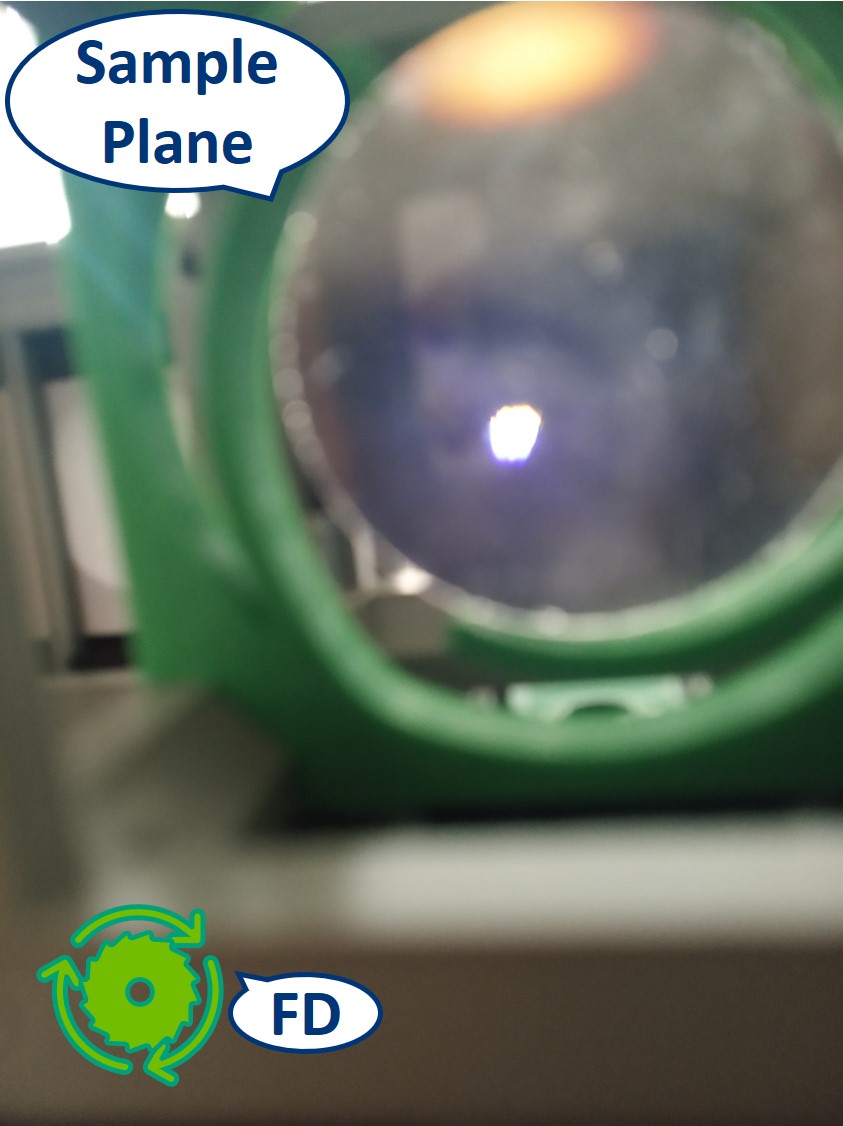
- Sample Cube (5)
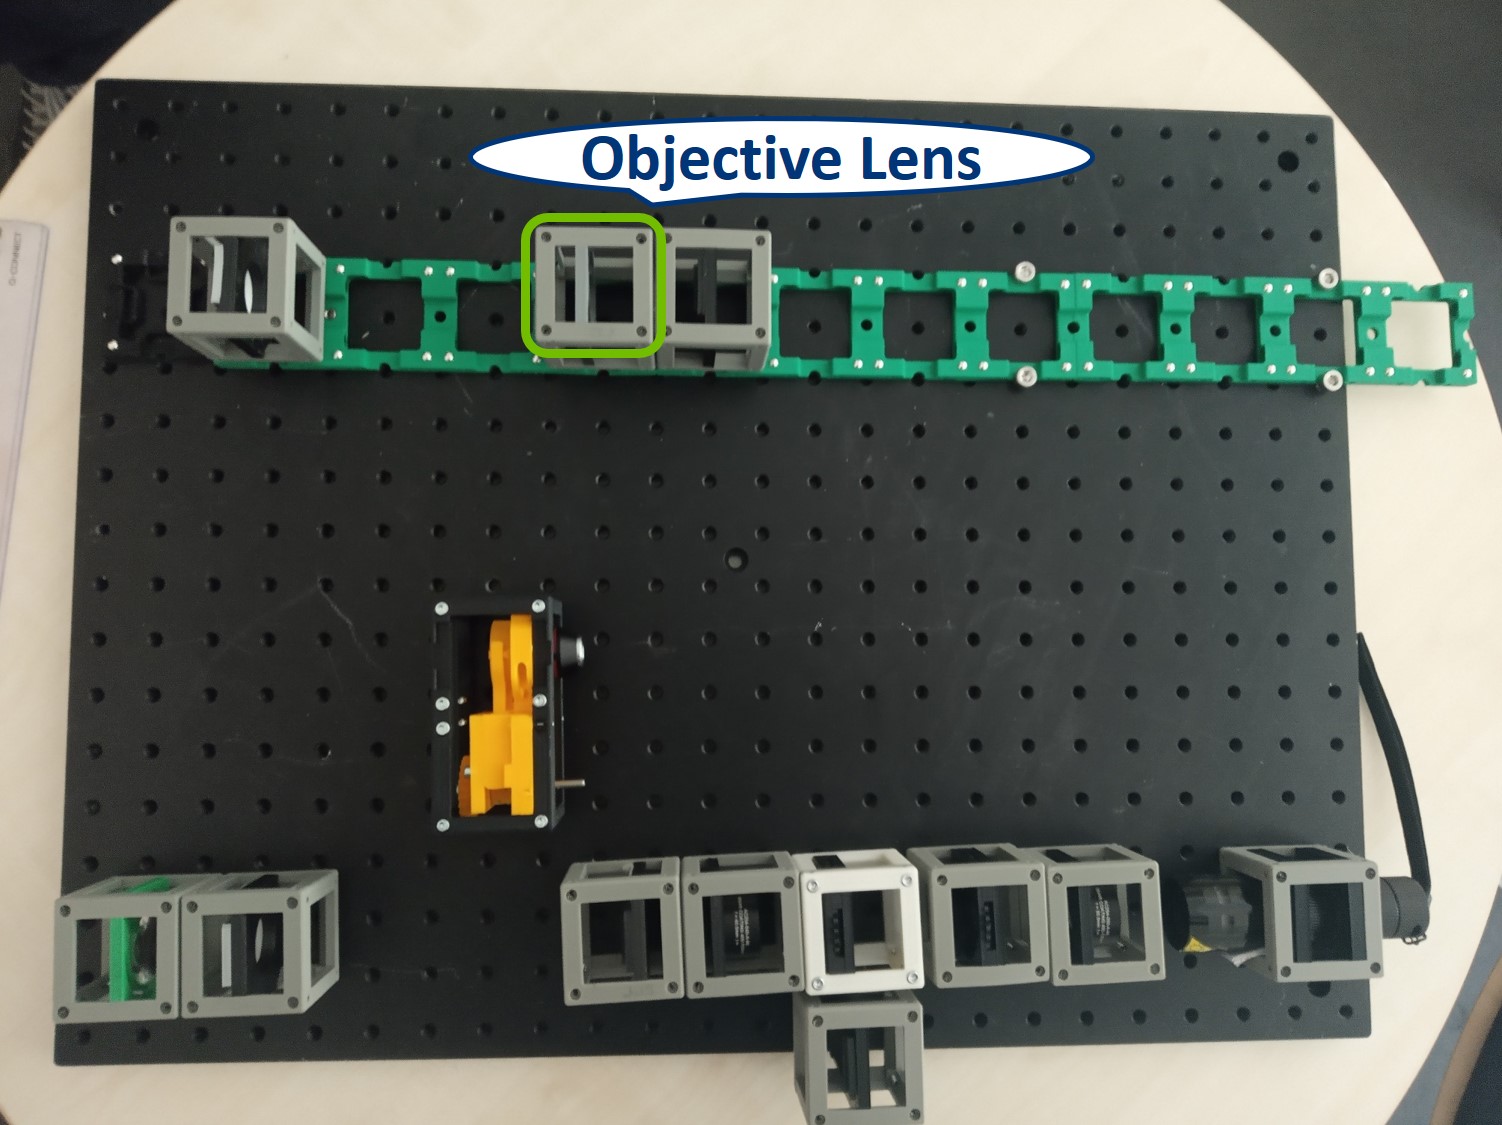
- Objective Lens Cube (6)
- Objective in Z-Stage Cube (7)
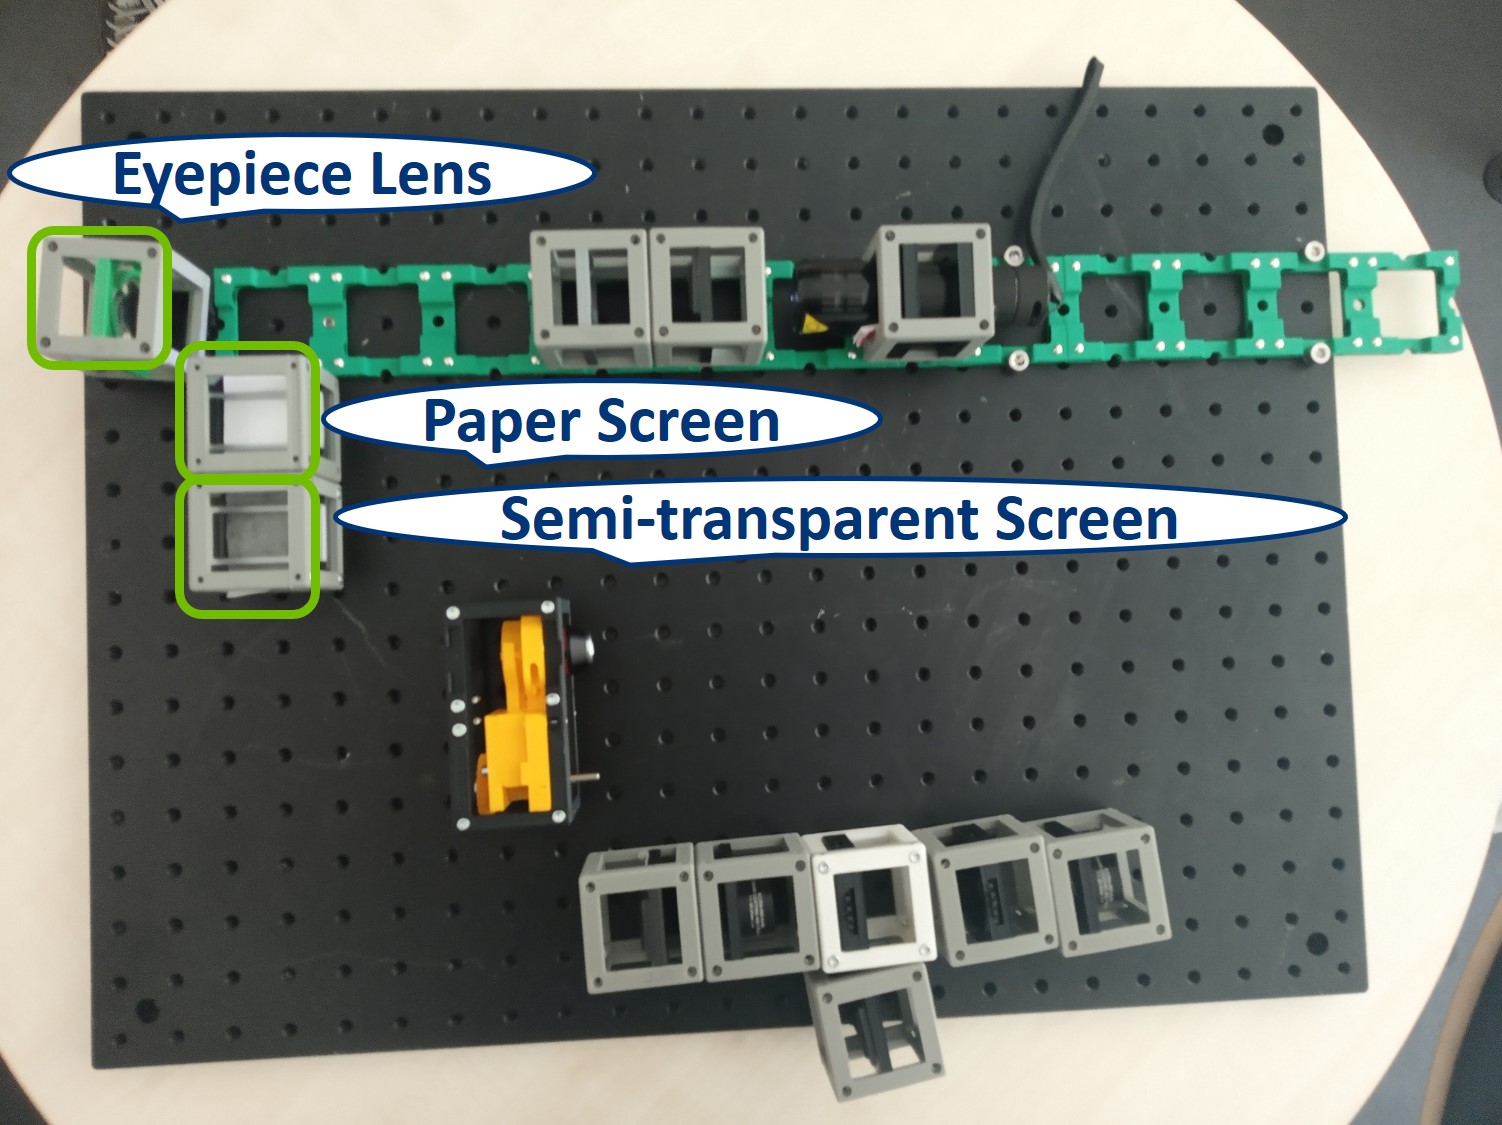
- Eyepiece Lens Cube (8)
- 4× Screen Cube - 1× with white paper, 3× with lens tissue (9)
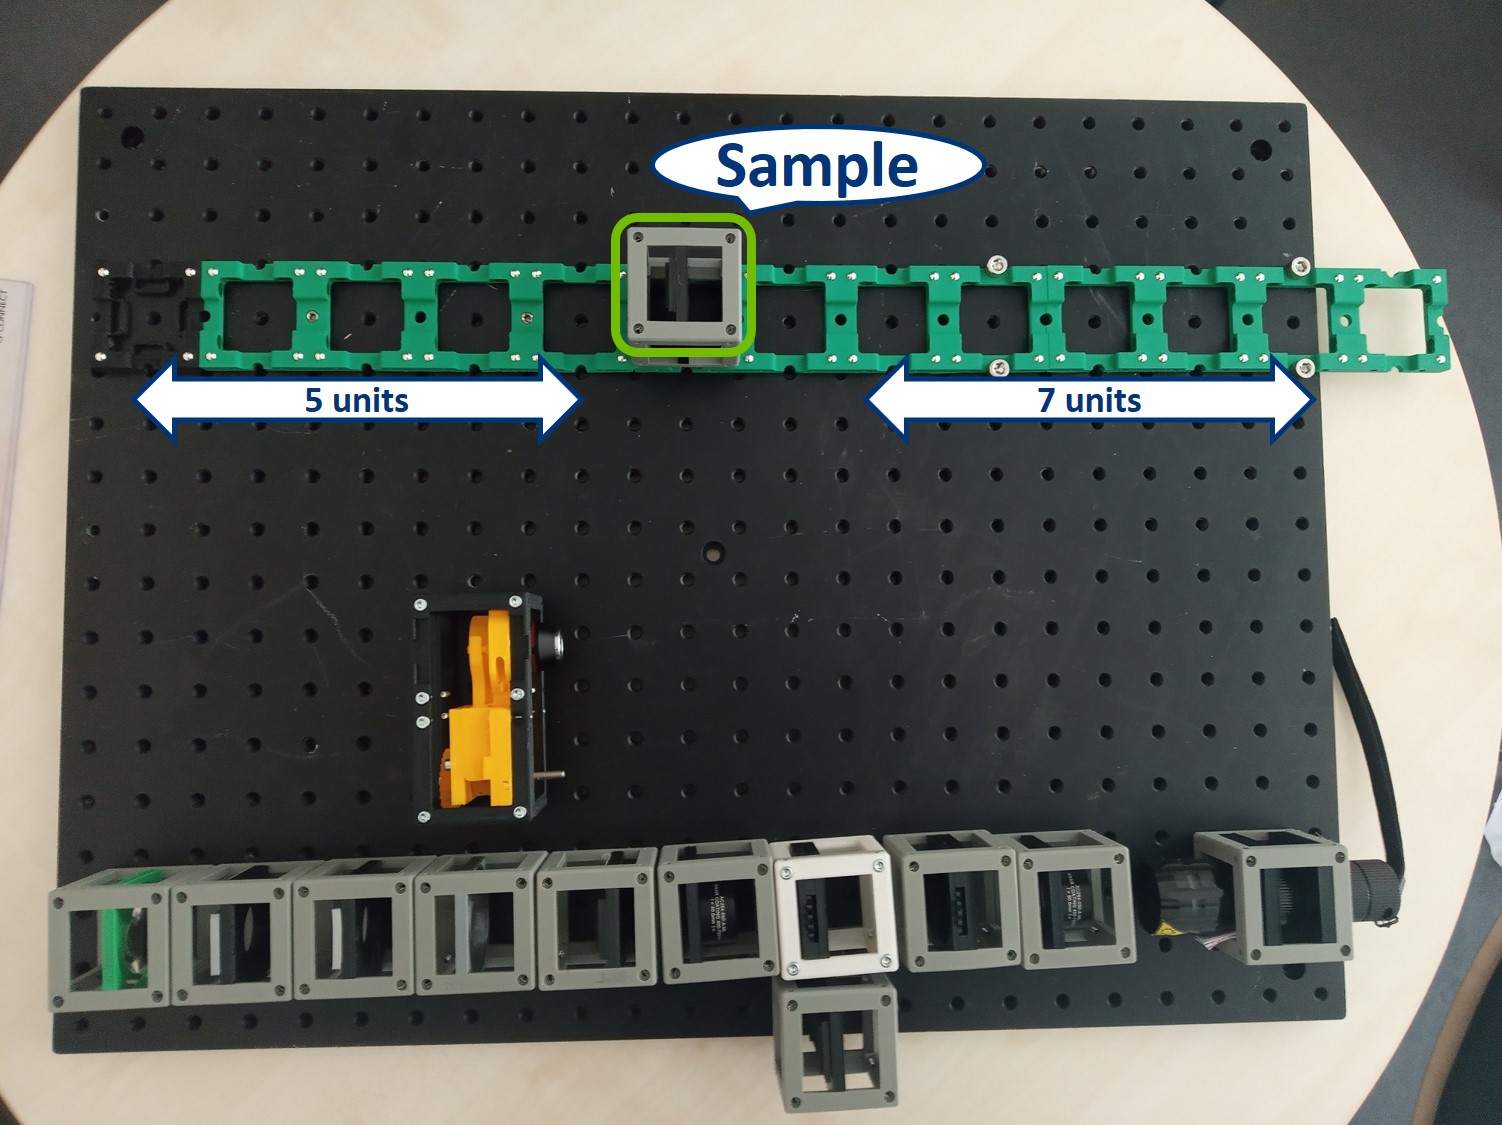
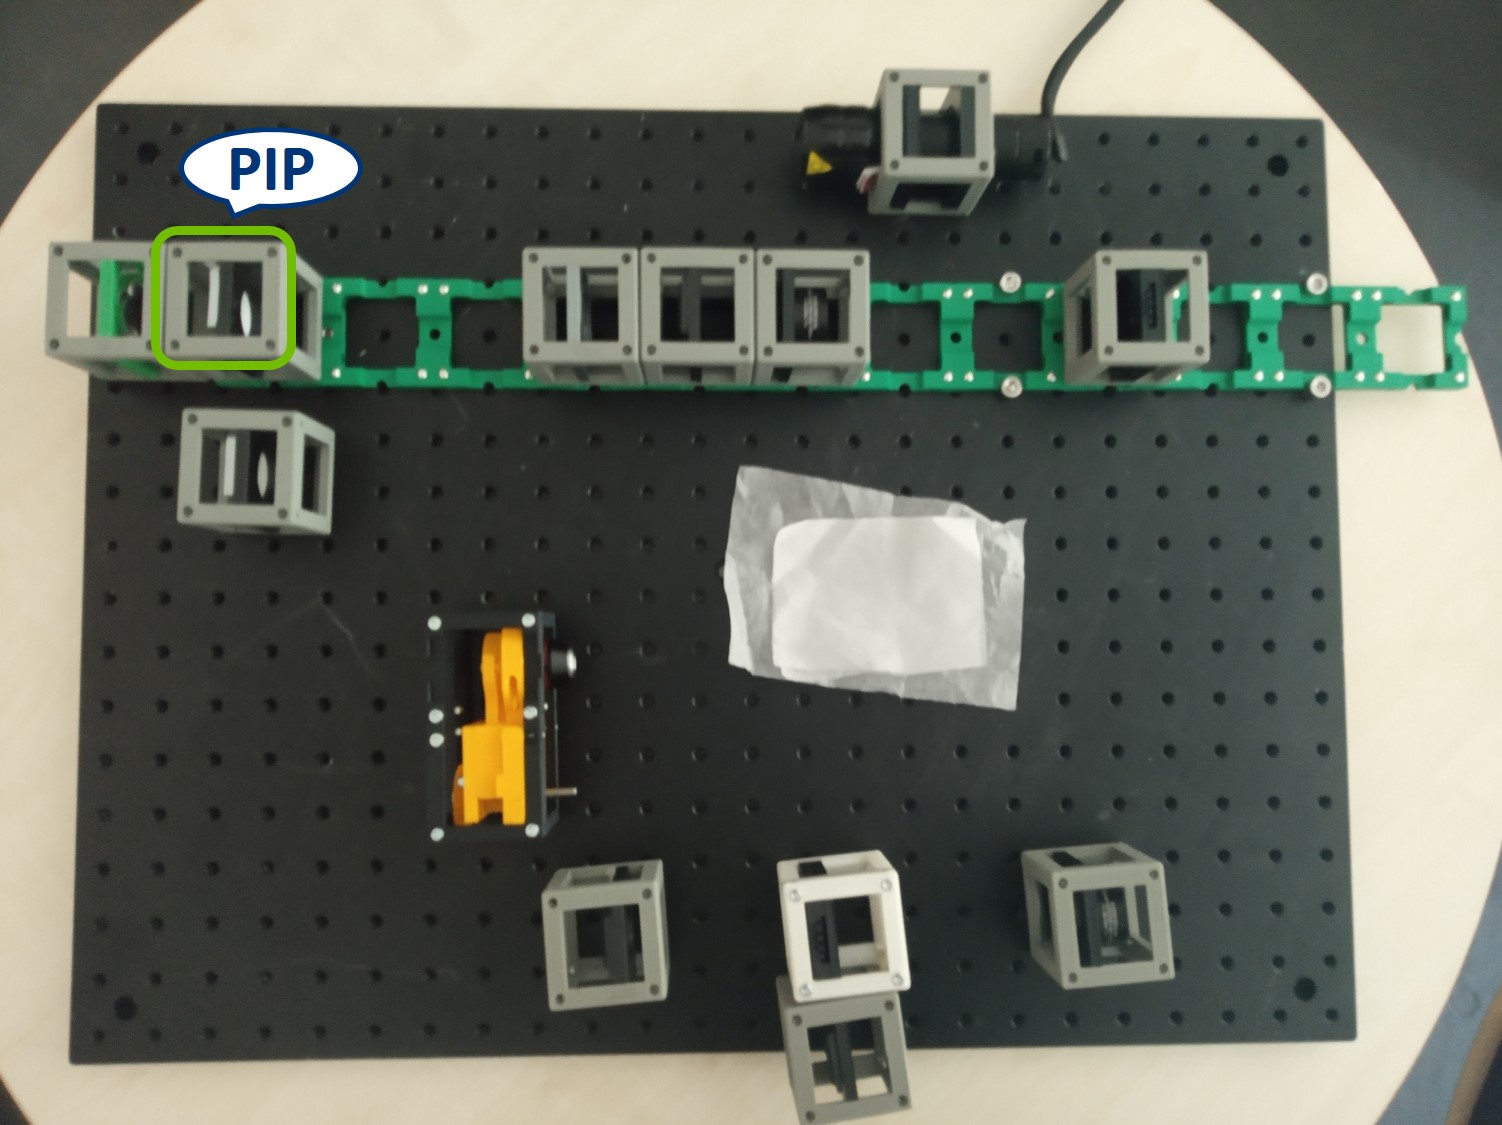
Place the objective lens. It is a single plano-convex lens with f' = 35 mm.
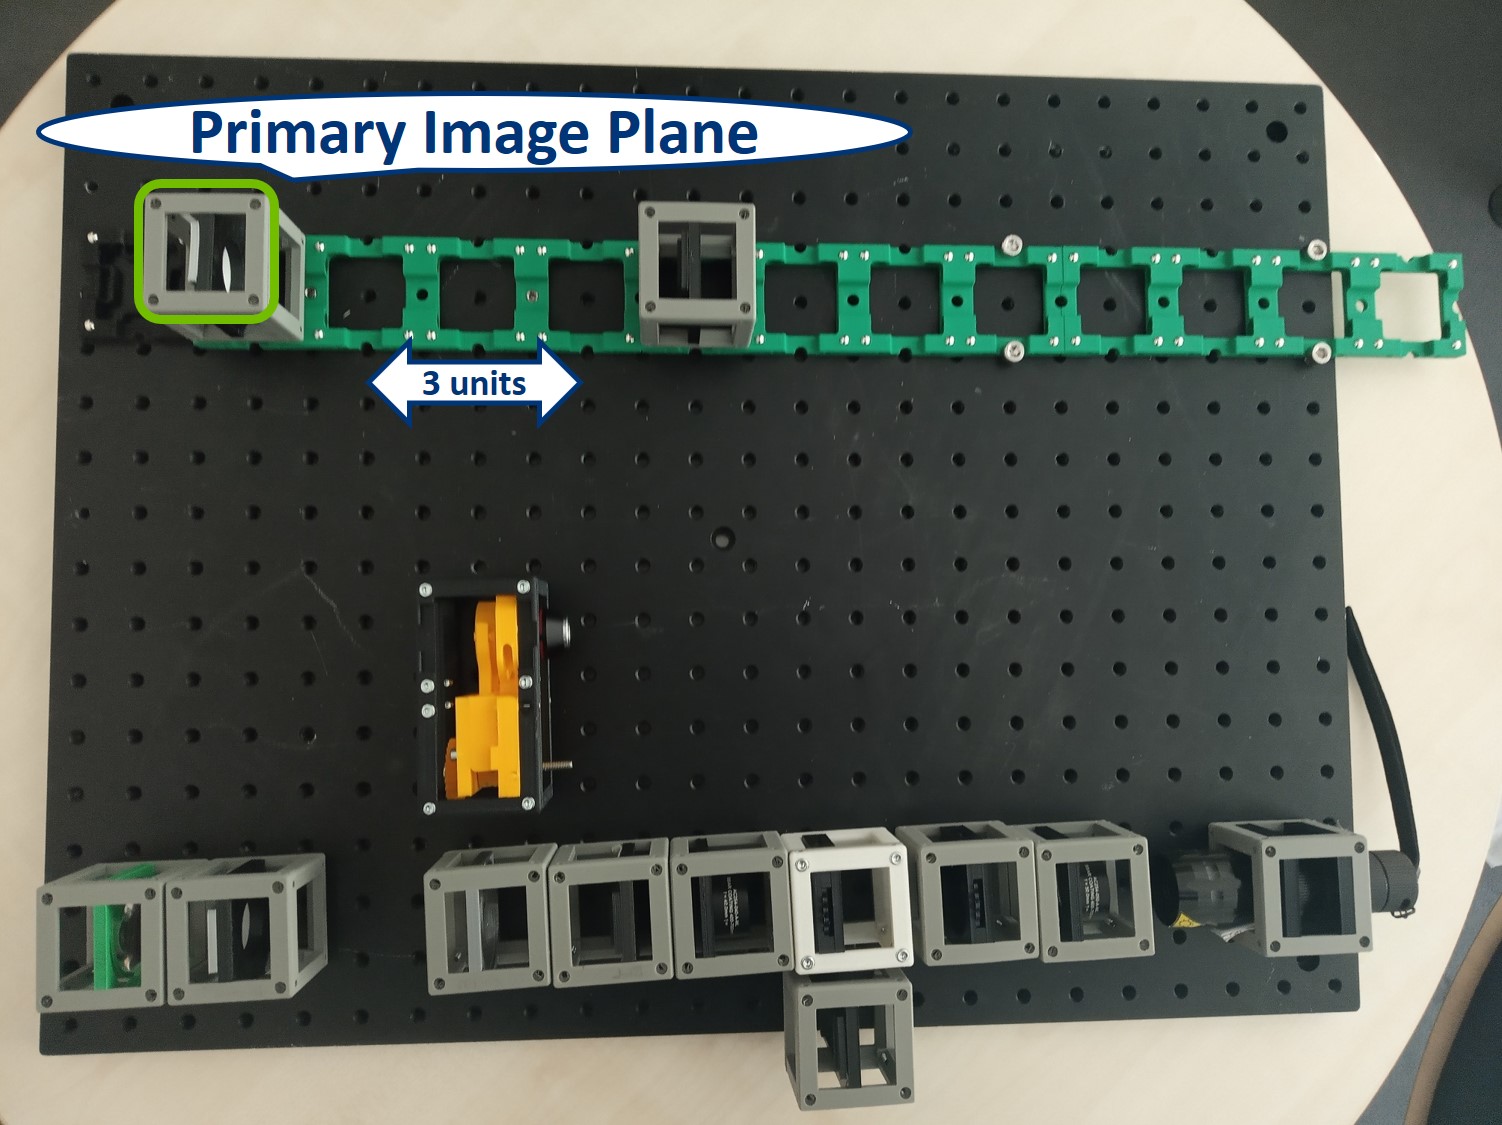
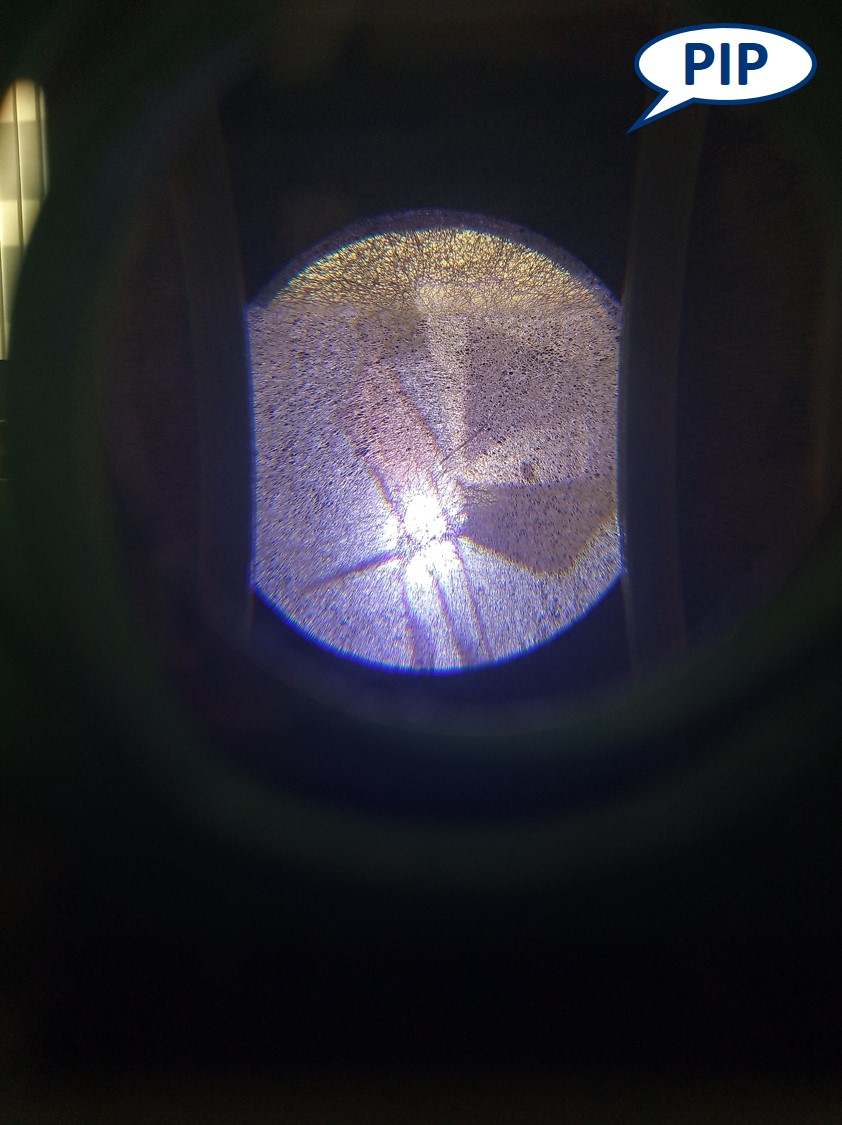
Use direct illumination from the flashlight with! its lens. Adjust the position of the objective lens - focus the image on PIP by moving the lens back or forth.
- Focussing Trick: Firstly move the whole objective lens cube in one direction (away from the sample). If the image sharpness in PIP improves, slide the insert in that direction. If the image sharpness in PIP get worse, slide the insert in the opposite direction, towards the sample. Continue until you get a focussed image of your sample on the PIP.
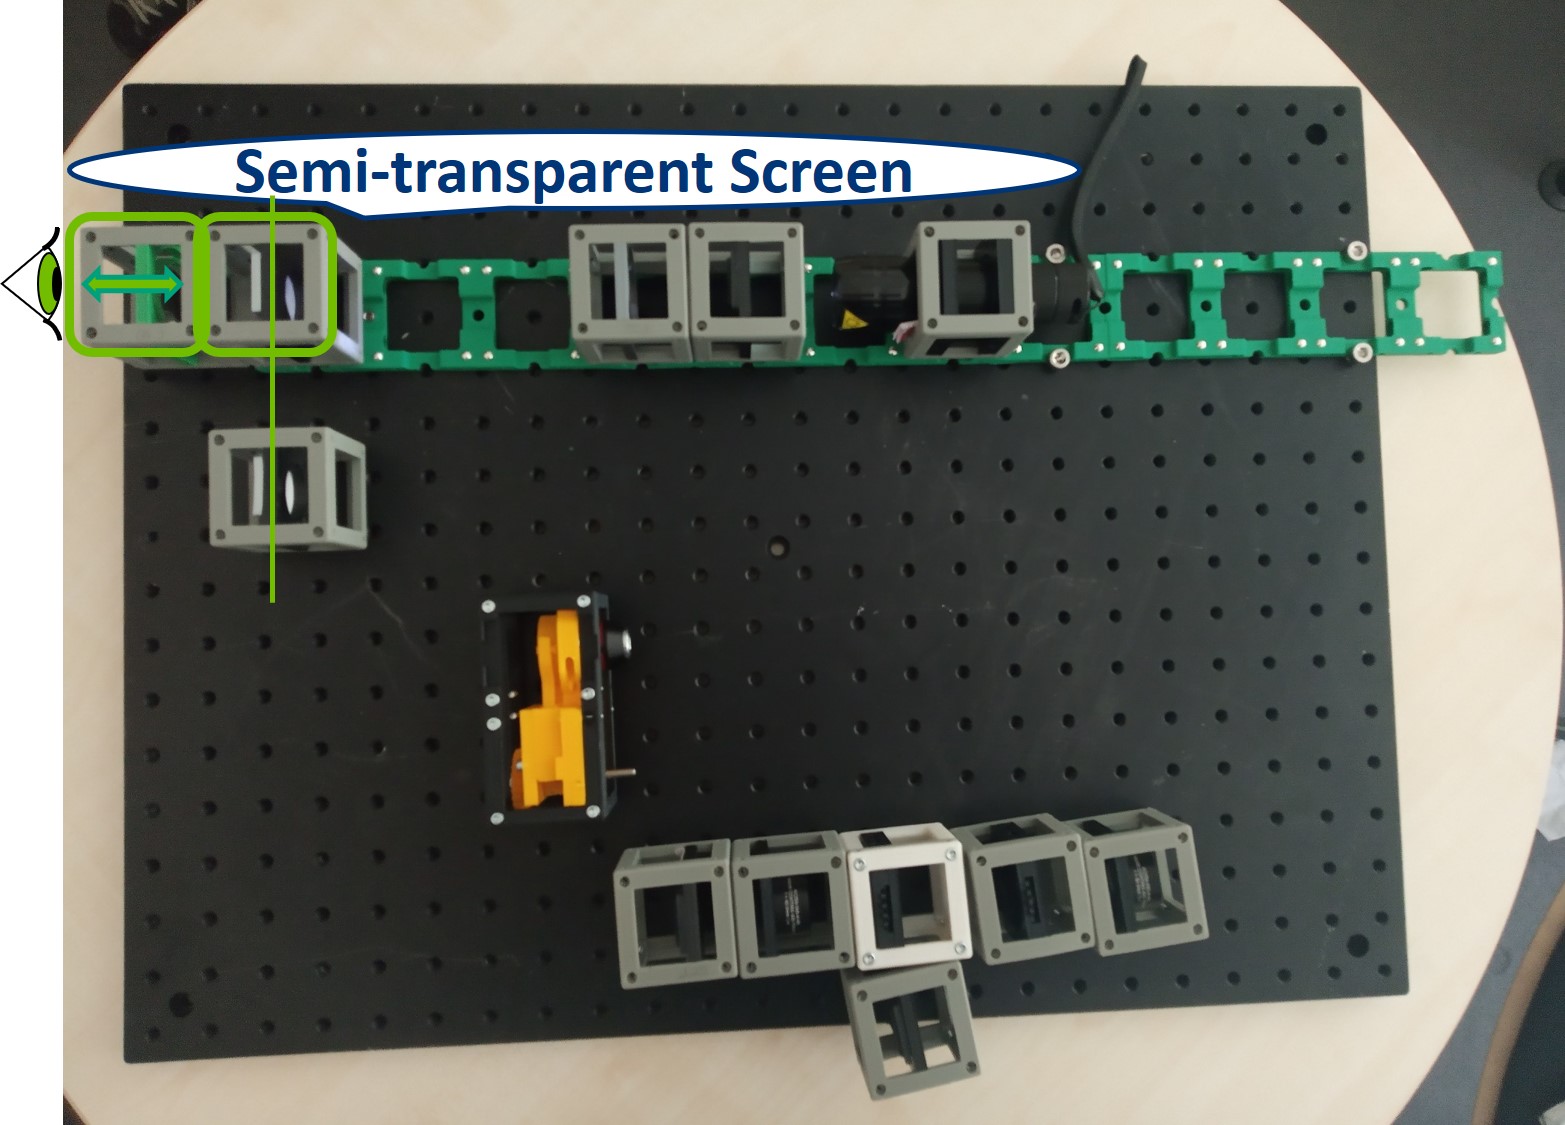
- Place the eyepiece lens behind the PIP. It is a single plano-convex lens with f' = 40 mm. Exchange the PIP screen with a semitransparent screen (lens tissue). While looking through the eyepiece, focus it on the PIP. Use the Focussing Trick again. The position within the cube of the sample holder for the paper screen and for the semitransparent screen has to be identical.
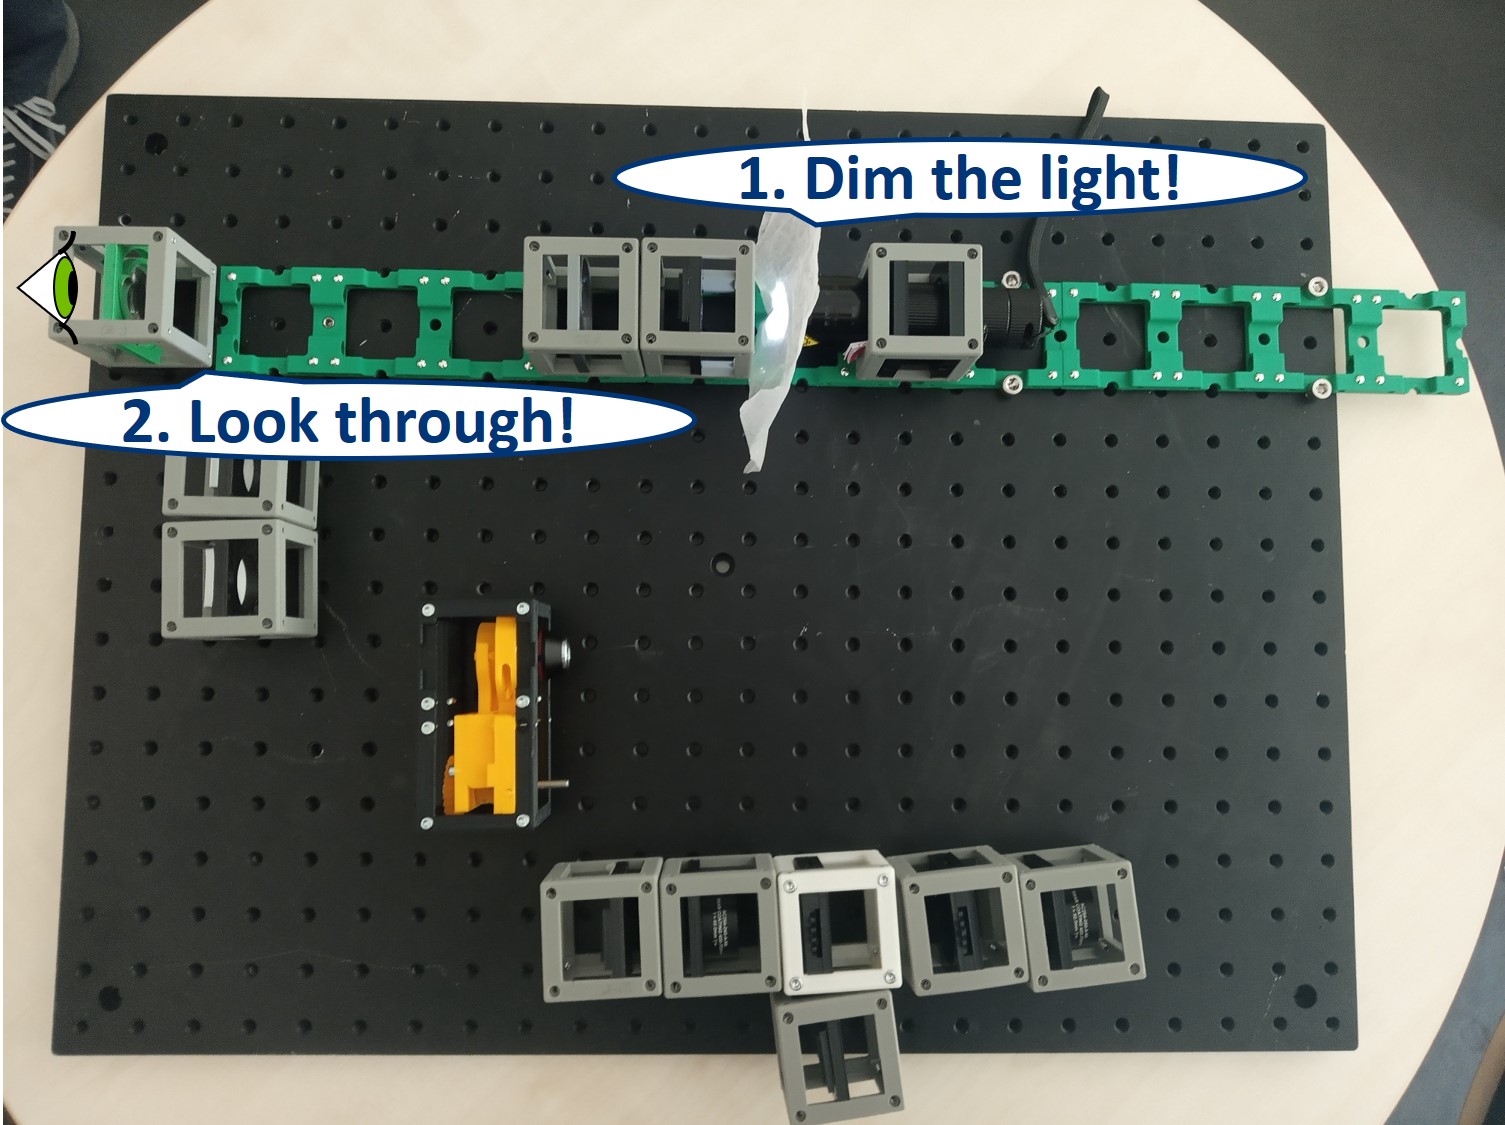
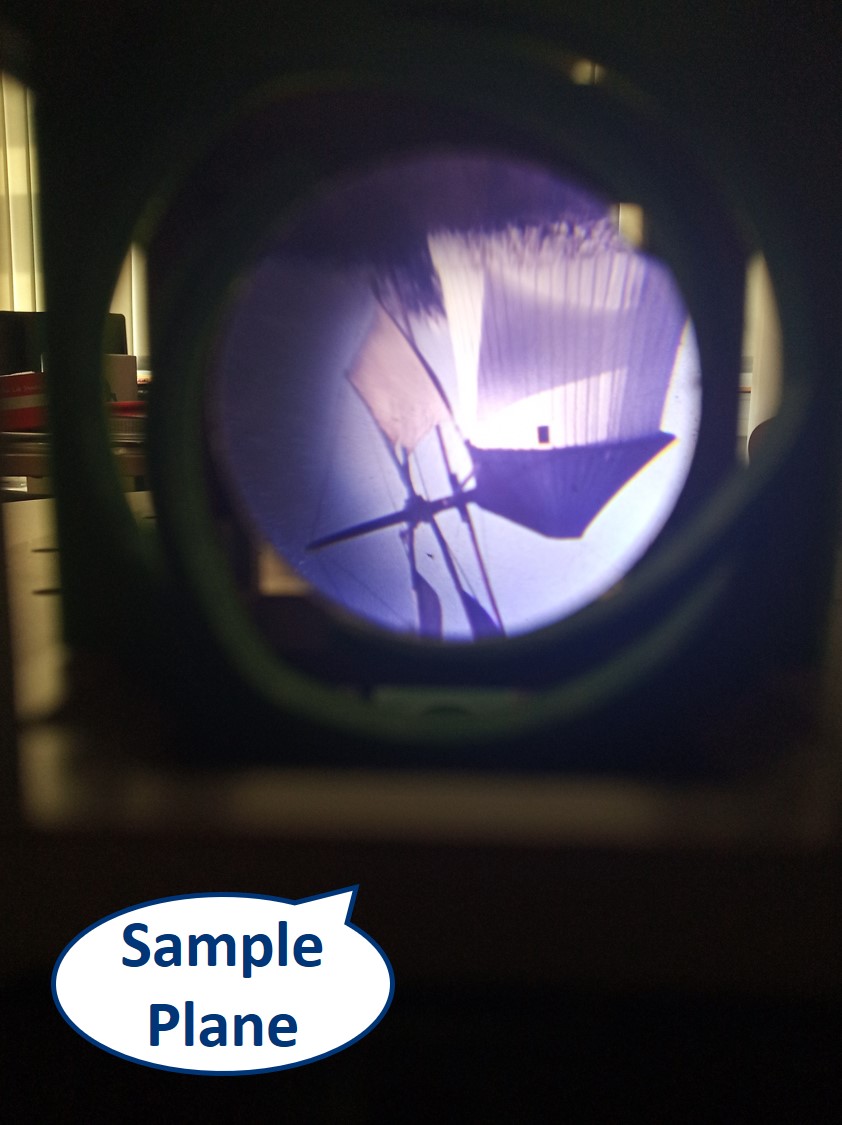
- Take away the screen from PIP. To dim the flashlight, put a piece of lens tissue in front of it. Look through the eyepiece - you should see a sharp image of your sample.
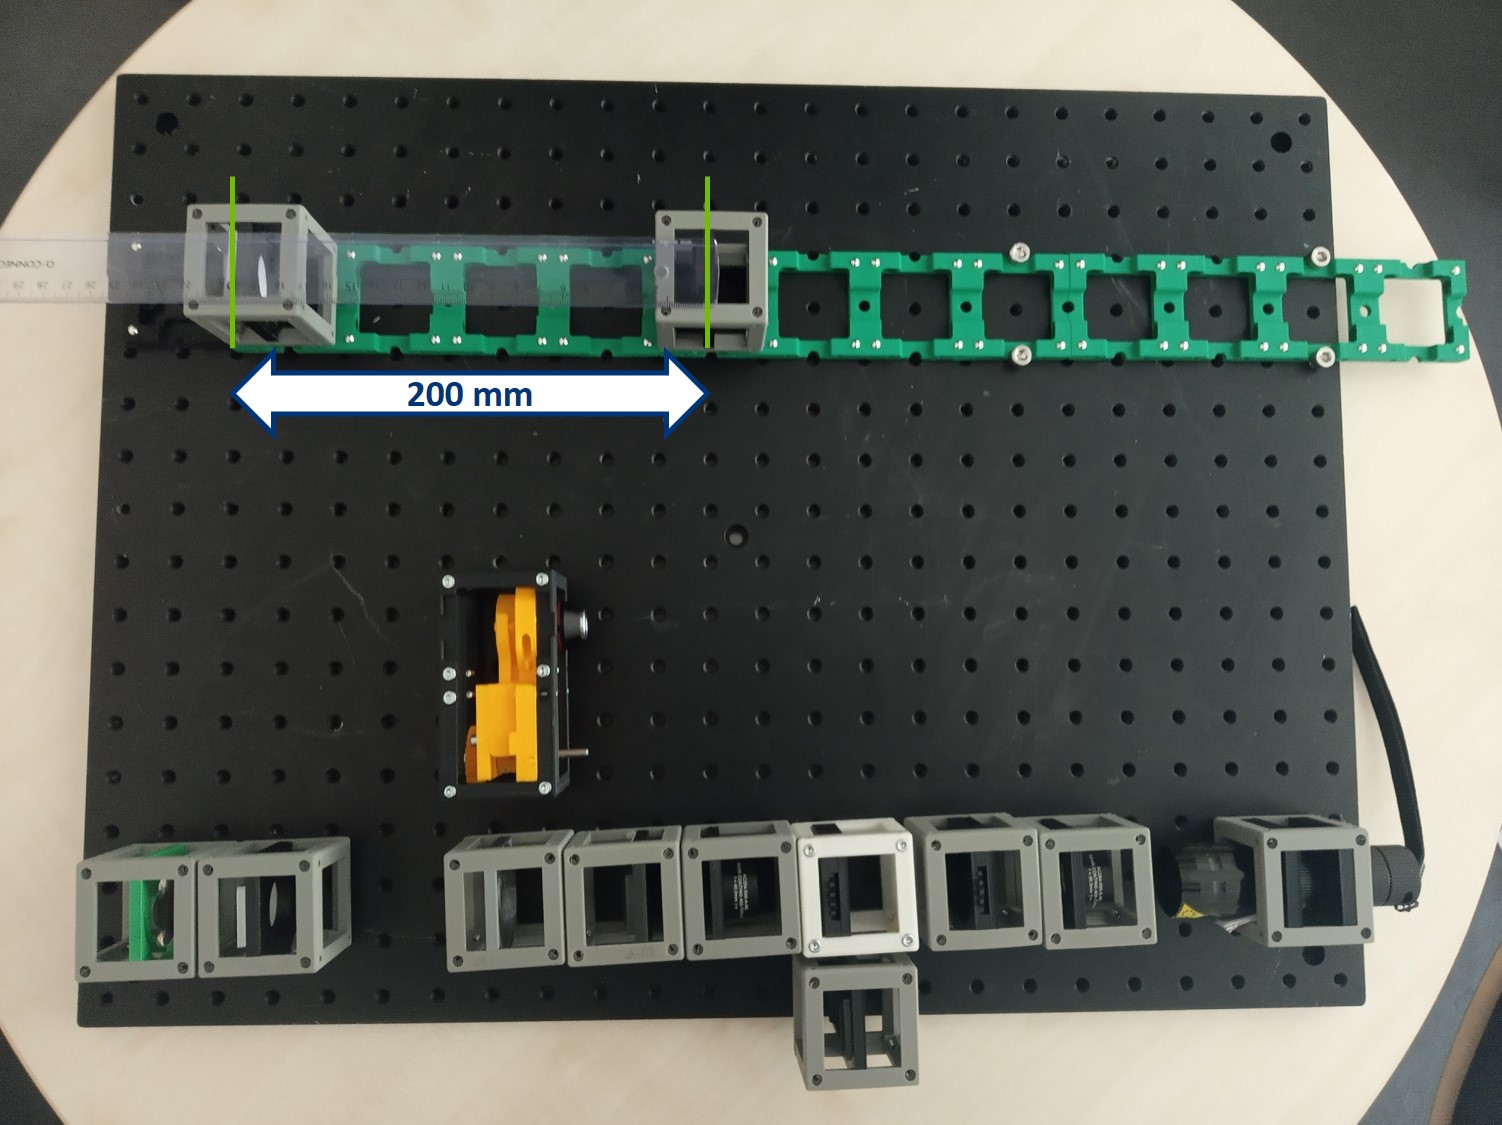
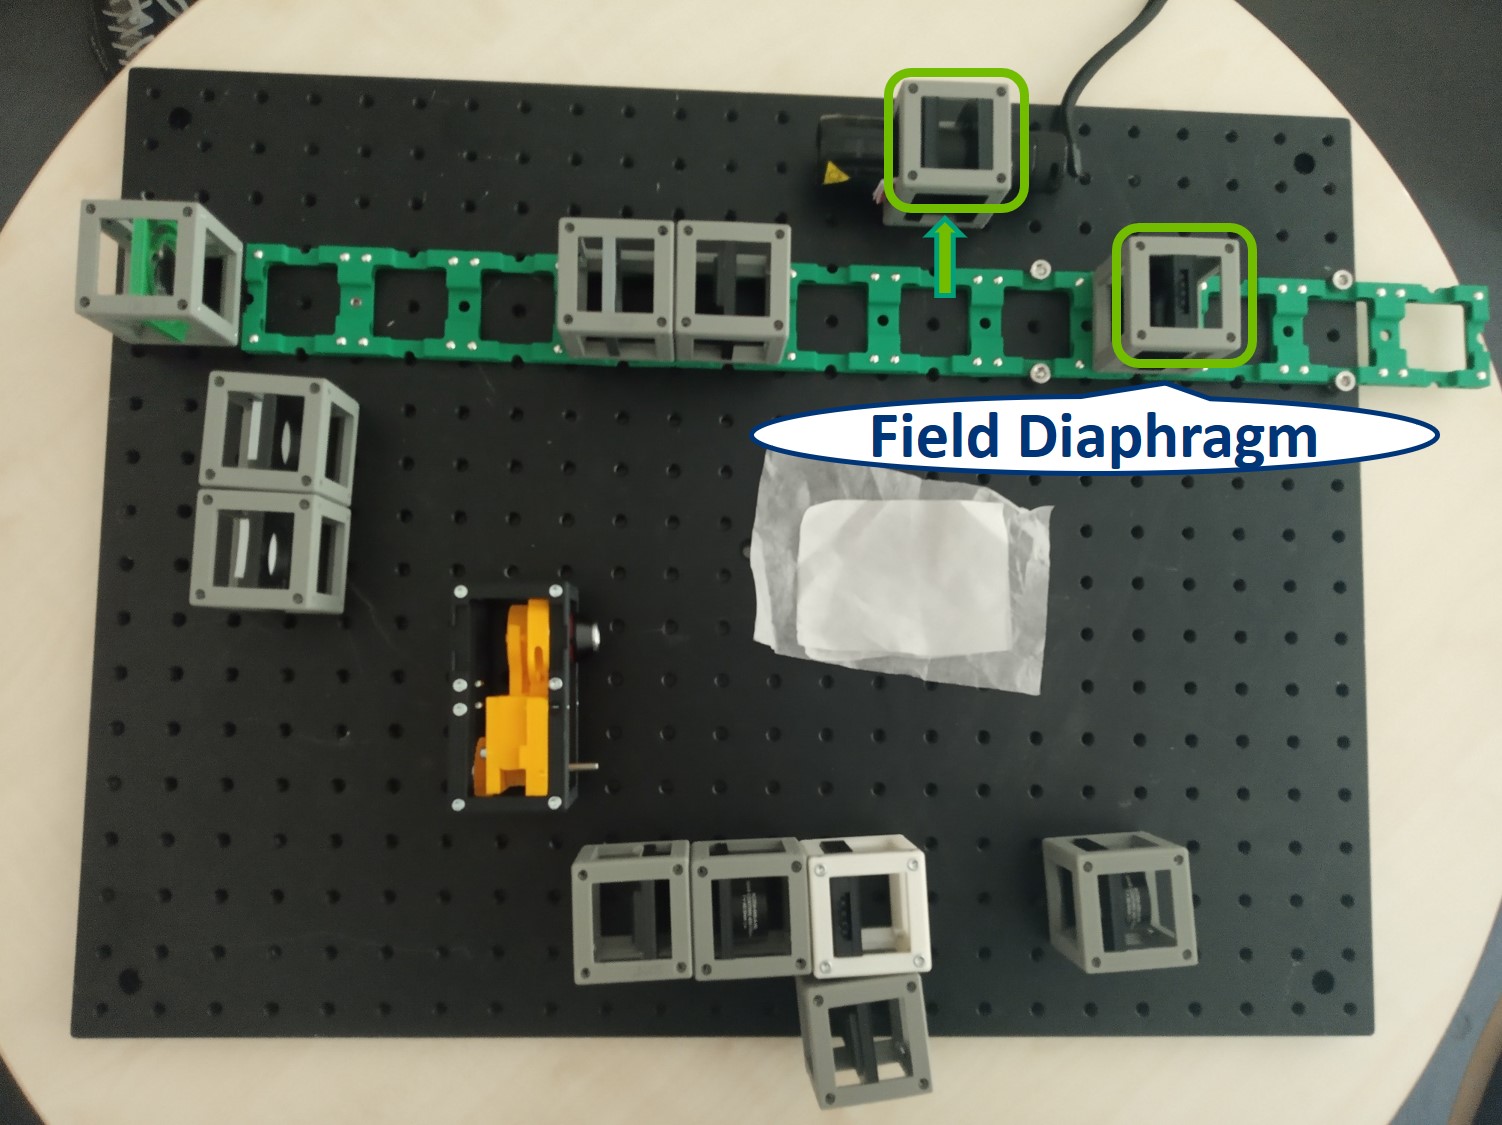
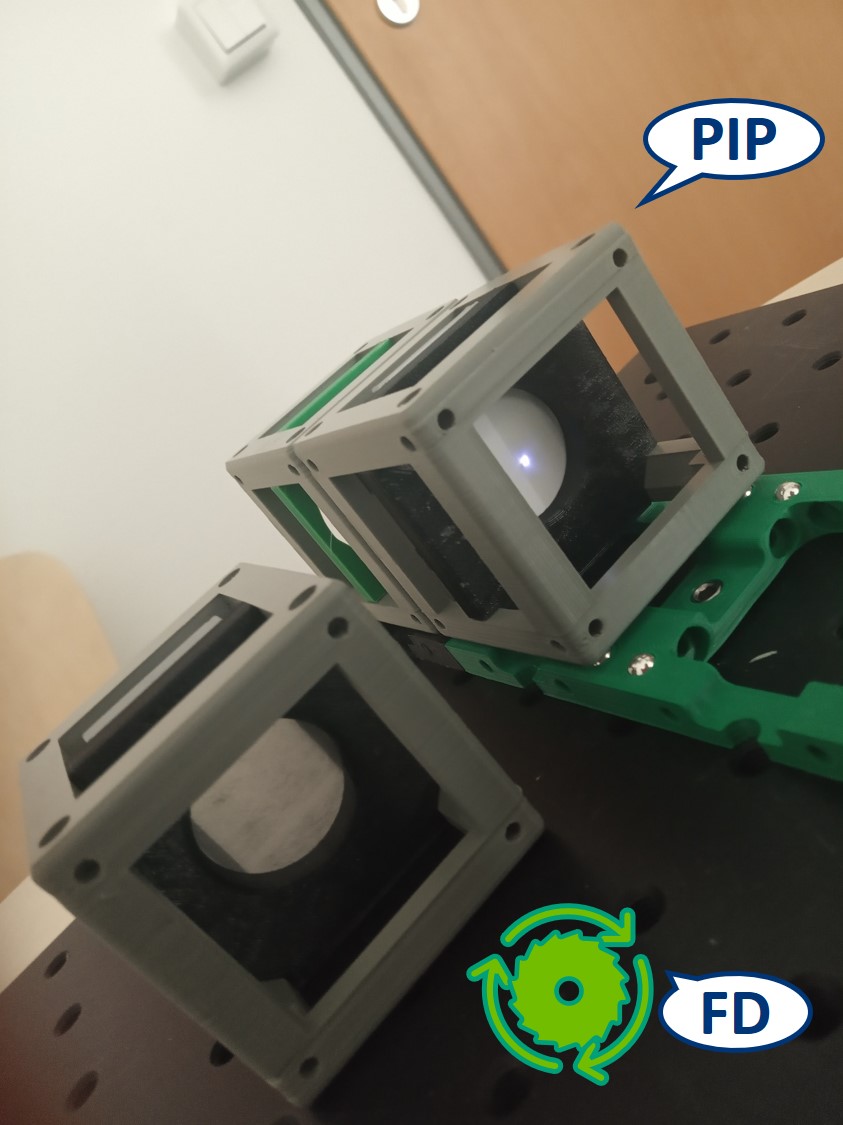
- Place the Field Diaphragm (FD). The position was chosen in order to work well with the availible lenss.
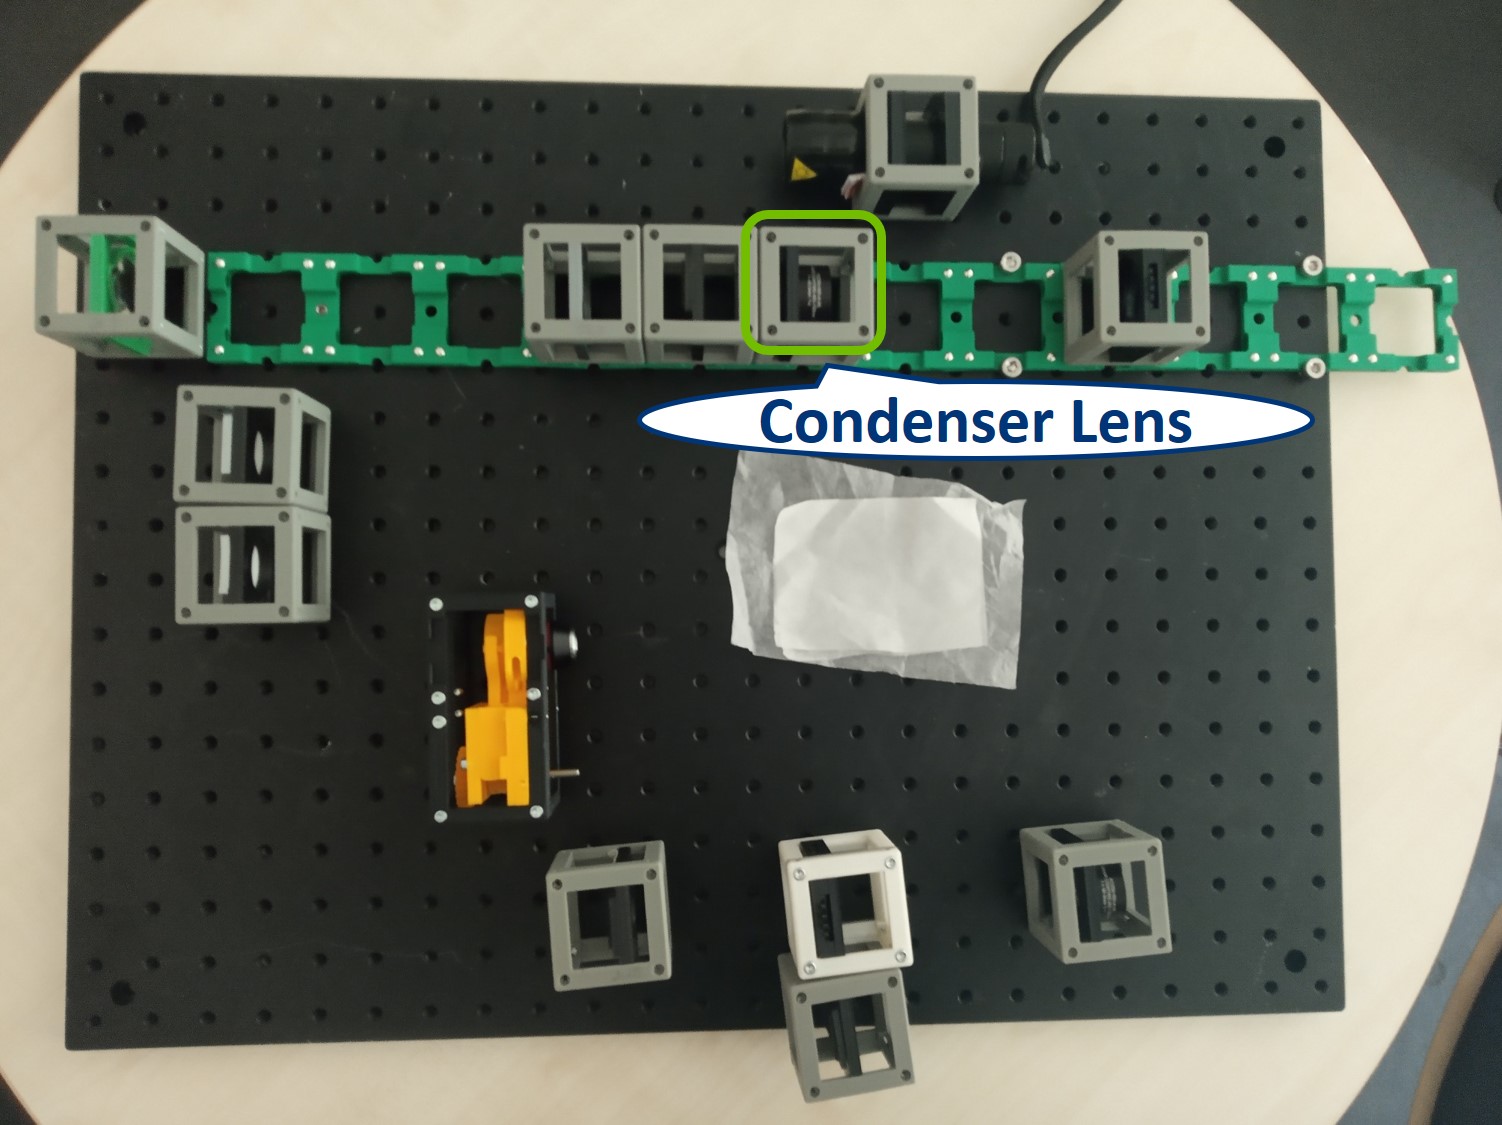
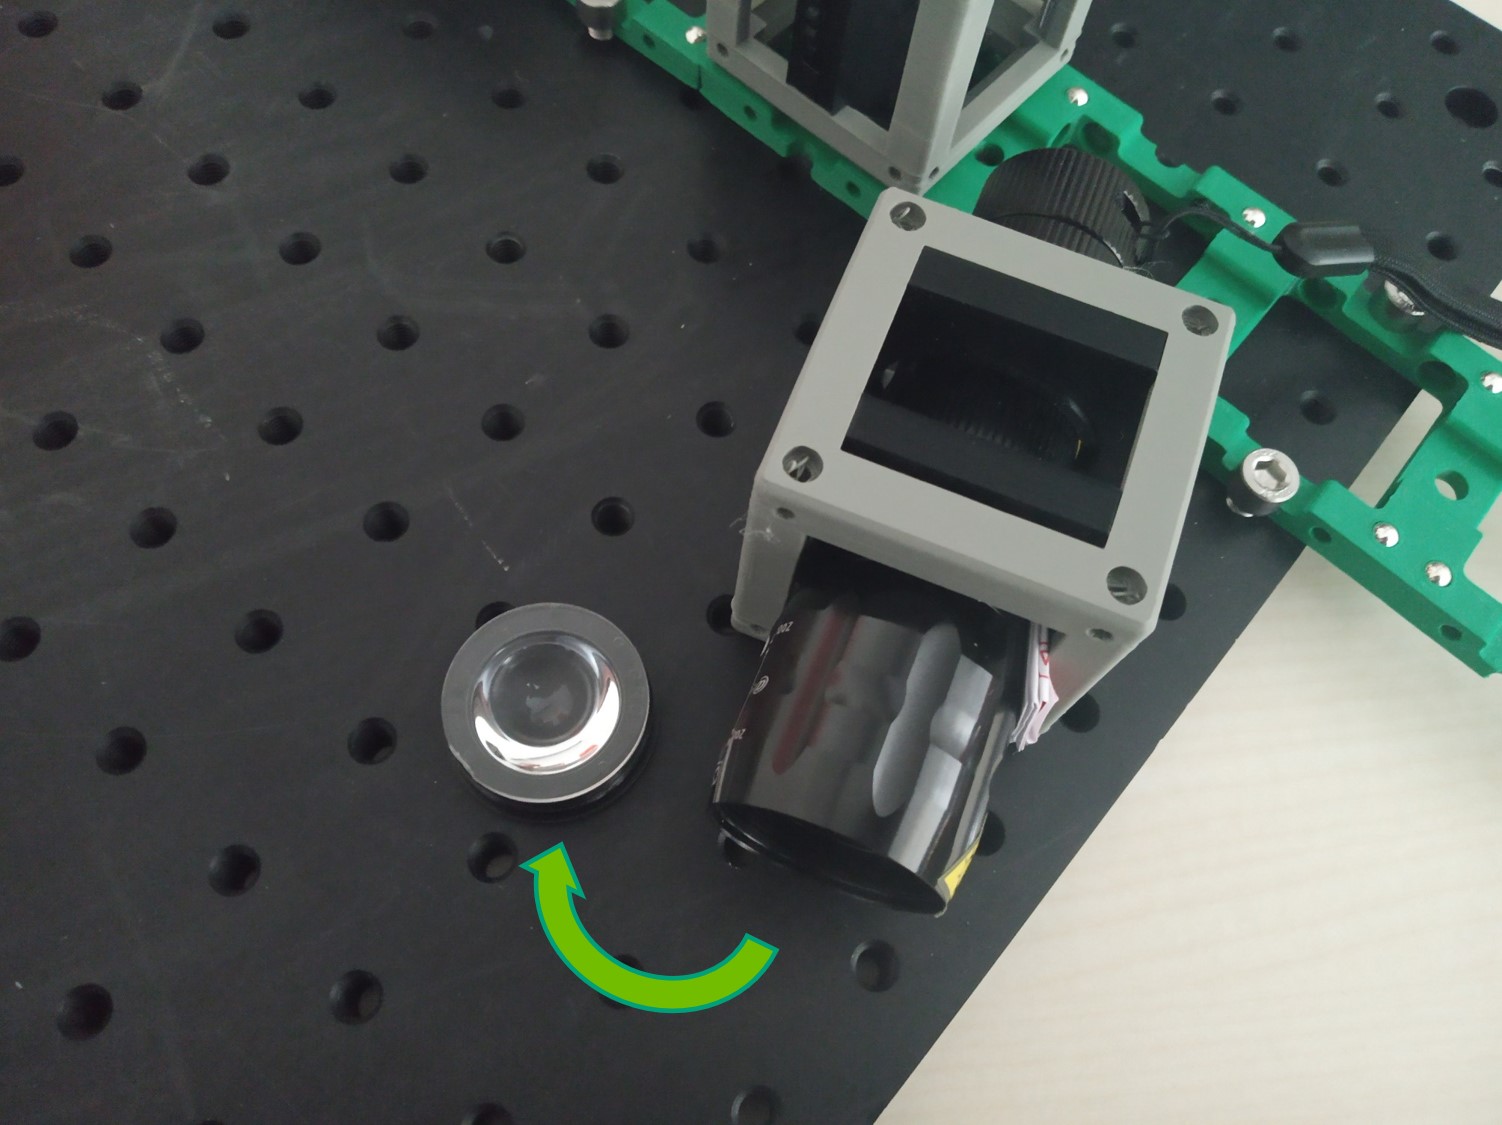
Place the condenser lens. It is a single plano-convex lens with f' = 40 mm.
Place the PIP screen back to its position.
Place the flashlight on one end of the baseplate. Close the FD.
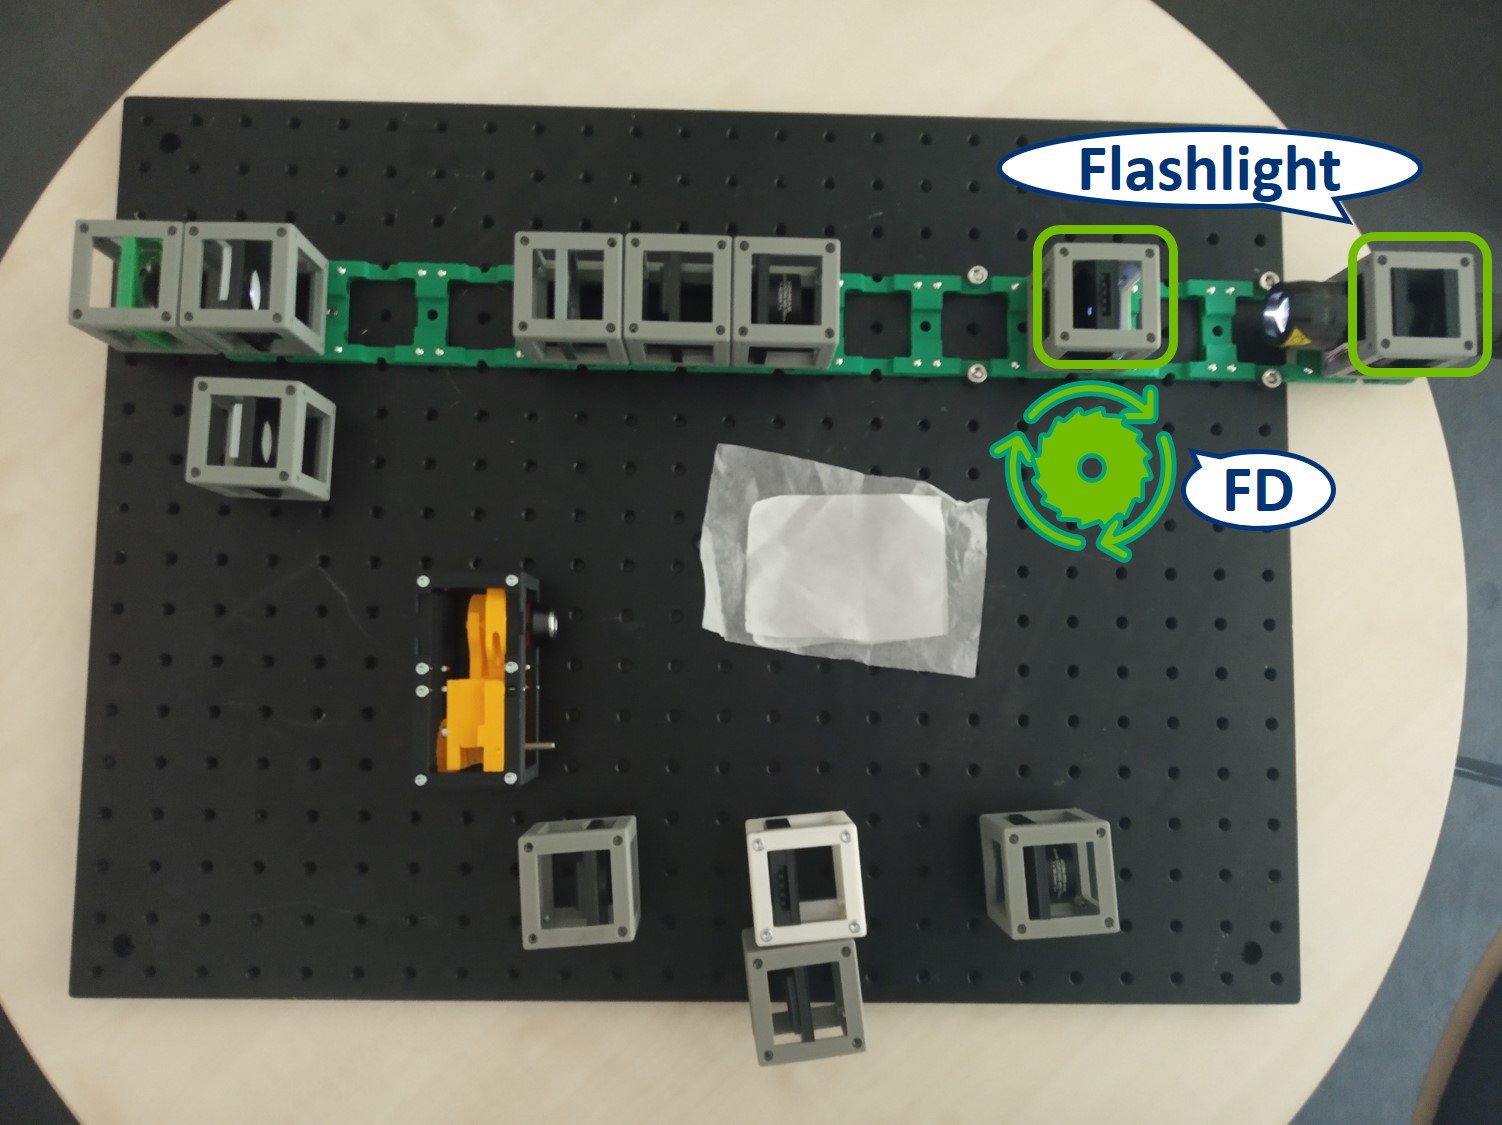
Adjust the position of the condenser lens - focus the image of the FD on PIP by moving the lens back or forth (Focussing Trick). Once you see a sharp image of the closed FD on the screen in PIP, open and close the aperture and observe its effect.
Remove the screen, look throught the eyepiece and check whether you see a sharp image of the closed FD.
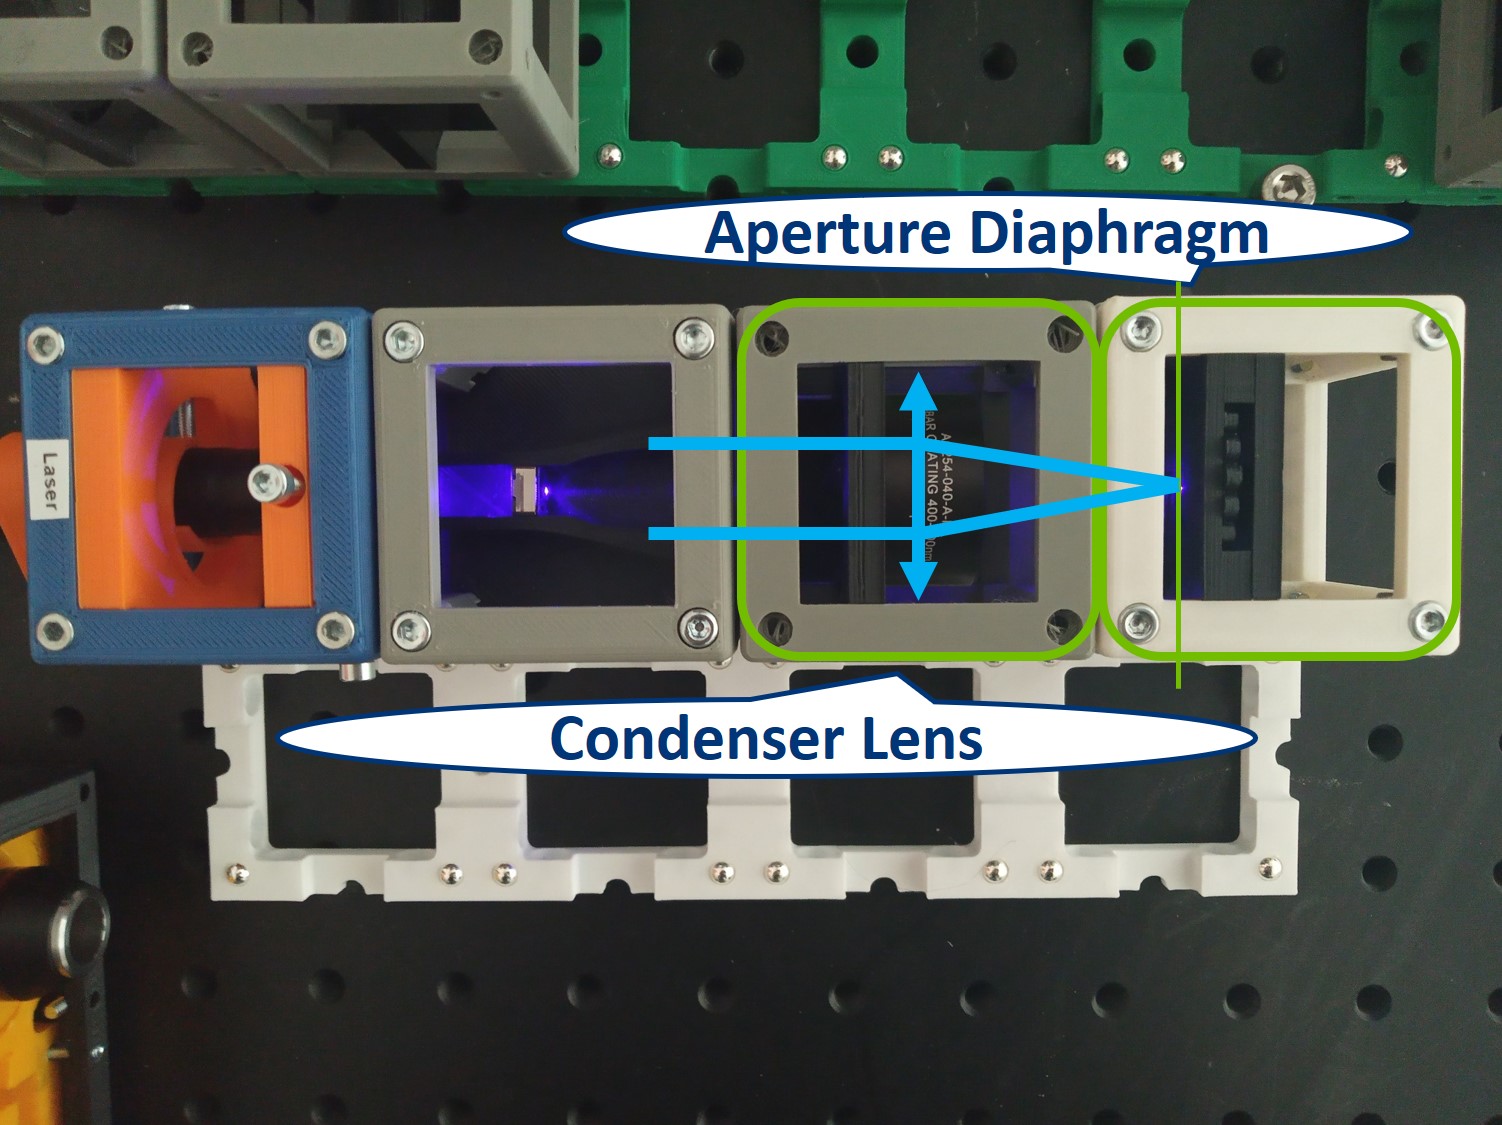
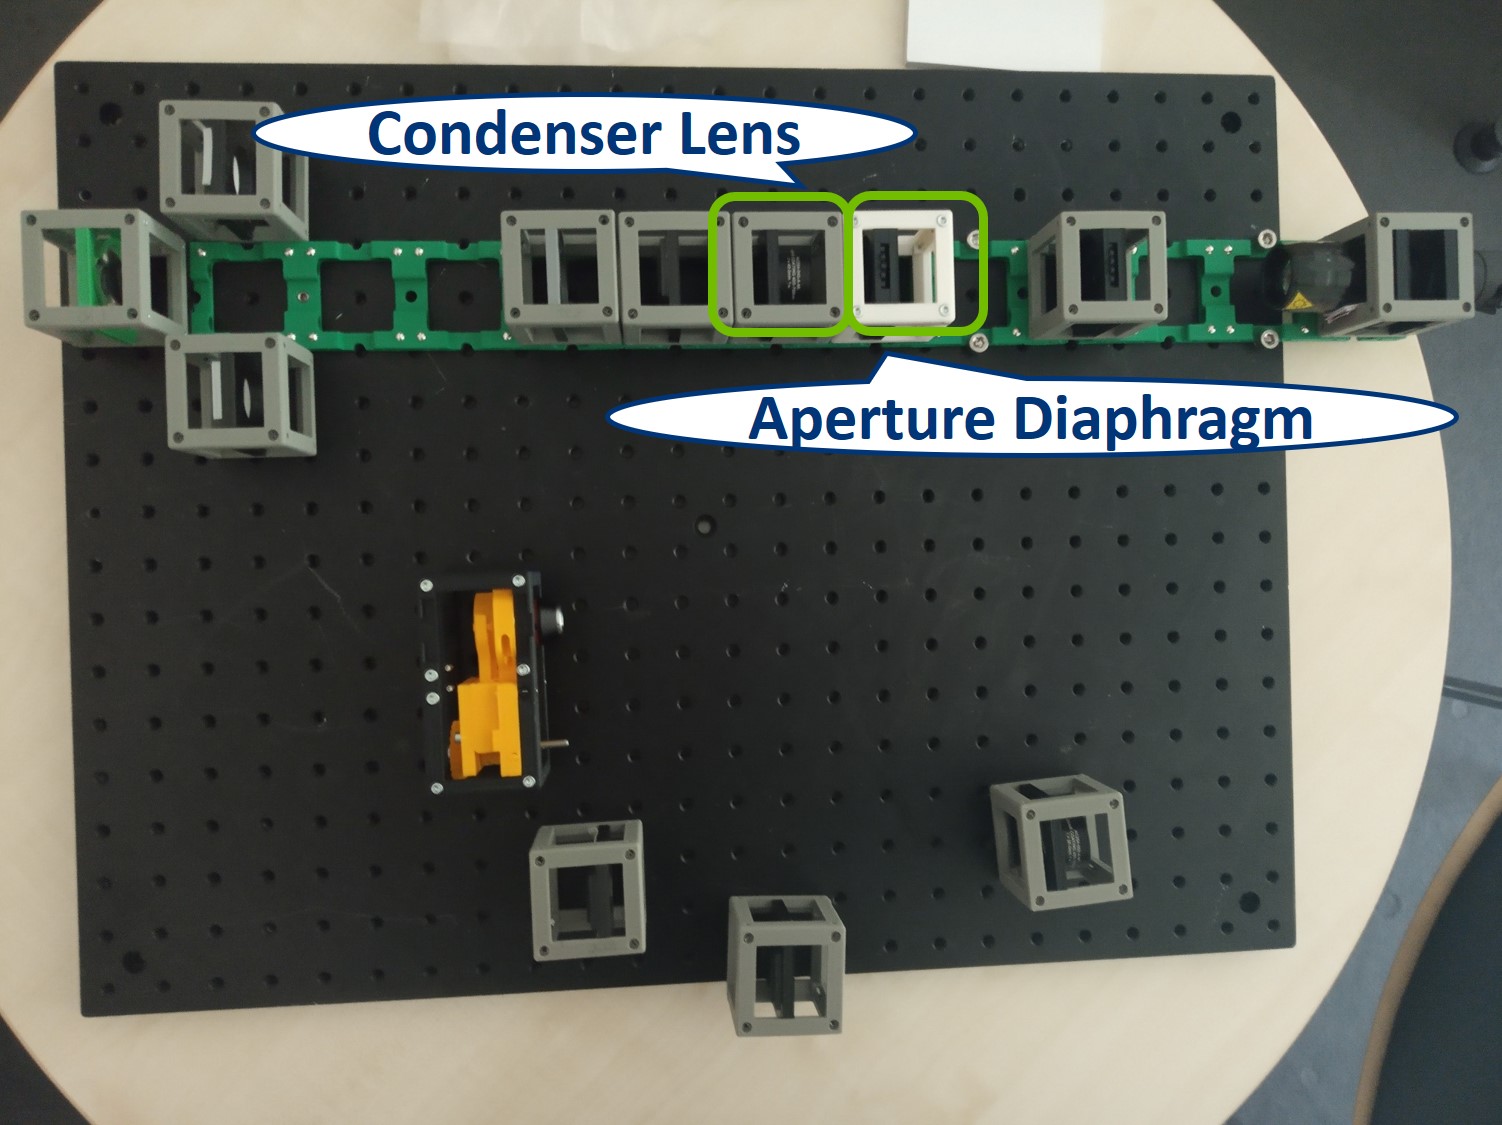
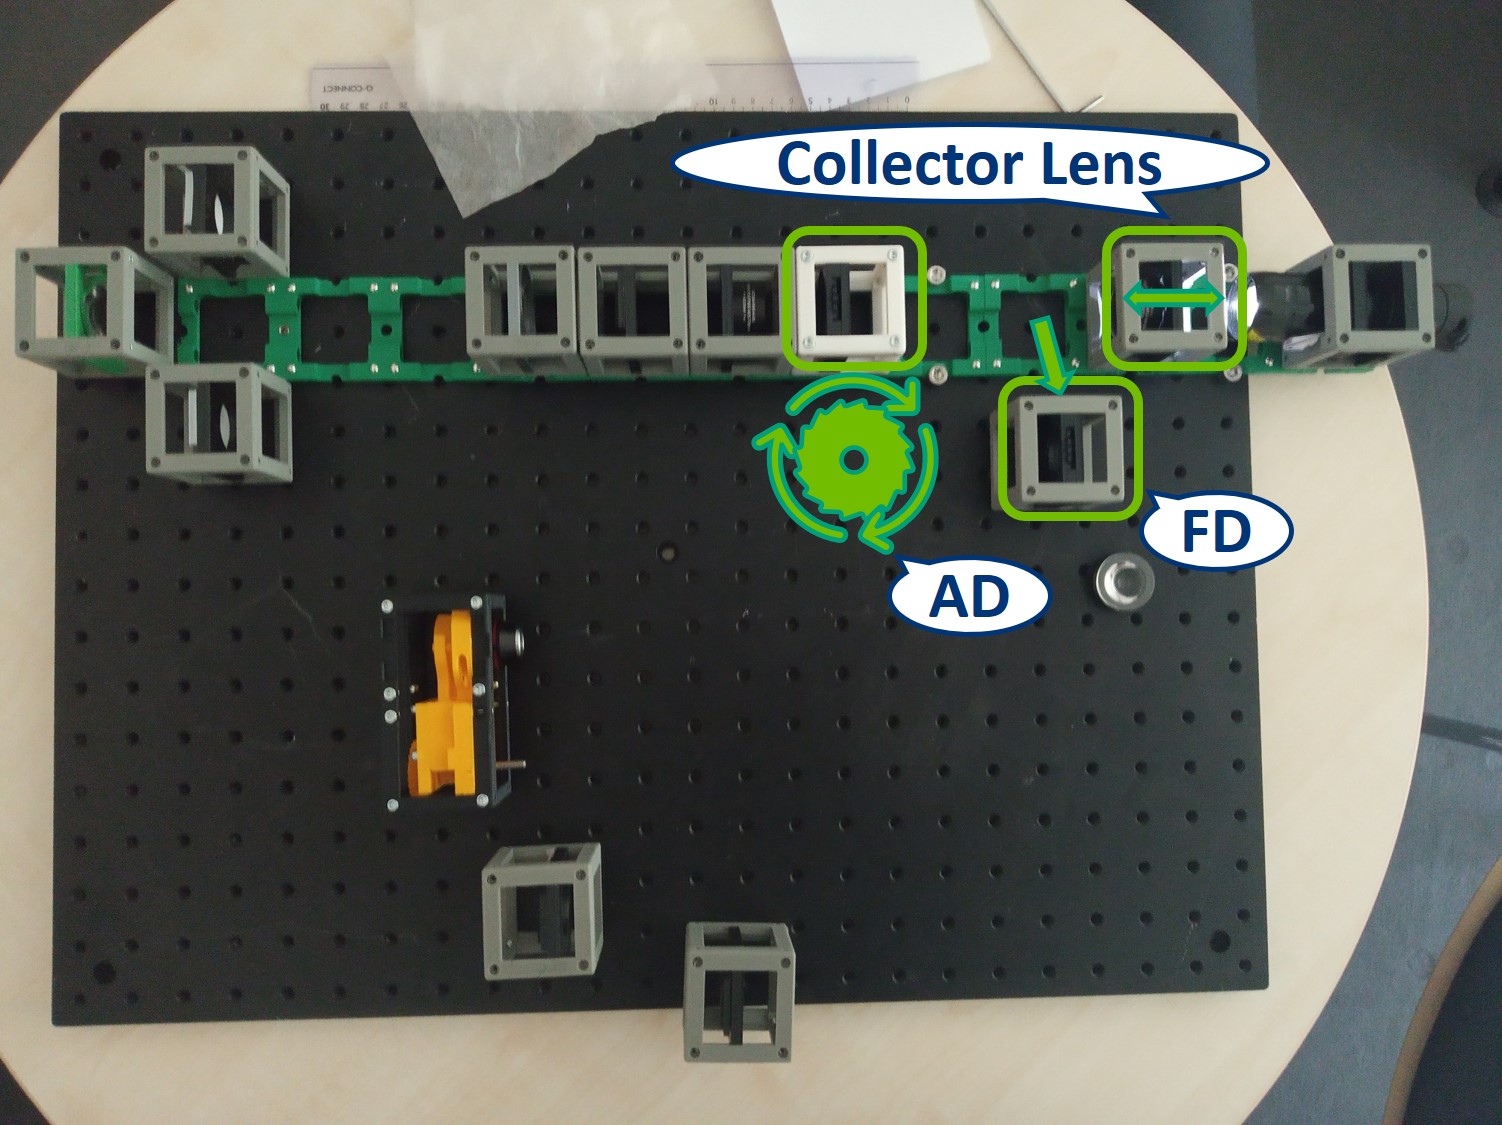
Place the Aperture Diaphragm (AD) into the Front Focal Plane (FFP) of the condenser lens (40 mm).
Focal Plane Trick - In case you don't know where exactly the FFP is, use this:
Use the Laser Cube with Beam Expander Cube to produce a collimated beam. Place the condenser lens in the collimated beam and find focus.
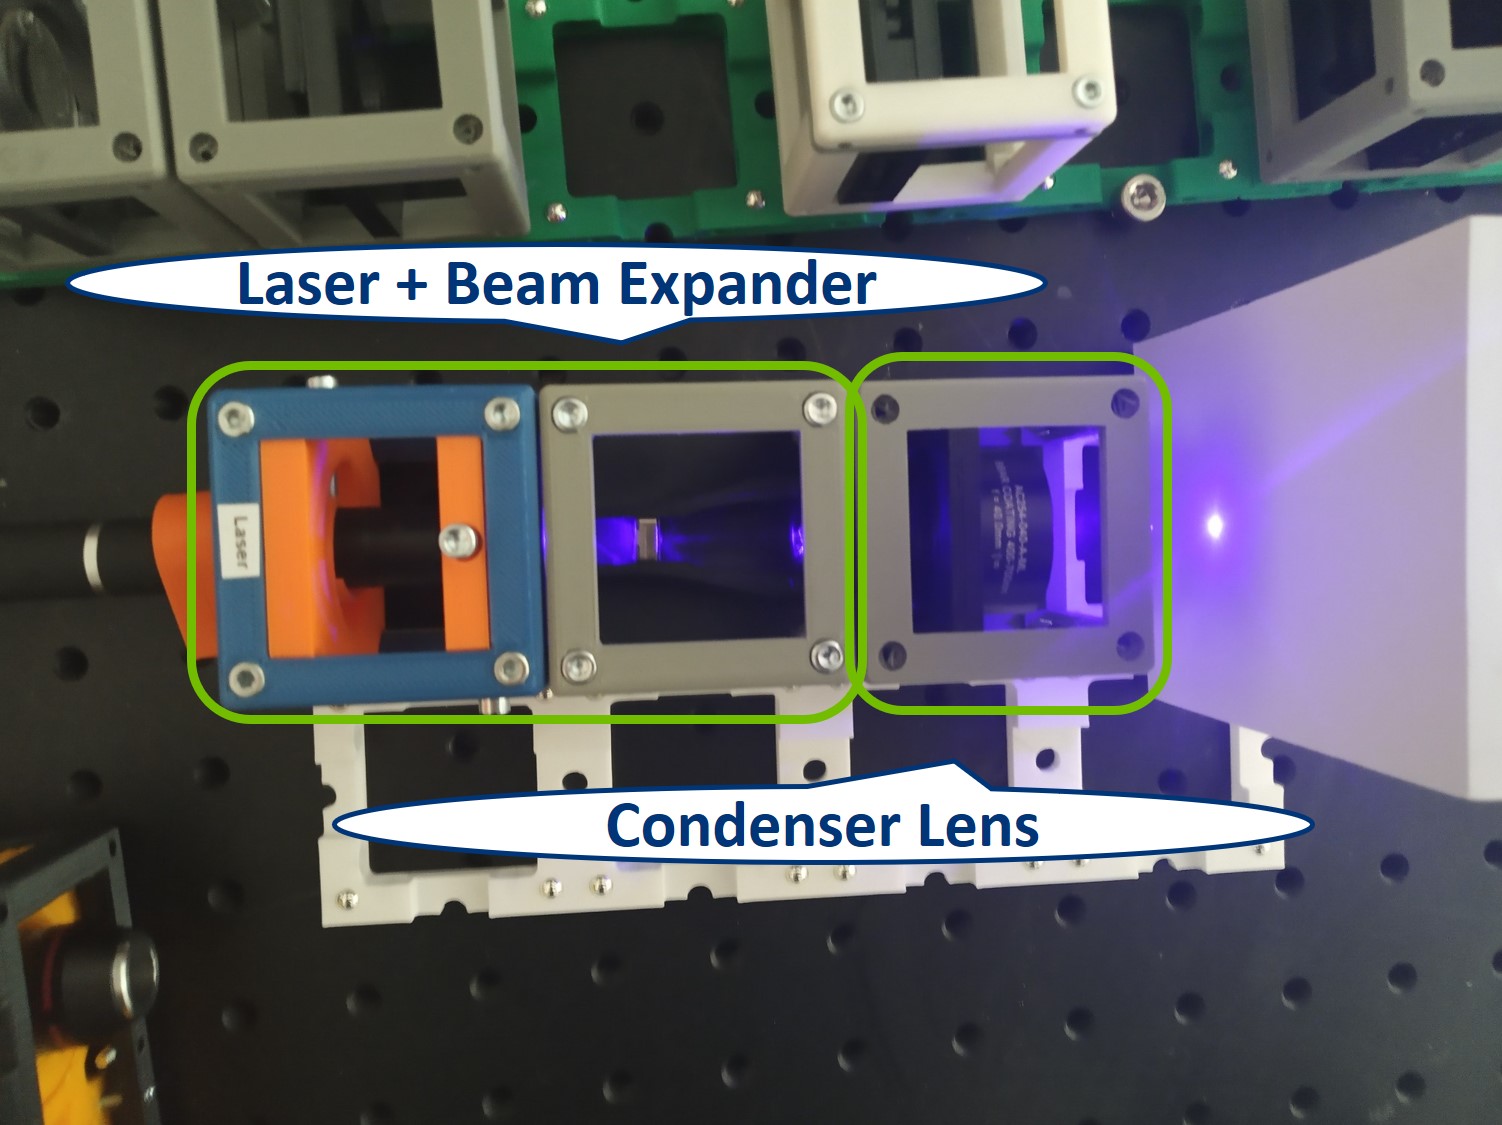
Place the AD into the same plane - slide in within the cube. Careful - push the Aperture from one side to keep it together.

- Remove the lens of the flashlight. The position of the flashlight remains.
- Place the collector lens. It is a single plano-convex lens with f' = 50 mm.
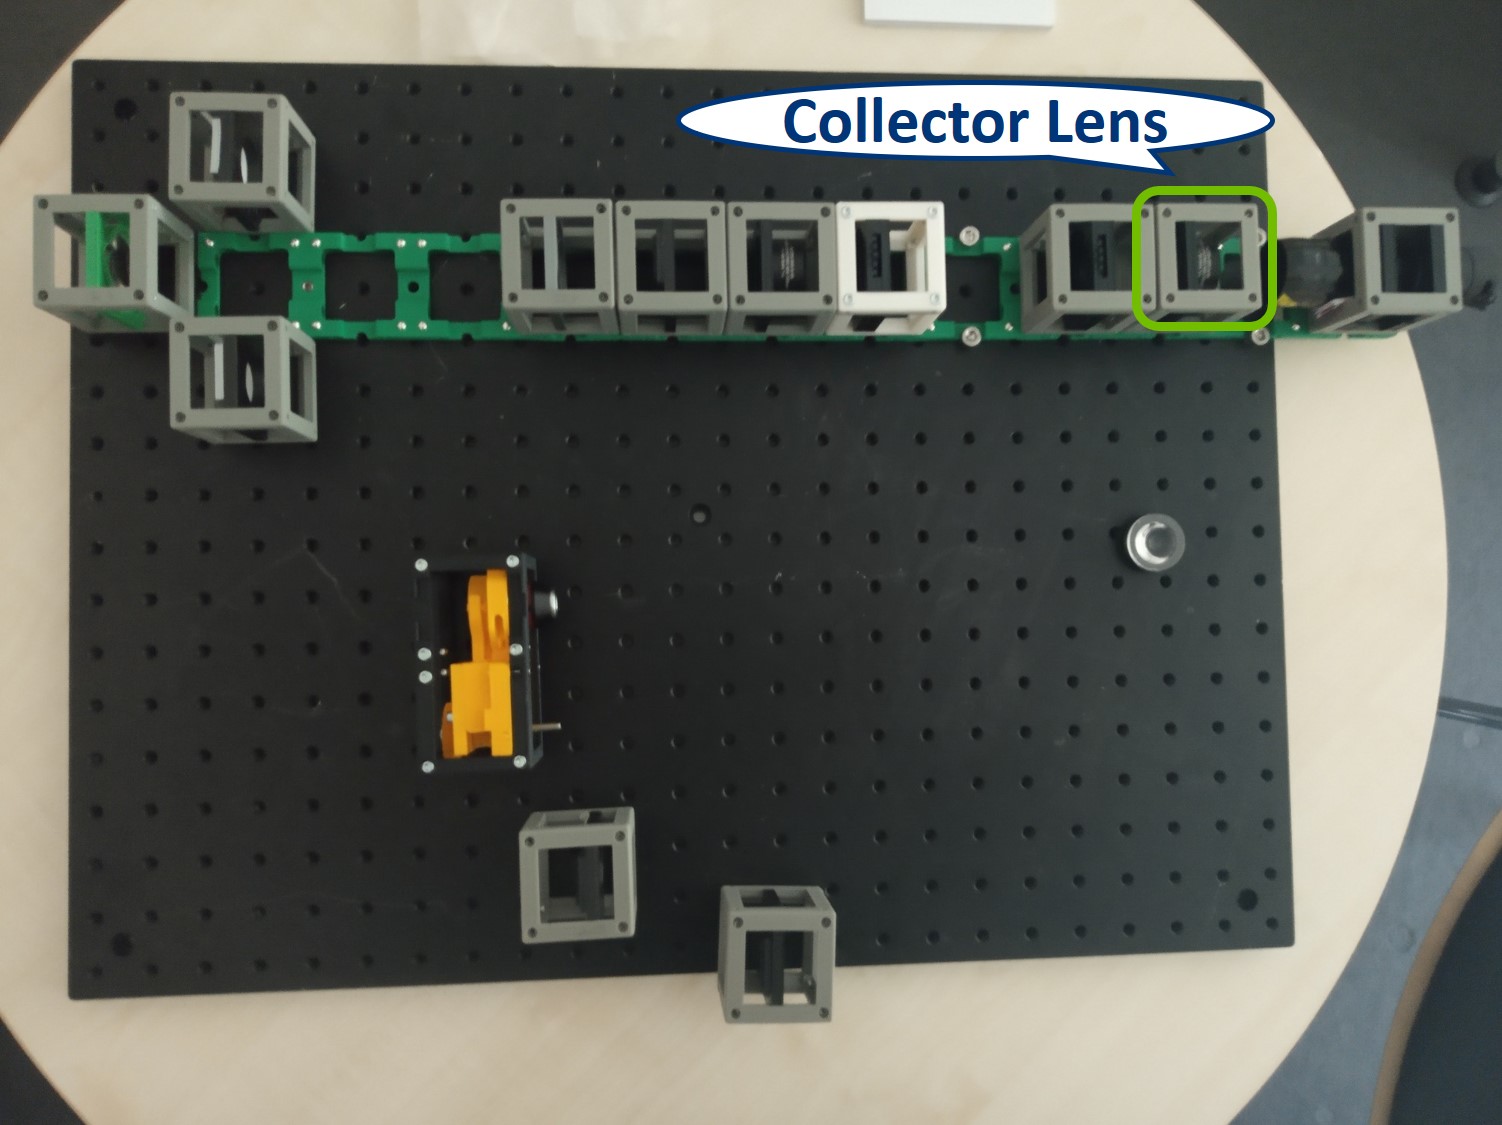
- Remove the FD. Close the AD. Center the flashlight with respect to the AD. Focus the image of the LED on the AD by adjusting the position of the collector lens (Focussing Trick).
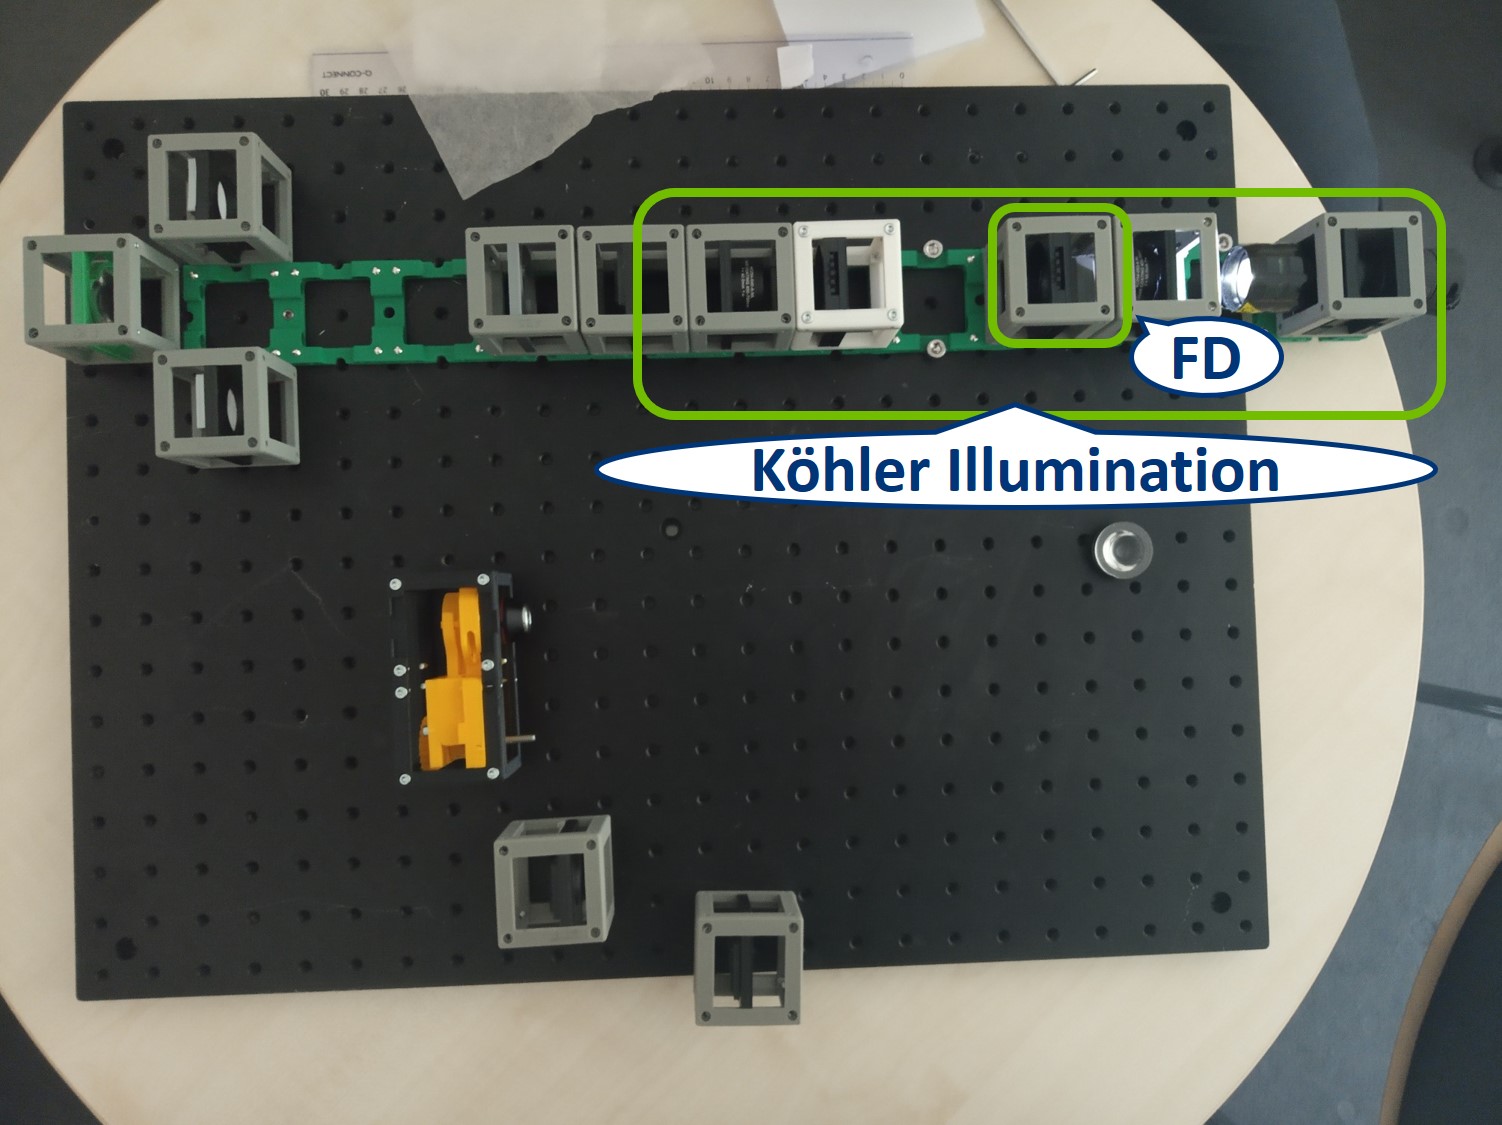
- Place the FD back in the illumination path. Now the Köhler illumination is properly aligned.
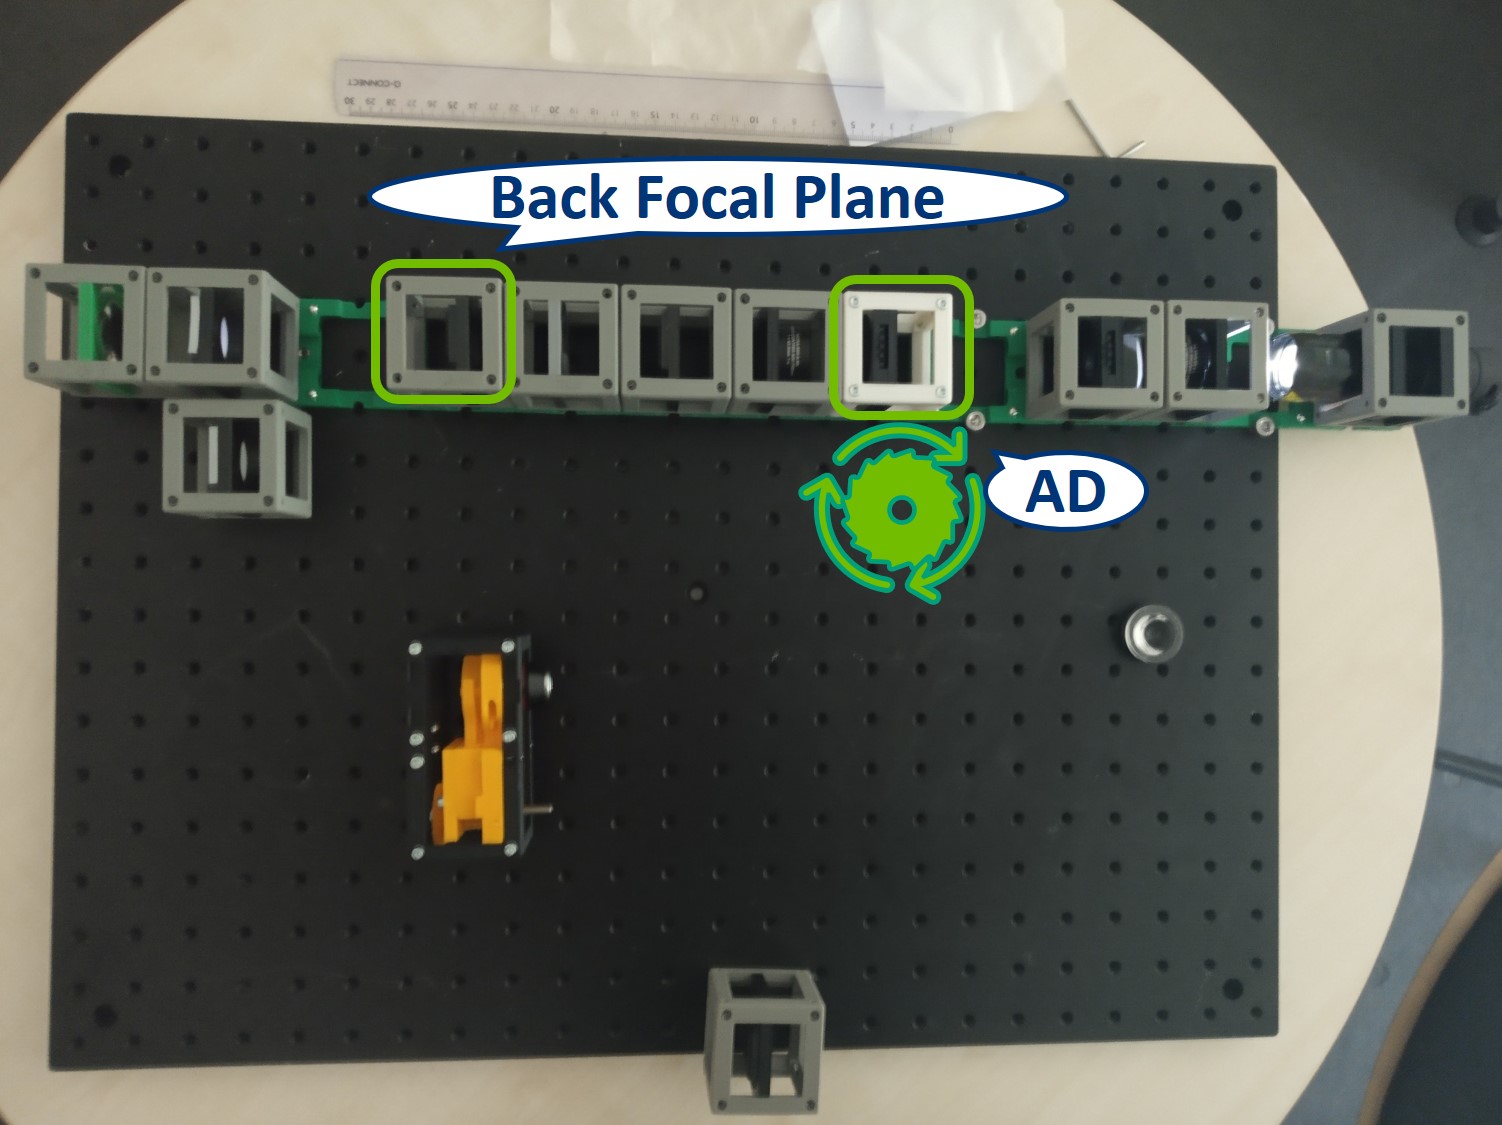
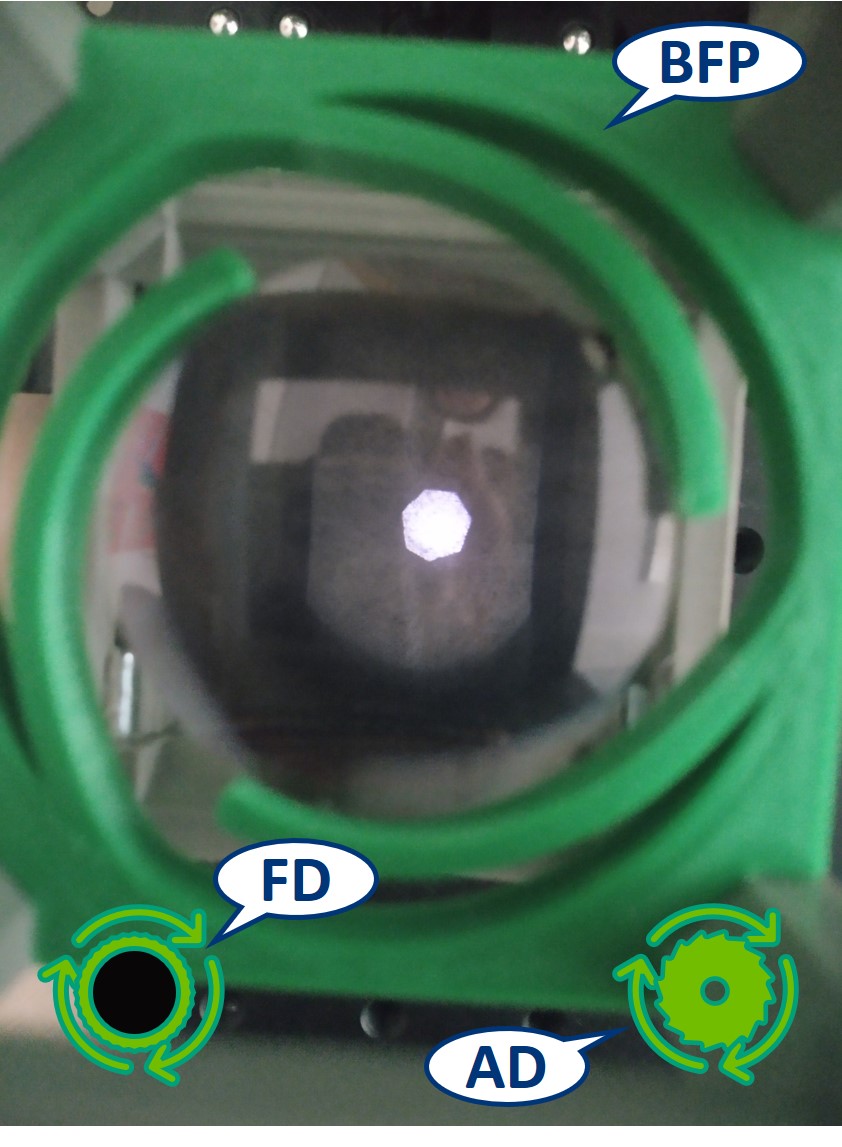
- Place a semitransparent screen into the Back Focal Plane (BFP) of the objective lens. Close the AD and check that you see a focussed image of the AD in the BFP.
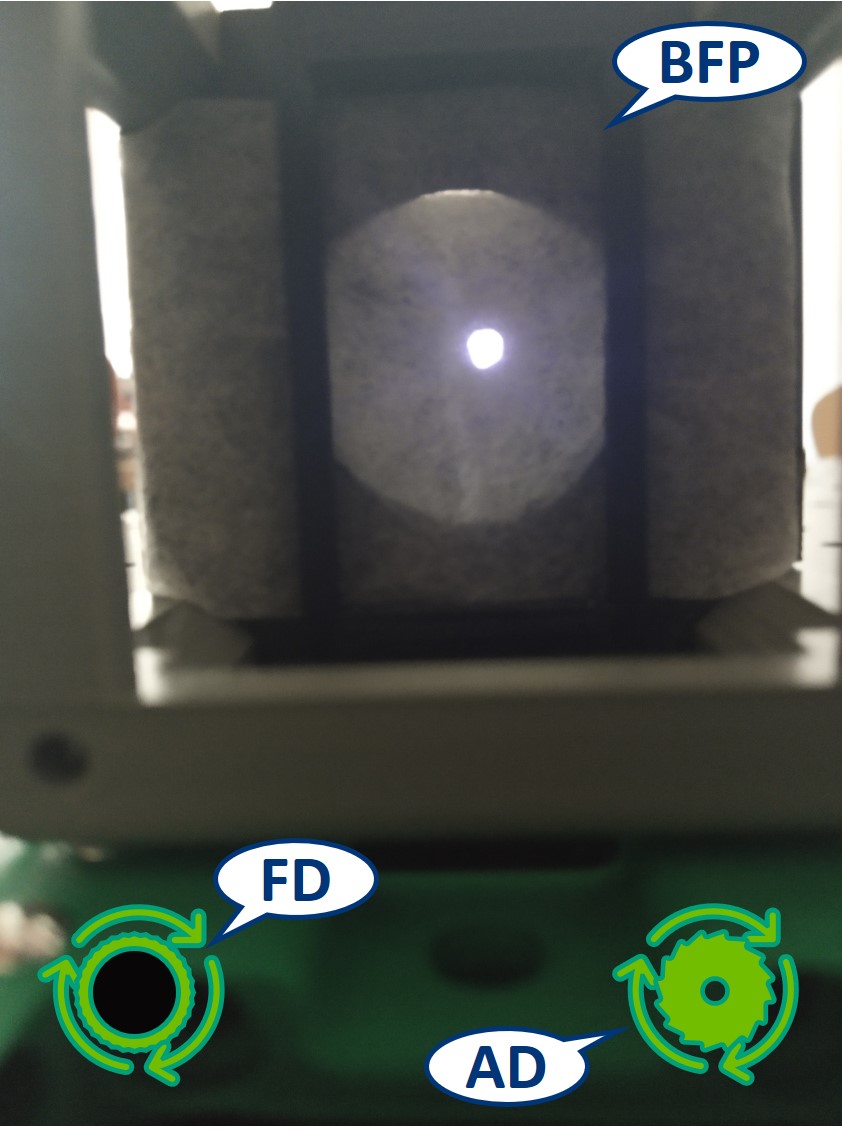
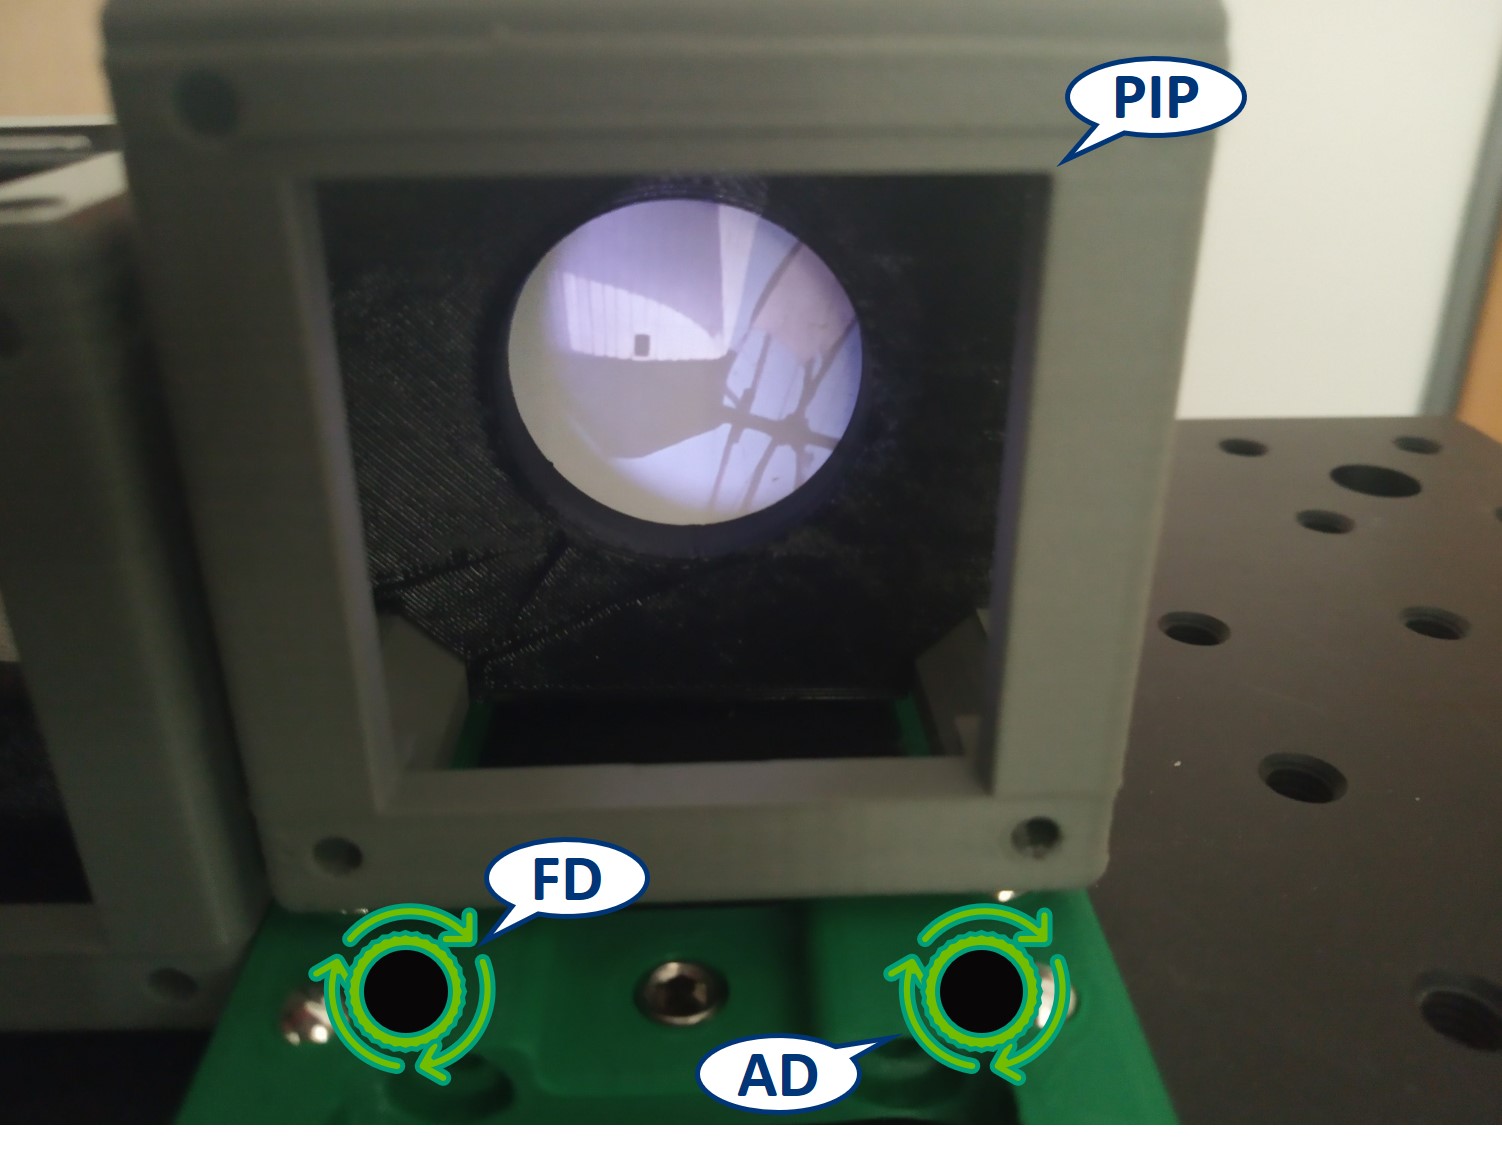
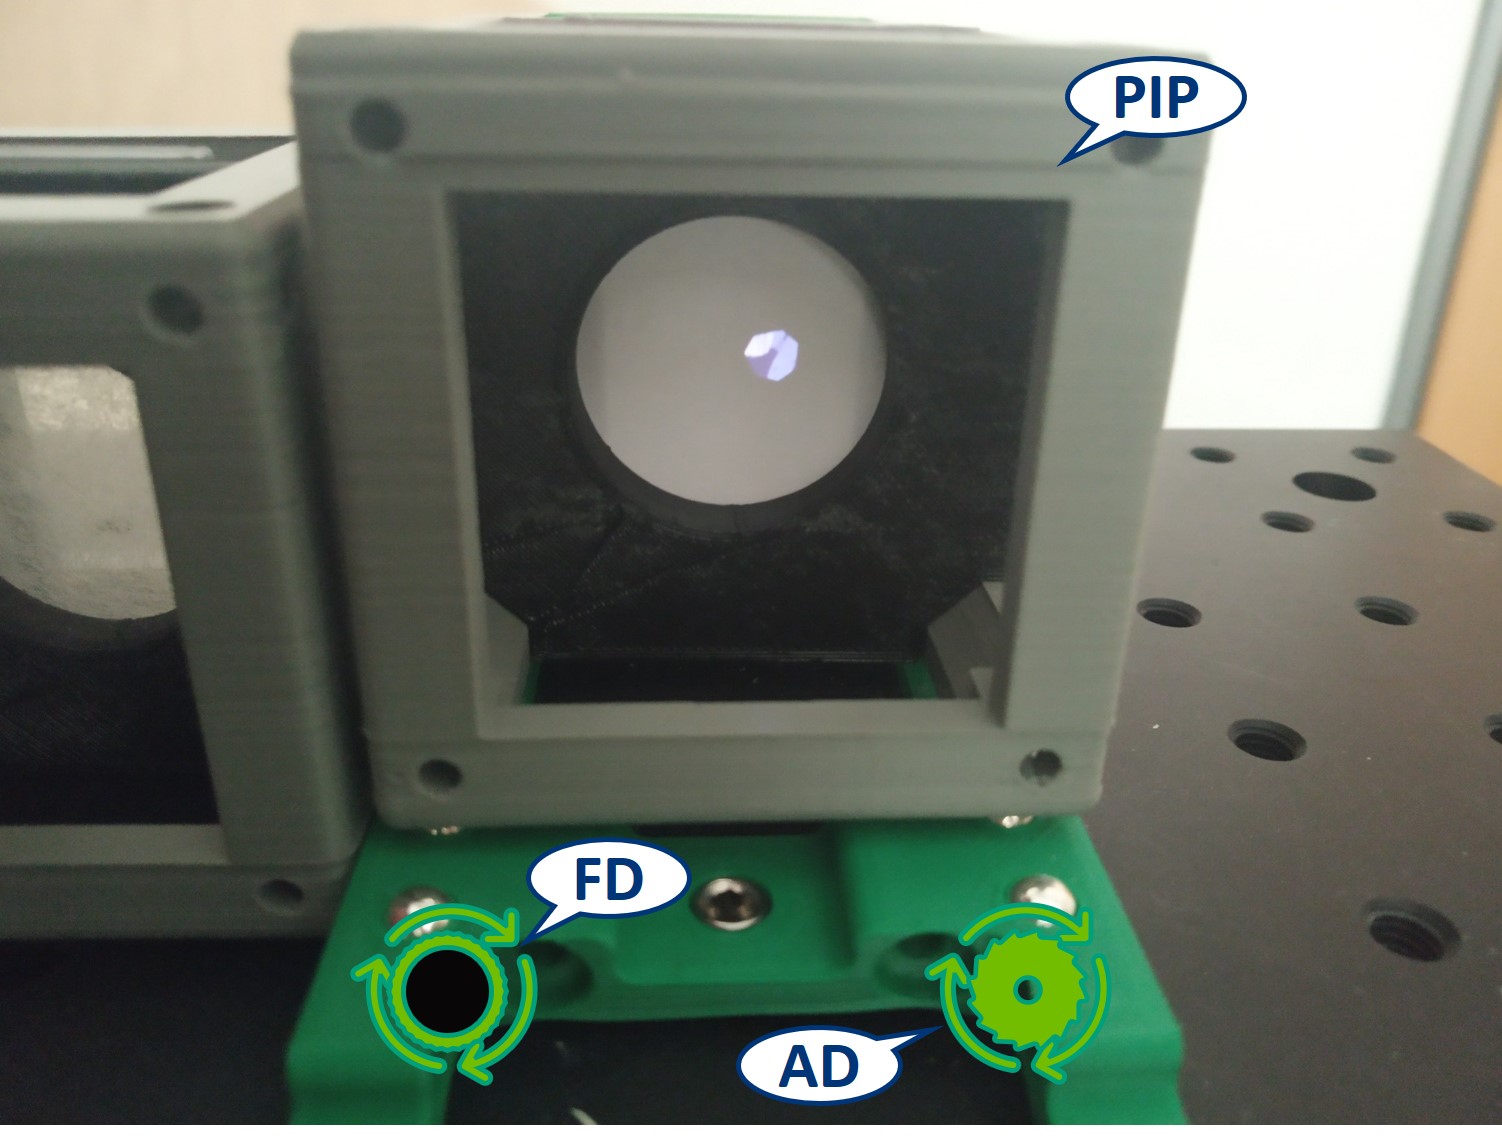
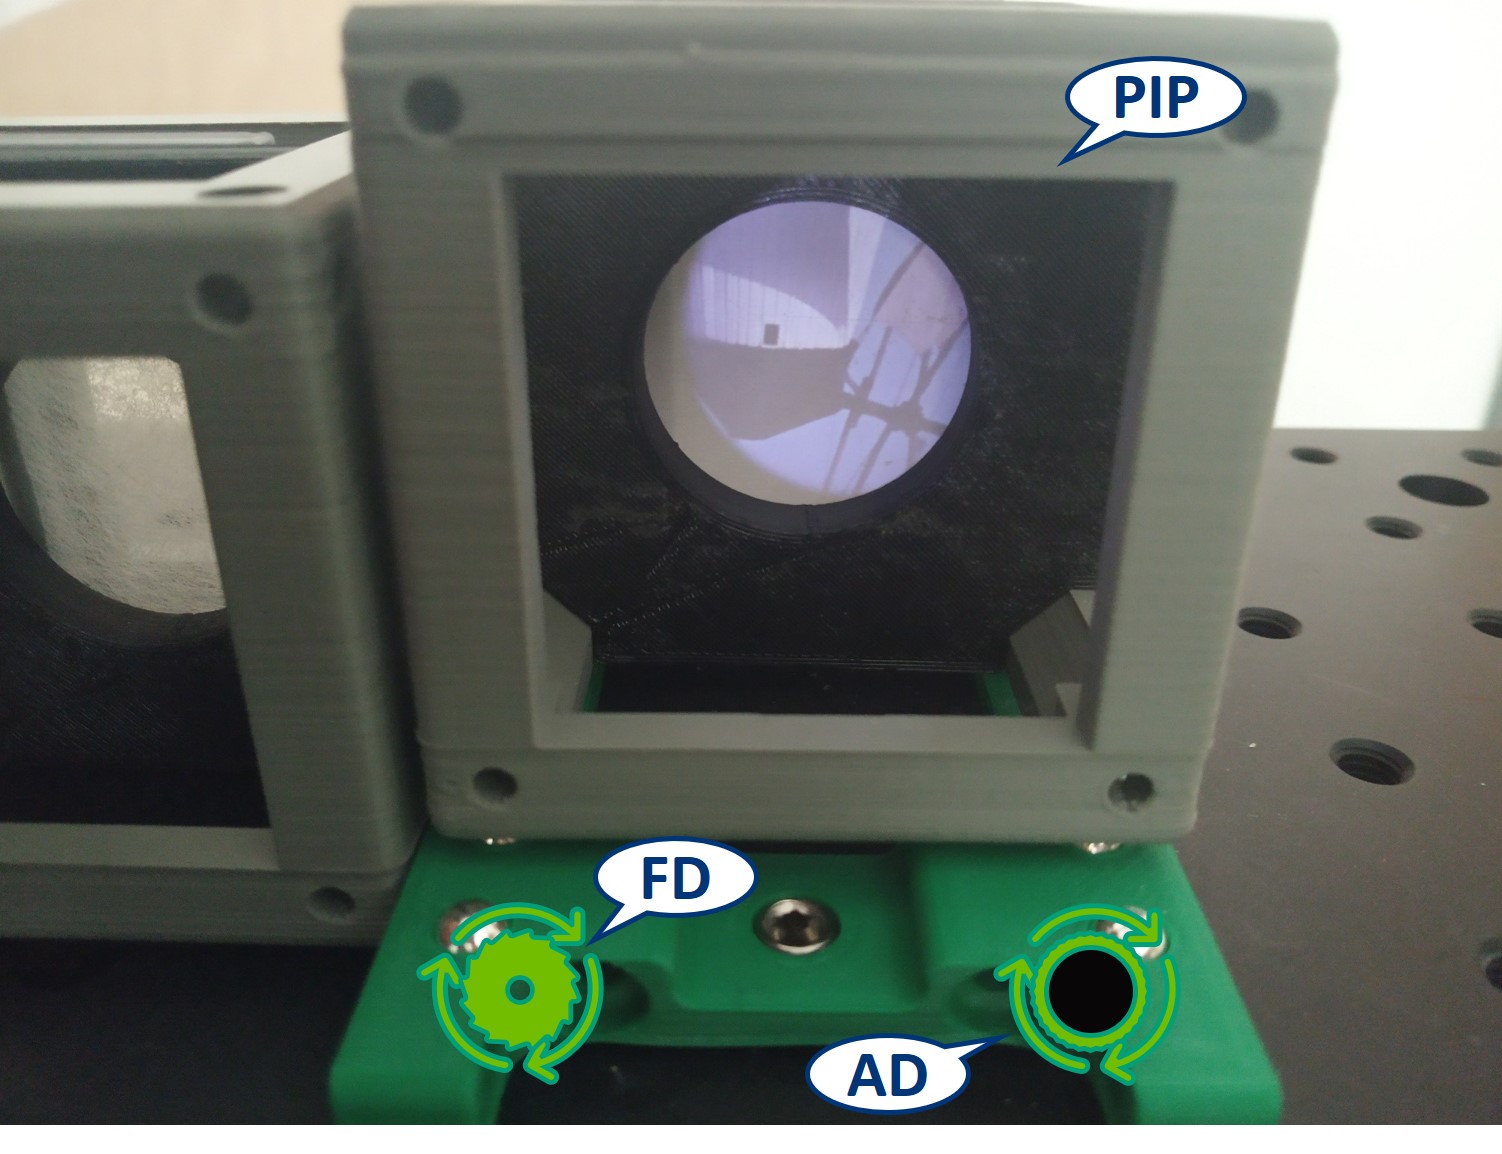
- Remove all screens. Use a lens tissue to dim the light and look through the eyepiece. Observe the effect of opening and closing the apertures.

- Left: both apertures open. Middle: FD closed. Right: AD closed.
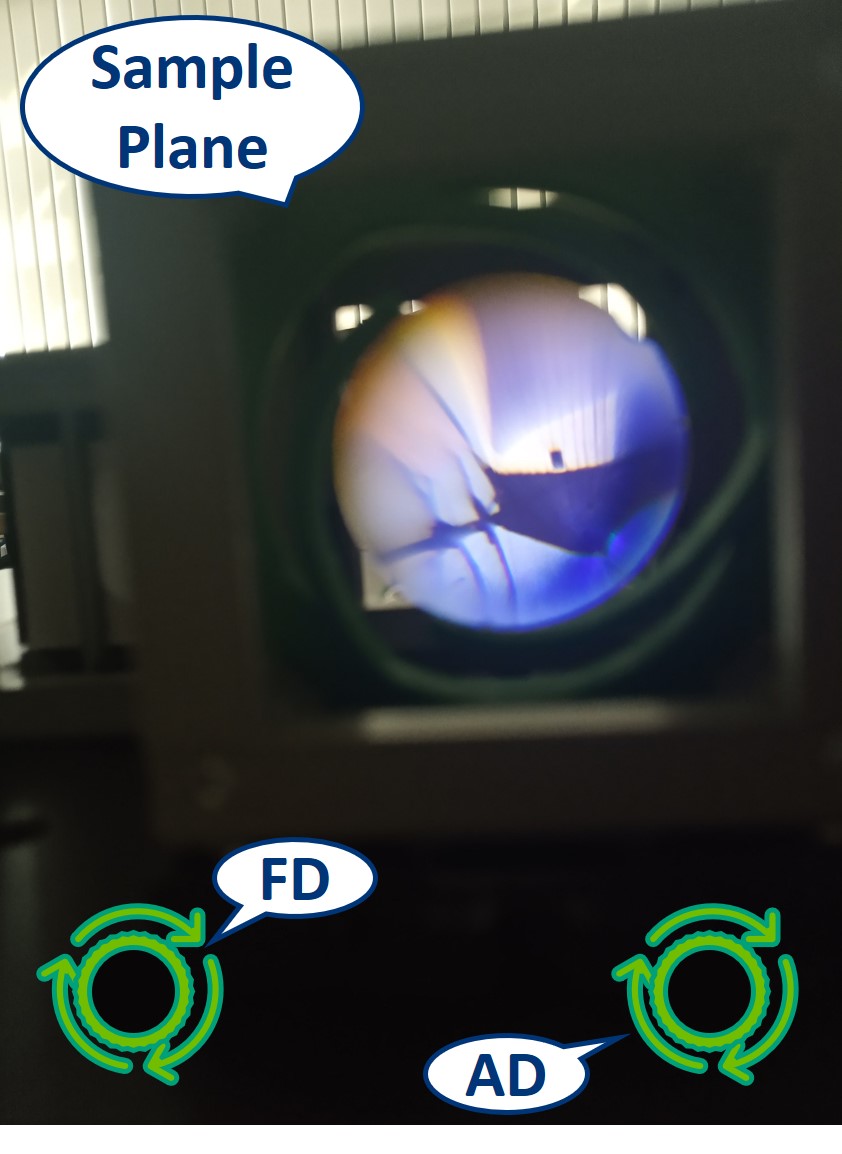
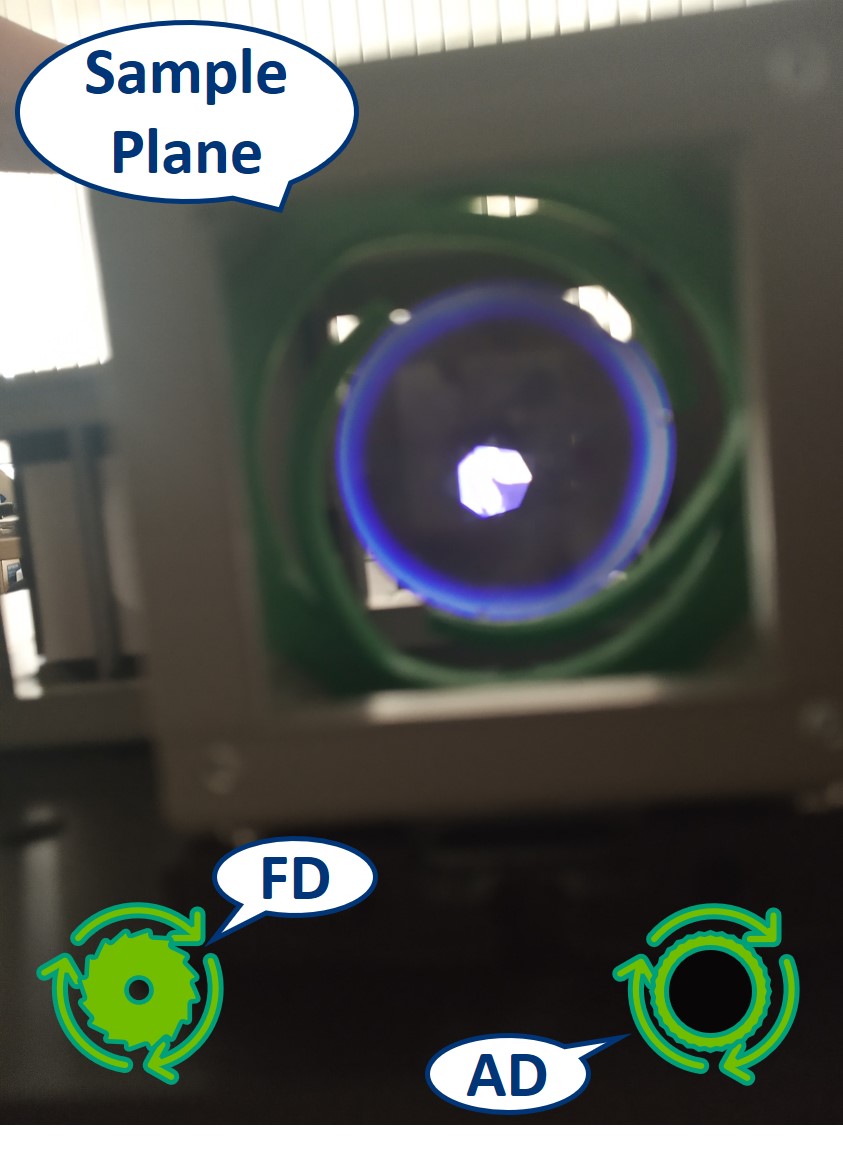
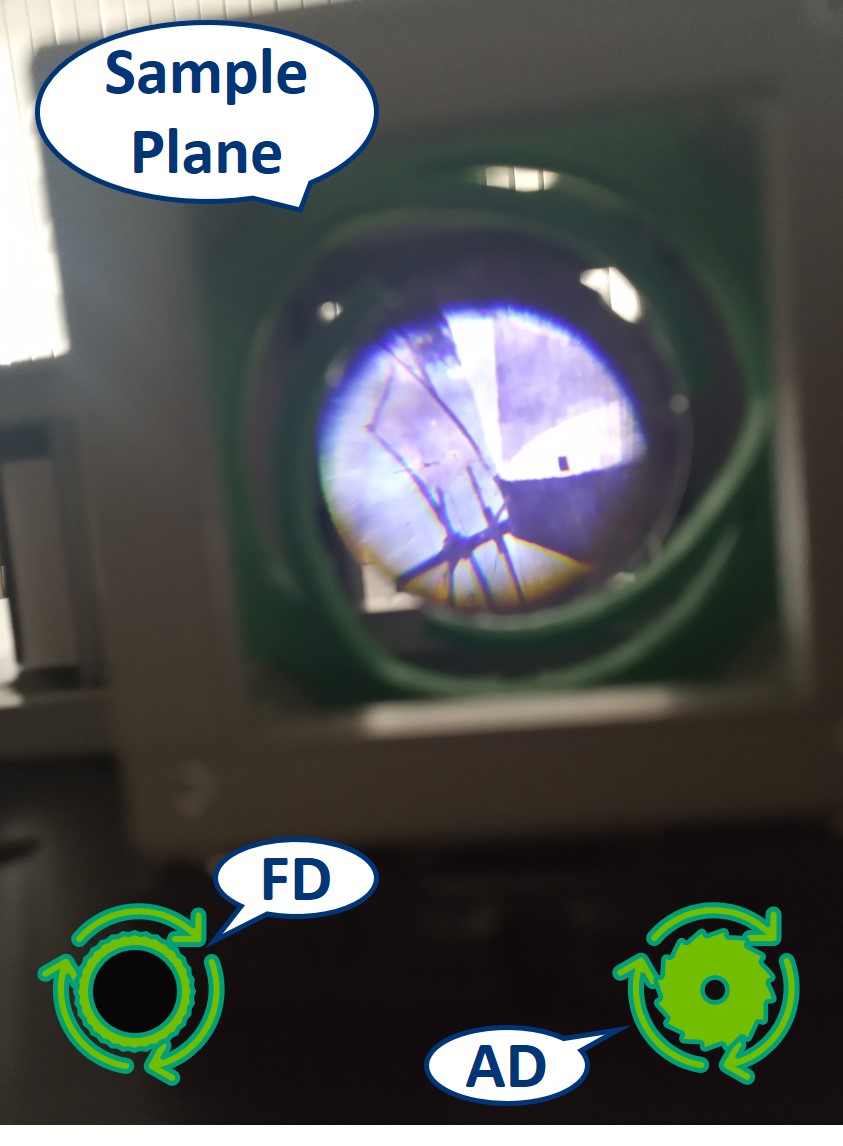
- Exhange objective lens with 4× objective in Z-Stage. Place a screen in PIP and observe the effect of opening and closing the apertures in the PIP.
- Top: both apertures open. Middle: AD closed. Bottom: FD closed.
- Remove the screen. This is an aligned finite-corrected microscope with Köhler illumination.
- By adding 4 more cubes and another baseplate, we will now create the Abbe Diffraction Experiment. The extra cubes are:
- Beamsplitter Cube (1)
- Mirror 45° Cube (2)
- Eyepiece Lens Cube (different f' than the previously used one!) (3)
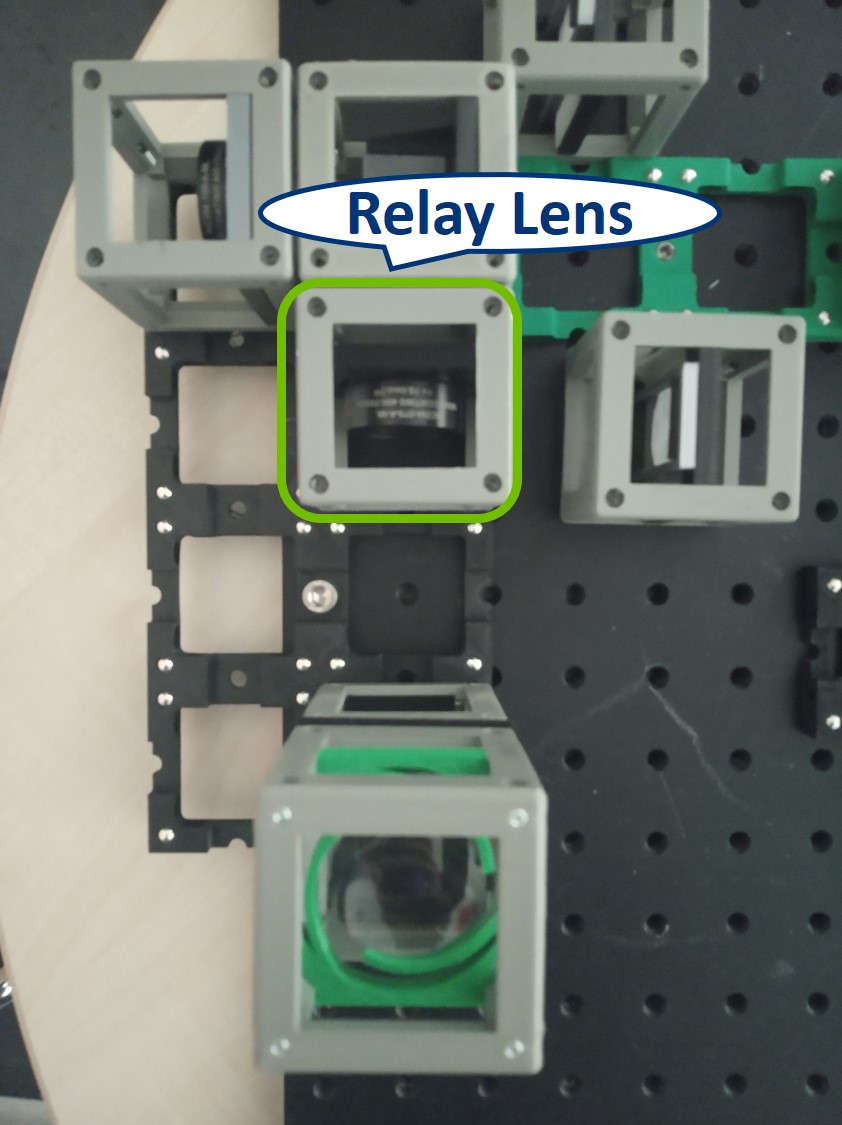
- Relay Lens Cube (4)
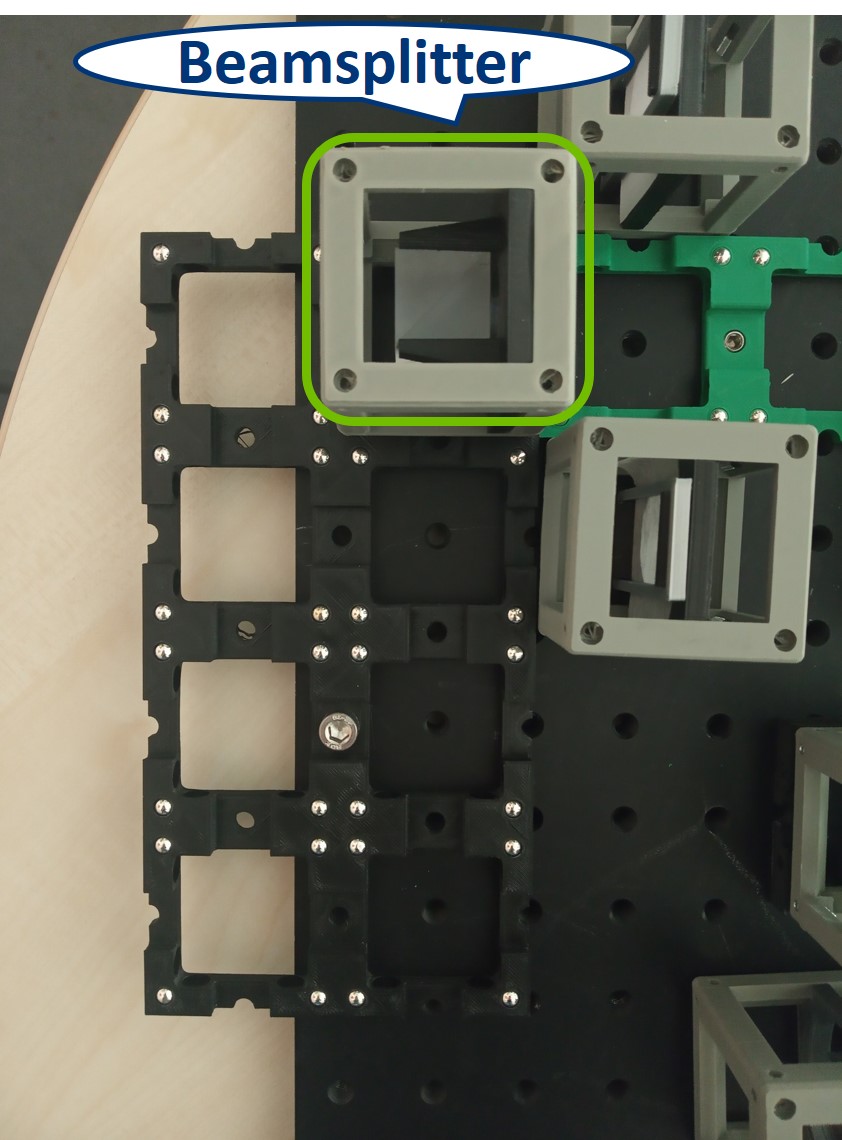
- Place the screen into the PIP, in front of the Beamsplitter. Place a new eyepiece lens behind the Beamsplitter. It is a single plano-convex lens with f' = 100 mm. While looking through the eyepiece, focus it on the PIP (Focussing Trick).

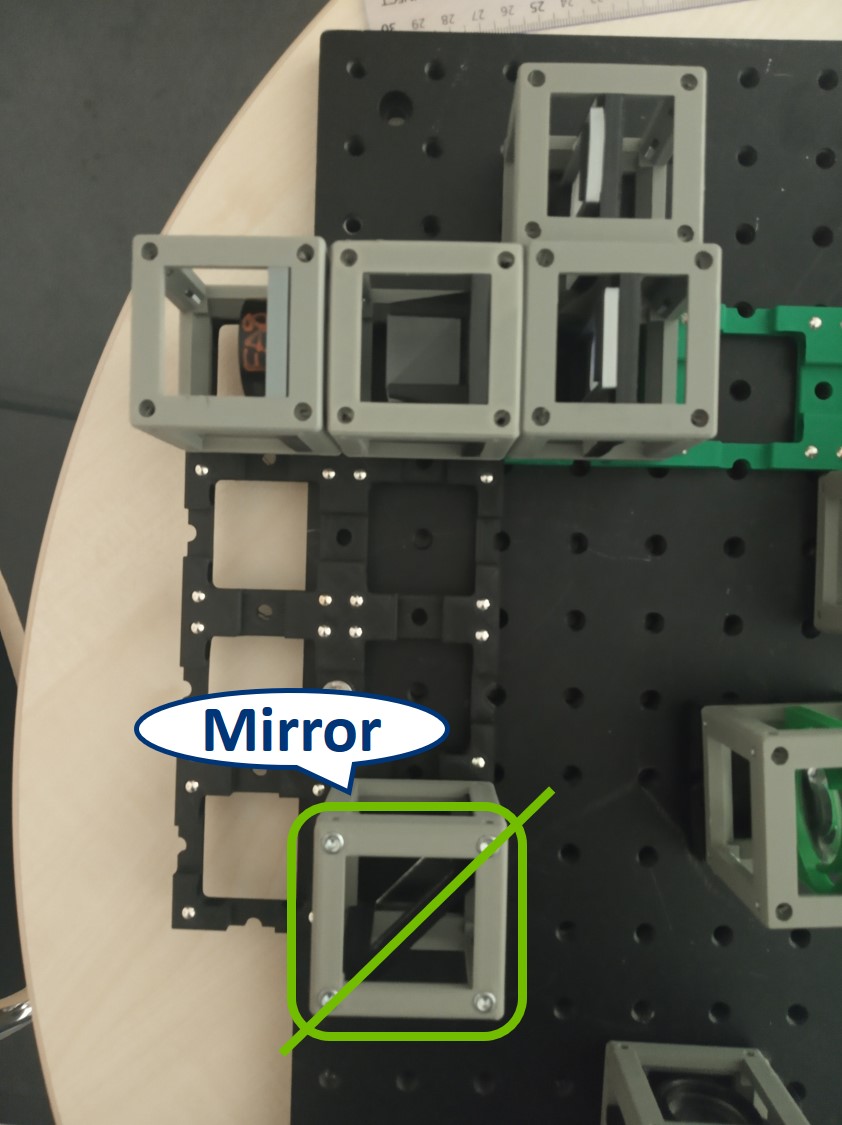
- In the other arm we will observe the BFP. There are two options, depending on how you place the Mirror in the next step.
- Option 1: Place the mirror as shown in the picture.
- Place the eyepiece lens (40 mm).

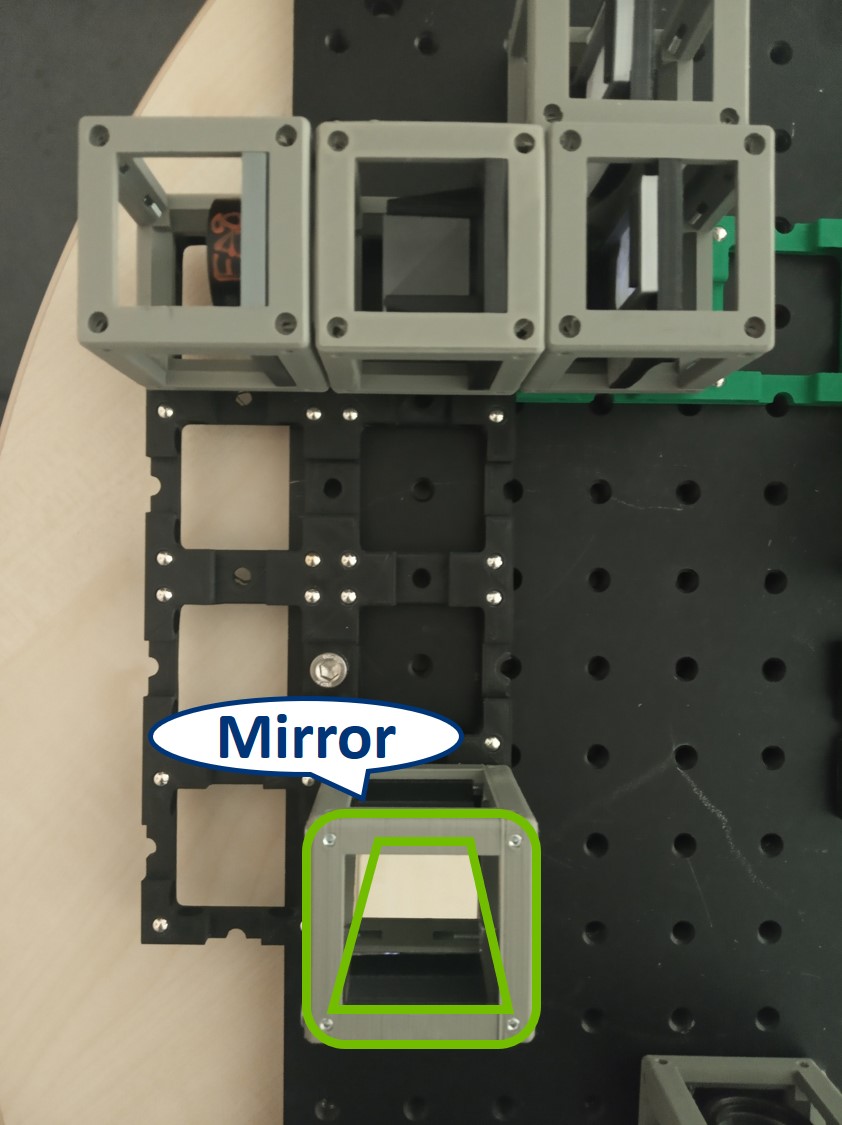
- Option 2: Place the mirror as shown in the picture.
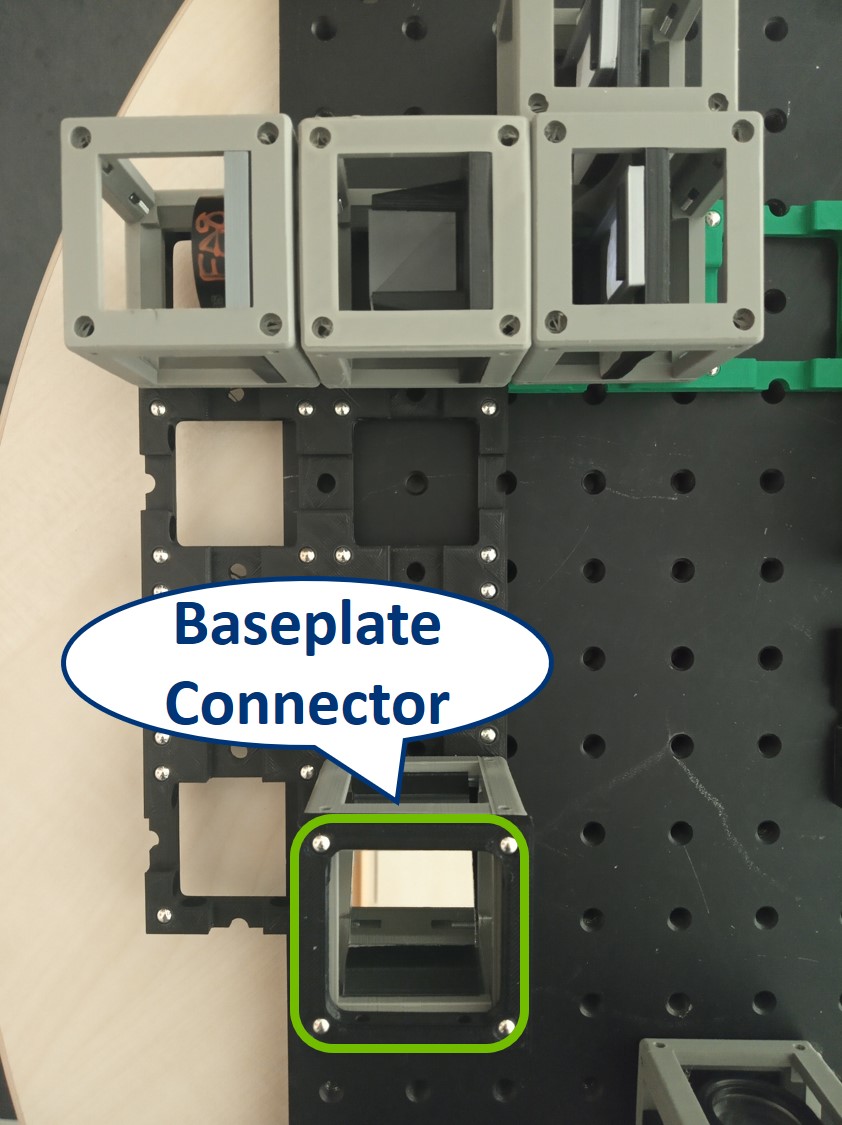
- Place the baseplate connector on the mirror cube.
- Place the eyepiece cube (40 mm) on the connector on the mirror cube.
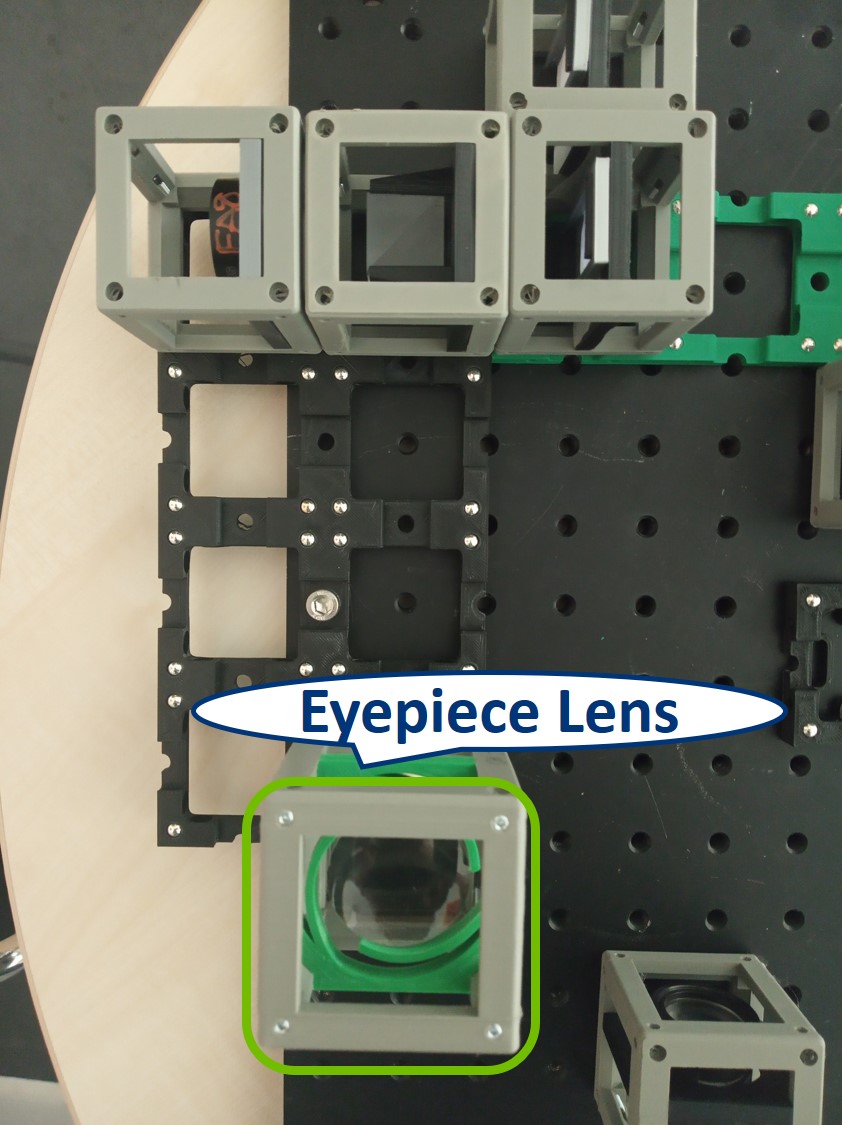
Place the relay lens after the Beamsplitter. It is a single plano-convex lens with f' = 75 mm.
Place a semitransparent screen in the BFP of the objective lens. Close AD and look through the eyepiece of the side arm. You should see a sharp image of the AD on the BFP.
This is the Abbe Difraction Experiment. Through the eyepieces you can see both sets of conjugate planes at the same time.
 Participate
If you have a cool idea, please don't hesitate to write us a line, we are happy to incorporate it in our design to make it even better.